HP DL785 Sun Solaris 10 Deployment Guide for HP ProLiant Servers - Page 27
Preparing the DHCP/PXE server
 |
UPC - 883585262809
View all HP DL785 manuals
Add to My Manuals
Save this manual to your list of manuals |
Page 27 highlights
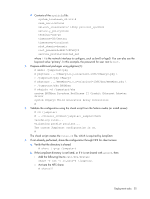
Preparing the DHCP/PXE server 1. Configure the DHCP server as follows: a. Start the DHCP Manager by entering the following command: # /usr/sadm/admin/bin/dhcpmgr NOTE: If the DHCP Manager crashes during setup, the manager might be missing network device configuration. You can configure the network devices using sys-unconfig. b. If starting with no configuration, dhcpmgr prompts you for the type of configuration, either DHCP server or BOOTP relay. Select DHCP server to start the DHCP Configuration Wizard. c. In the wizard, choose to store the DHCP configuration data as text files, and then click the right arrow. d. Specify a location to store the configuration data. e. Choose the option to not manage host records. f. Enter a lease length, and then choose to enable clients to renew their leases. g. Do not specify a DNS domain. h. Select a network from the list, or enter a network address and subnet mask. i. Specify local area network as the network type, and then choose to use the router discovery protocol. j. Do not configure an NIS domain. k. Do not configure an NIS+ domain. l. Verify the configuration, and then click Finish to complete the server configuration. m. Start the Address Wizard. n. Enter the number of IP addresses to add. o. Enter the DHCP server name and the first IP address in the range. p. For the configuration macro, select the DHCP server name option. q. Select the dynamic lease type. r. Verify the configuration, and then click Finish to complete the address configuration. 2. If a modified miniroot is to be used, replace x86.miniroot under .../Solaris_10/boot/ with the custom miniroot, and save a copy of the original in the process. The preceding procedure enables the DHCP server, but does not enable network booting to Solaris installations. To enable network booting for installations, add installation clients by performing the following steps: 3. Use add_install_client(1M) to add the client configuration to the DHCP server: # cd .../Solaris_10/Tools # ./add_install_client -d -e ethmac \ > -s installpath \ > -c jsnfspath \ > -p idsnfspath \ > -t mrpath \ i86pc where: Deployment tasks 27
-
 1
1 -
2
-
3
-
4
-
5
-
6
-
7
-
8
-
9
-
10
-
11
-
12
-
13
-
14
-
15
-
16
-
17
-
18
-
19
-
20
-
21
-
 22
22 -
 23
23 -
 24
24 -
 25
25 -
 26
26 -
 27
27 -
 28
28 -
 29
29 -
 30
30 -
 31
31 -
 32
32 -
33
-
34
-
35
-
36
-
37
-
38
-
39
-
40
-
41
-
42
-
43
-
44
-
45
-
46
-
47
-
48
-
49
-
50
-
51
-
52
-
53
-
54
 |
 |
