HP Digital Sender Flow 8500 User Guide 1 - Page 76
Replace the separation pad
 |
View all HP Digital Sender Flow 8500 manuals
Add to My Manuals
Save this manual to your list of manuals |
Page 76 highlights
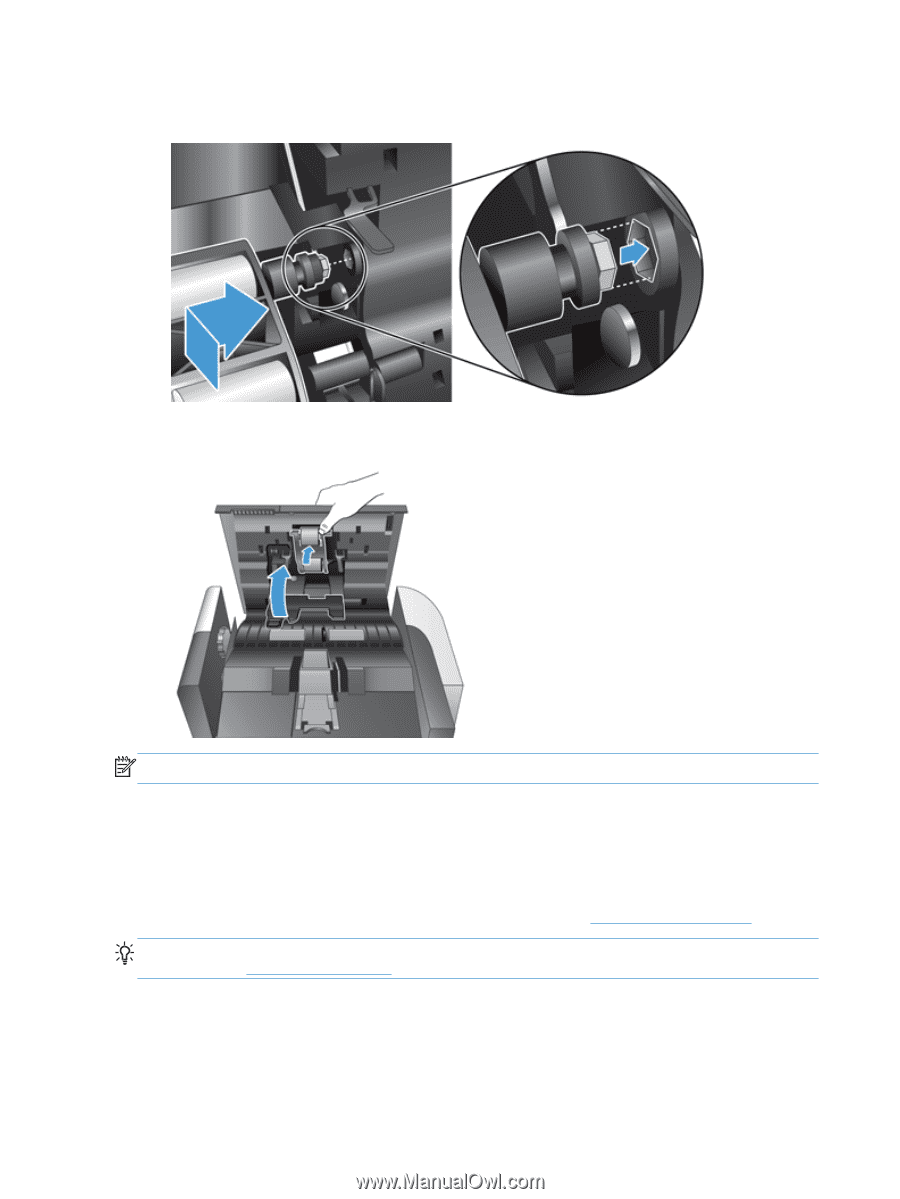
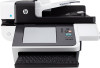
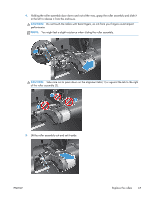
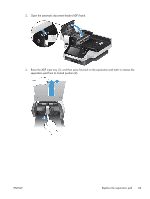
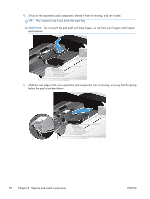
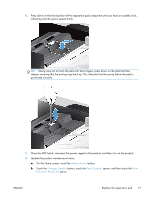
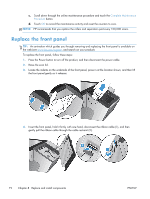
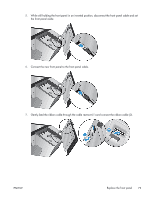
6. Holding the roller assembly door down and out of the way, insert the new roller assembly into the enclosure and slide it to the right until it is seated firmly. 7. Close the roller assembly door, pressing firmly against the door until you hear a click (the click indicates that the latch is seated correctly). NOTE: HP recommends that you replace the rollers and separation pad every 100,000 scans. Once the rollers are replaced, replace the separation pad and then log the maintenance activity. Replace the separation pad The roller replacement kit includes a replacement separation pad. Always replace the separation pad when you replace the rollers. To order the roller replacement kit, see www.hp.com/buy/parts. TIP: An animation which guides you through removing and replacing the separation pad is available on the web (see www.hp.com/support, and search on your product). To replace the separation pad, follow these steps: 1. Make sure the scanner is turned off and the power cable is disconnected. 68 Chapter 8 Replace and install components ENWW
-
 1
1 -
2
-
3
-
4
-
5
-
6
-
7
-
8
-
9
-
10
-
11
-
12
-
13
-
14
-
15
-
16
-
17
-
18
-
19
-
20
-
21
-
22
-
23
-
24
-
25
-
26
-
27
-
28
-
29
-
30
-
31
-
32
-
33
-
34
-
35
-
36
-
37
-
38
-
39
-
40
-
41
-
42
-
43
-
44
-
45
-
46
-
47
-
48
-
49
-
50
-
51
-
52
-
53
-
54
-
55
-
56
-
57
-
58
-
59
-
60
-
61
-
62
-
63
-
64
-
65
-
66
-
67
-
68
-
69
-
70
-
 71
71 -
 72
72 -
 73
73 -
 74
74 -
 75
75 -
 76
76 -
 77
77 -
 78
78 -
 79
79 -
 80
80 -
 81
81 -
82
-
83
-
84
-
85
-
86
-
87
-
88
-
89
-
90
-
91
-
92
-
93
-
94
-
95
-
96
-
97
-
98
-
99
-
100
-
101
-
102
-
103
-
104
-
105
-
106
-
107
-
108
-
109
-
110
 |
 |