HP Digital Sender Flow 8500 User Guide 1 - Page 78
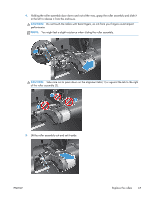
Slide the rear edge of the new separation pad component into its housing, ensuring that the spring
 |
View all HP Digital Sender Flow 8500 manuals
Add to My Manuals
Save this manual to your list of manuals |
Page 78 highlights
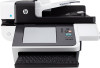
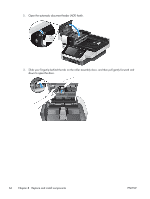
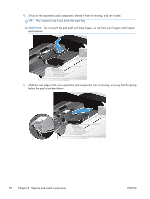
4. Lift up on the separation pad component, release it from its housing, and set it aside. TIP: This is easier to do if you lower the input tray. CAUTION: Do not touch the pad itself with bare fingers, as oils from your fingers could impact performance. 5. Slide the rear edge of the new separation pad component into its housing, ensuring that the spring below the pad is not bent down. 70 Chapter 8 Replace and install components ENWW
-
 1
1 -
2
-
3
-
4
-
5
-
6
-
7
-
8
-
9
-
10
-
11
-
12
-
13
-
14
-
15
-
16
-
17
-
18
-
19
-
20
-
21
-
22
-
23
-
24
-
25
-
26
-
27
-
28
-
29
-
30
-
31
-
32
-
33
-
34
-
35
-
36
-
37
-
38
-
39
-
40
-
41
-
42
-
43
-
44
-
45
-
46
-
47
-
48
-
49
-
50
-
51
-
52
-
53
-
54
-
55
-
56
-
57
-
58
-
59
-
60
-
61
-
62
-
63
-
64
-
65
-
66
-
67
-
68
-
69
-
70
-
71
-
72
-
 73
73 -
 74
74 -
 75
75 -
 76
76 -
 77
77 -
 78
78 -
 79
79 -
 80
80 -
 81
81 -
 82
82 -
 83
83 -
84
-
85
-
86
-
87
-
88
-
89
-
90
-
91
-
92
-
93
-
94
-
95
-
96
-
97
-
98
-
99
-
100
-
101
-
102
-
103
-
104
-
105
-
106
-
107
-
108
-
109
-
110
 |
 |
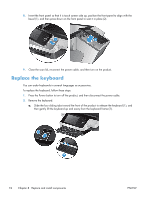
4.
Lift up on the separation pad component, release it from its housing, and set it aside.
TIP:
This is easier to do if you lower the input tray.
CAUTION:
Do not touch the pad itself with bare fingers, as oils from your fingers could impact
performance.
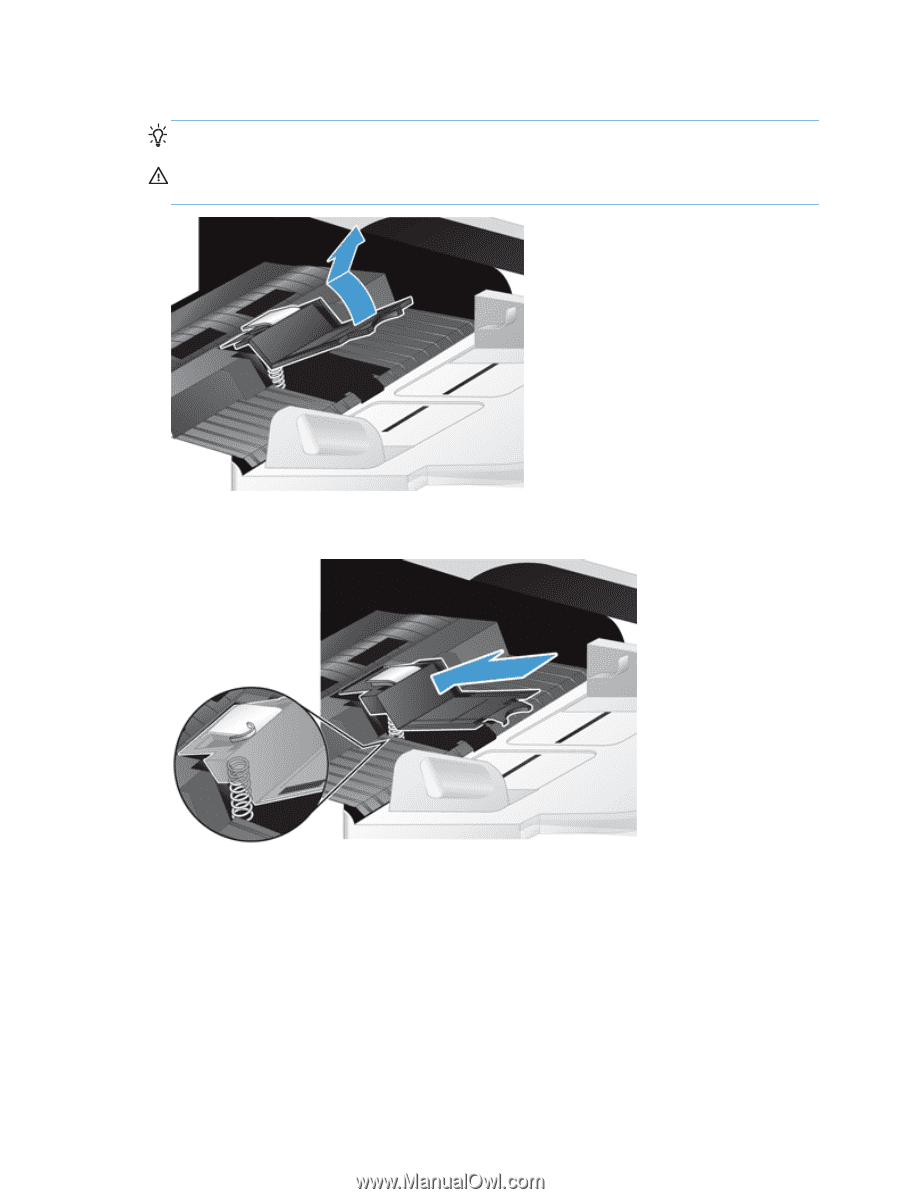
5.
Slide the rear edge of the new separation pad component into its housing, ensuring that the spring
below the pad is not bent down.
70
Chapter 8
Replace and install components
ENWW