HP ENVY 110 User Guide - Page 14
Print photos saved on your computer, Print documents - e all in one new
 |
View all HP ENVY 110 manuals
Add to My Manuals
Save this manual to your list of manuals |
Page 14 highlights
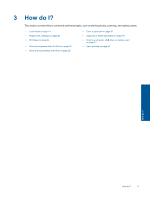
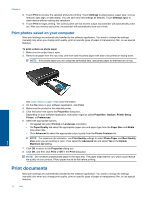
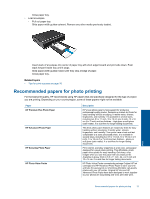
Chapter 4 8. Touch Print to preview the selected photos for printing. Touch Settings to adjust layout, paper type, red eye removal, auto align, or date stamp. You can save any new settings as defaults. Touch Settings again to close menus without making any selections. 9. Touch Print to begin printing. The control panel will rise and the output tray extender will automatically come out. After you remove your prints, the extender will automatically stow out of view. Print photos saved on your computer Most print settings are automatically handled by the software application. You need to change the settings manually only when you change print quality, print on specific types of paper or transparency film, or use special features. To print a photo on photo paper 1. Make sure the output tray is open. 2. Remove all paper from the input tray, and then load the photo paper with side to be printed on facing down. NOTE: If the photo paper you are using has perforated tabs, load photo paper so that tabs are on top. Print See Load media on page 14 for more information. 3. On the File menu in your software application, click Print. 4. Make sure the product is the selected printer. 5. Click the button that opens the Properties dialog box. Depending on your software application, this button might be called Properties, Options, Printer Setup, Printer, or Preferences. 6. Select the appropriate options. • On Layout tab select Portrait or Landscape orientation. • On Paper/Quality tab select the appropriate paper size and paper type from the Paper Size and Media drop-down lists. • Click Advanced to select the appropriate output quality from the Printer Features list. NOTE: For maximum dpi resolution, use Print Quality settings to select Photo Paper and Best Quality. Make sure you are printing in color. Then select the Advanced tab and select Yes in the Enable Maximum dpi setting. 7. Click OK to return to the Properties dialog box. 8. Click OK, and then click Print or OK in the Print dialog box. NOTE: Do not leave unused photo paper in the input tray. The paper might start to curl, which could reduce the quality of your printout. Photo paper should be flat before printing. Print documents Most print settings are automatically handled by the software application. You need to change the settings manually only when you change print quality, print on specific types of paper or transparency film, or use special features. 12 Print
-
 1
1 -
2
-
3
-
4
-
5
-
6
-
7
-
8
-
 9
9 -
 10
10 -
 11
11 -
 12
12 -
 13
13 -
 14
14 -
 15
15 -
 16
16 -
 17
17 -
 18
18 -
 19
19 -
20
-
21
-
22
-
23
-
24
-
25
-
26
-
27
-
28
-
29
-
30
-
31
-
32
-
33
-
34
-
35
-
36
-
37
-
38
-
39
-
40
-
41
-
42
-
43
-
44
-
45
-
46
-
47
-
48
-
49
-
50
-
51
-
52
-
53
-
54
-
55
-
56
-
57
-
58
 |
 |