HP ENVY 110 User Guide - Page 34
Wireless with a router (infrastructure network), Install the software for a network connection - windows 7 installation
 |
View all HP ENVY 110 manuals
Add to My Manuals
Save this manual to your list of manuals |
Page 34 highlights
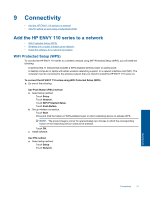
Chapter 9 ❑ Touch WiFi Protected Setup. ❑ Touch PIN. b. Set up wireless connection. ❑ Touch Start. The device displays a PIN. ❑ Enter PIN on WPS-enabled router or other networking device. NOTE: The product begins a timer for approximately two minutes in which the PIN needs to be entered on the networking device. ❑ Touch OK. c. Install software. Wireless with a router (infrastructure network) To connect the HP ENVY 110 series to an integrated wireless WLAN 802.11 network, you will need the following: ❑ A wireless 802.11 network that includes a wireless router or access point. ❑ A desktop computer or laptop with either wireless networking support, or a network interface card (NIC). The computer must be connected to the wireless network that you intend to install the HP ENVY 110 series on. ❑ Broadband Internet access (recommended) such as cable or DSL. If you connect the HP ENVY 110 series on a wireless network that has Internet access, HP recommends that you use a wireless router (access point or base station) that uses Dynamic Host Configuration Protocol (DHCP). ❑ Network name (SSID). ❑ WEP key or WPA Passphrase (if needed). To connect the printer with the Wireless Setup Wizard 1. Write down your network name (SSID) and WEP key or WPA passphrase. 2. Start Wireless Setup Wizard. ▲ Touch Wireless Setup Wizard. 3. Connect to wireless network. ▲ Select your network from the list of detected networks. 4. Follow prompts. 5. Install software. Related topics • Install the software for a network connection on page 32 Install the software for a network connection Use this section to install the HP ENVY software on a computer connected to a network. Before you install the software, make sure you have connected the HP ENVY 110 series to a network. If the HP ENVY 110 series has not been connected to a network, follow the onscreen instructions during the software installation to connect the product to the network. NOTE: Installation time can vary depending on your operating system, the amount of available space, and the processor speed of your computer. To install the Windows HP ENVY Software on a networked computer 1. Quit all applications running on your computer. 2. Insert the installation CD that came with the product into the CD-ROM drive on your computer and follow the onscreen instructions. NOTE: If the HP ENVY 110 series is not connected to a network, run the Wireless Setup Wizard from the Network menu on the HP ENVY 110 series. Connectivity 32 Connectivity
-
 1
1 -
2
-
3
-
4
-
5
-
6
-
7
-
8
-
9
-
10
-
11
-
12
-
13
-
14
-
15
-
16
-
17
-
18
-
19
-
20
-
21
-
22
-
23
-
24
-
25
-
26
-
27
-
28
-
 29
29 -
 30
30 -
 31
31 -
 32
32 -
 33
33 -
 34
34 -
 35
35 -
 36
36 -
 37
37 -
 38
38 -
 39
39 -
40
-
41
-
42
-
43
-
44
-
45
-
46
-
47
-
48
-
49
-
50
-
51
-
52
-
53
-
54
-
55
-
56
-
57
-
58
 |
 |