HP ENVY 15-ar000 Maintenance and Service Guide - Page 33
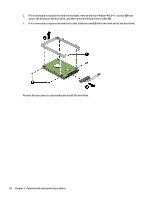
and swing it up and back until it releases., Release the bottom cover rear edge
 |
View all HP ENVY 15-ar000 manuals
Add to My Manuals
Save this manual to your list of manuals |
Page 33 highlights
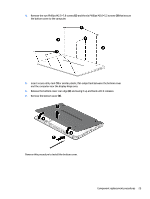
4. Remove the two Phillips M2.5×7.8 screws (2) and the six Phillips M2.0×5.2 screws (3) that secure the bottom cover to the computer. 5. Insert a case utility tool (1) or similar plastic, flat-edged tool between the bottom cover and the computer near the display hinge area. 6. Release the bottom cover rear edge (2) and swing it up and back until it releases. 7. Remove the bottom cover (3). Reverse this procedure to install the bottom cover. Component replacement procedures 25
-
 1
1 -
2
-
3
-
4
-
5
-
6
-
7
-
8
-
9
-
10
-
11
-
12
-
13
-
14
-
15
-
16
-
17
-
18
-
19
-
20
-
21
-
22
-
23
-
24
-
25
-
26
-
27
-
 28
28 -
 29
29 -
 30
30 -
 31
31 -
 32
32 -
 33
33 -
 34
34 -
 35
35 -
 36
36 -
 37
37 -
 38
38 -
39
-
40
-
41
-
42
-
43
-
44
-
45
-
46
-
47
-
48
-
49
-
50
-
51
-
52
-
53
-
54
-
55
-
56
-
57
-
58
-
59
-
60
-
61
-
62
-
63
-
64
-
65
-
66
-
67
-
68
-
69
-
70
-
71
-
72
-
73
-
74
-
75
-
76
 |
 |
4.
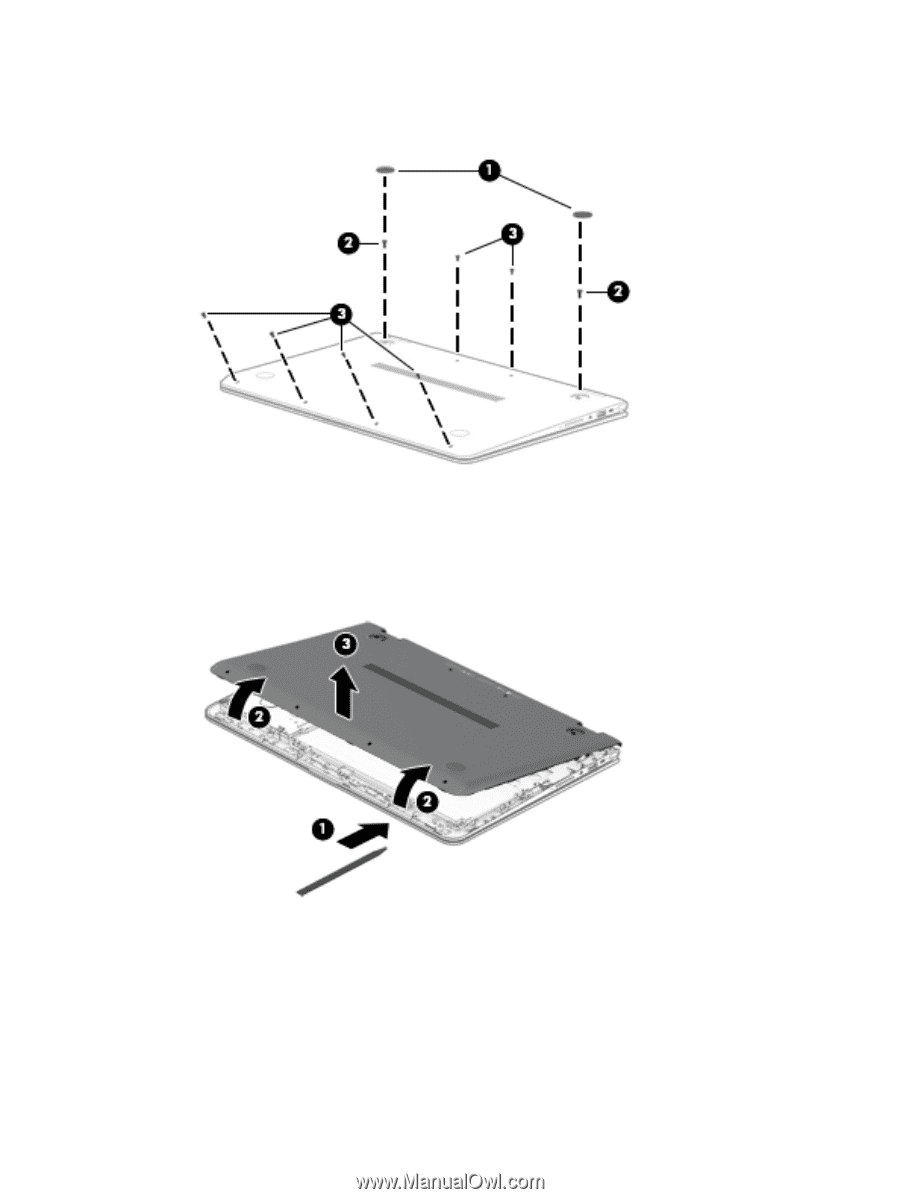
Remove the two Phillips M2.5×7.8 screws
(2)
and the six Phillips M2.0×5.2 screws
(3)
that secure
the bottom cover to the computer.
5.
Insert a case utility tool
(1)
or similar plastic,
flat-edged
tool between the bottom cover
and the computer near the display hinge area.
6.
Release the bottom cover rear edge
(2)
and swing it up and back until it releases.
7.
Remove the bottom cover
(3)
.
Reverse this procedure to install the bottom cover.
Component replacement procedures
25