HP ENVY x2 - 15t-c000 HP ENVY x2 Detachable PC Maintenance and Service Guide - Page 42
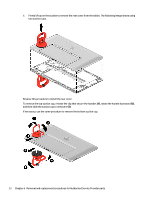
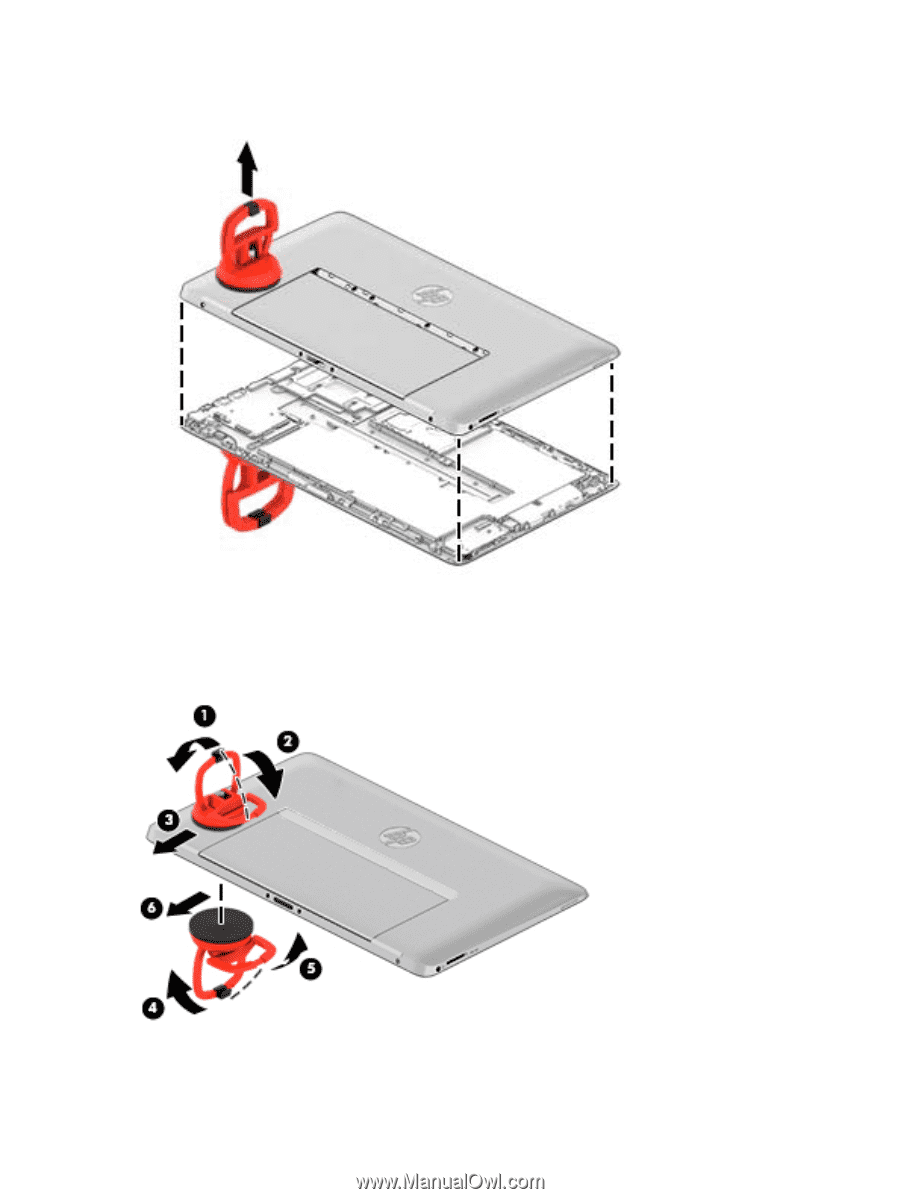
rotate the handle downward, If necessary, use the same procedure to remove the bottom suction cup.
 |
View all HP ENVY x2 - 15t-c000 manuals
Add to My Manuals
Save this manual to your list of manuals |
Page 42 highlights
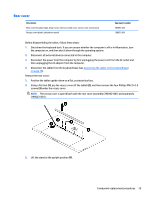
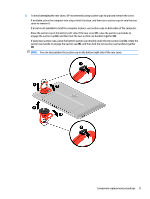
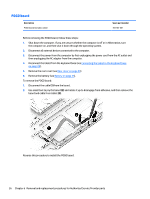
6. Firmly lift up on the suction to remove the rear cover from the tablet. The following image shows using two suction cups. Reverse this procedure to install the rear cover. To remove the top suction cup, release the clip that secure the handles (1), rotate the handle downward (2), and then slide the suction cup to remove it (3). If necessary, use the same procedure to remove the bottom suction cup. 32 Chapter 6 Removal and replacement procedures for Authorized Service Provider parts
-
 1
1 -
2
-
3
-
4
-
5
-
6
-
7
-
8
-
9
-
10
-
11
-
12
-
13
-
14
-
15
-
16
-
17
-
18
-
19
-
20
-
21
-
22
-
23
-
24
-
25
-
26
-
27
-
28
-
29
-
30
-
31
-
32
-
33
-
34
-
35
-
36
-
 37
37 -
 38
38 -
 39
39 -
 40
40 -
 41
41 -
 42
42 -
 43
43 -
 44
44 -
 45
45 -
 46
46 -
 47
47 -
48
-
49
-
50
-
51
-
52
-
53
-
54
-
55
-
56
-
57
-
58
-
59
-
60
-
61
-
62
-
63
-
64
-
65
-
66
-
67
-
68
-
69
-
70
-
71
-
72
-
73
-
74
-
75
-
76
-
77
-
78
-
79
-
80
-
81
-
82
 |
 |
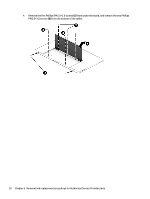
6.
Firmly lift up on the suction to remove the rear cover from the tablet. The following image shows using
two suction cups.
Reverse this procedure to install the rear cover.
To remove the top suction cup, release the clip that secure the handles
(1)
, rotate the handle downward
(2)
,
and then slide the suction cup to remove it
(3)
.
If necessary, use the same procedure to remove the bottom suction cup.
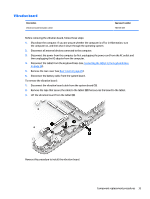
32
Chapter 6
Removal and replacement procedures for Authorized Service Provider parts