HP Indigo 10000 B&R Drivers Troubleshooting -- Document P/N:CA493-00610 Re - Page 36
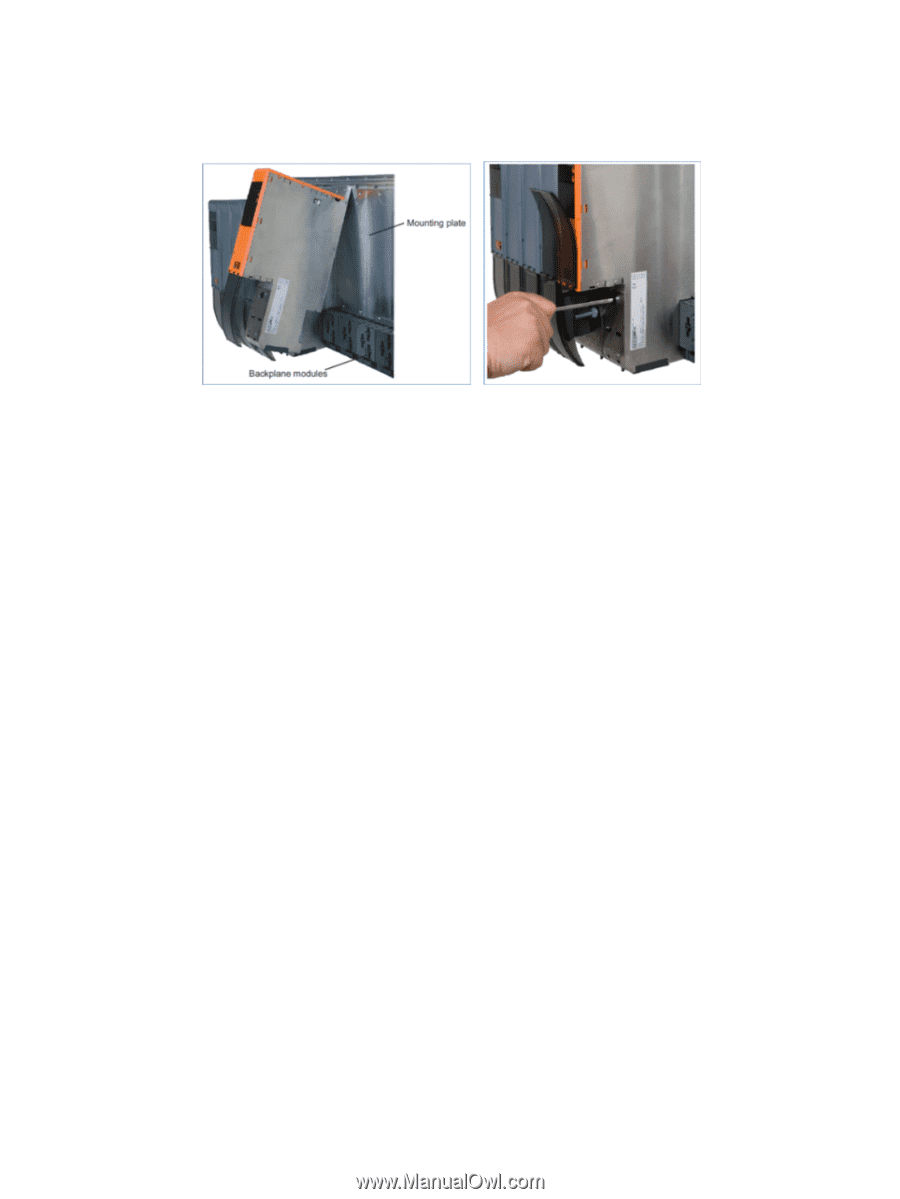
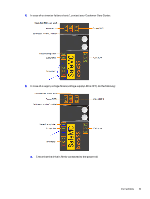
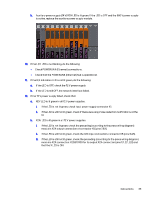
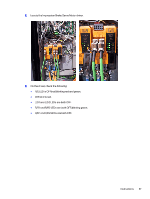
CE Suitcase, voltage connector X1 pin couples 1, 2 and 3
 |
View all HP Indigo 10000 manuals
Add to My Manuals
Save this manual to your list of manuals |
Page 36 highlights
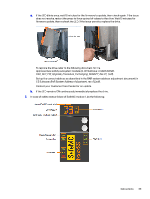
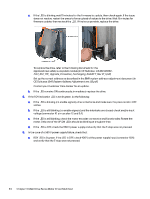
a. If the LED is blinking, wait 15 minutes for the firmware to update, then check again. If the issue does not resolve, restart the press to force upload of values to the drive. Wait 15 minutes for firmware update, then recheck the LED . If the issue persists, replace the drive. To replace the drive, refer to the following document for the approved new safety subsystem module (in CE Suitcase: CA493-00090 Eilat_SLC_FW_Upgrade_Procedure_Exchanging_SafeKEY_Rev 01_1.pdf). Set up the correct address as described in the BNR system address adjustment document (in CE Suitcase: BnR System Address Adjustment_rev_02.pdf). Contact your Customer Care Center for an update. b. If the LED remains ON continuously, immediately replace the drive. 8. If the RDY indication LED is not lit green, do the following: a. If the LED is blinking (no enable signals), check interlocks and make sure the press is not in OFF status. b. If the LED is still blinking (no enable signals) and the interlocks are closed, check enable input voltage (connector X1 pin couples 1,2 and 3,4). c. If the LED is still blinking, check the motor encoder connection and functionality: Rotate the motor. Only one of the UP/DN LEDs should be blinking at any given time. d. If the LED is OFF, check the 560 V power supply and verify that the E-stop was not pressed. 9. In the case of a 560 V power supply failure, check that: a. RDY LED is lit green. If the LED is OFF, check 400 V at the power supply input (connector X5A) and verify that the E-stop was not pressed. 34 Chapter 4 Main Drive Servo Motor Driver Multi Test
-
 1
1 -
2
-
3
-
4
-
5
-
6
-
7
-
8
-
9
-
10
-
11
-
12
-
13
-
14
-
15
-
16
-
17
-
18
-
19
-
20
-
21
-
22
-
23
-
24
-
25
-
26
-
27
-
28
-
29
-
30
-
 31
31 -
 32
32 -
 33
33 -
 34
34 -
 35
35 -
 36
36 -
 37
37 -
 38
38 -
 39
39 -
 40
40 -
 41
41 -
42
-
43
-
44
-
45
-
46
-
47
-
48
-
49
-
50
-
51
-
52
-
53
-
54
-
55
-
56
-
57
-
58
-
59
-
60
-
61
 |
 |