HP LaserJet 3052 HP LaserJet 3050/3052/3055/3390/3392 All-in-One User Guide - Page 163
Scanning from the all-in-one and HP Director (Macintosh), Scanning to e-mail, Select Destination
 |
View all HP LaserJet 3052 manuals
Add to My Manuals
Save this manual to your list of manuals |
Page 163 highlights
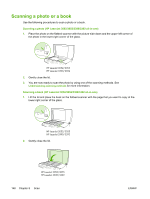
Scanning from the all-in-one and HP Director (Macintosh) For more information about tasks and settings described in this section, see the HP Director online Help. For more detailed instructions about loading original documents onto the flatbed scanner or into the automatic document feeder (ADF) input tray, see Loading documents to fax, copy, or scan. Scanning to e-mail 1. Load the originals that are to be scanned face-up in the automatic document feeder (ADF) input tray. Adjust the media guides to hold the originals in place. -or- Lift the flatbed scanner lid and load the original that is to be scanned face-down on the flatbed scanner with the upper-left corner of the document at the lower-right corner of the glass. Gently close the lid. 2. On the all-in-one control panel, press Scan To. 3. Use the < or the > button to select an e-mail program such as Apple Mail. 4. Press Start Scan. The original is scanned. The e-mail program that you selected in step 3 opens on the computer. A blank e-mail message opens with the scanned document as an attachment. 5. Enter an e-mail recipient, add text or other attachments, and then send the message. Scanning to a file 1. Load the originals that are to be scanned face-up in the automatic document feeder (ADF) input tray. Adjust the media guides to hold the originals in place. -or- Lift the flatbed scanner lid and load the original that is to be scanned face-down on the flatbed scanner with the upper-left corner of the document at the lower-right corner of the glass. Gently close the lid. 2. If the all-in-one is connected directly to your computer, the HP Director opens after you insert an item into the ADF input tray. -or- If you are scanning from the flatbed scanner (or if the HP Director does not automatically open), click the HP Director icon in the dock. 3. In the HP Director, click Scan. 4. Click Select Destination. 5. Click Save to file in the pop-up menu and then enter a name for the file. 6. Click Save. 7. Click Close to close HP LaserJet Scan. ENWW Scanning from the all-in-one and HP Director (Macintosh) 145
-
 1
1 -
2
-
3
-
4
-
5
-
6
-
7
-
8
-
9
-
10
-
11
-
12
-
13
-
14
-
15
-
16
-
17
-
18
-
19
-
20
-
21
-
22
-
23
-
24
-
25
-
26
-
27
-
28
-
29
-
30
-
31
-
32
-
33
-
34
-
35
-
36
-
37
-
38
-
39
-
40
-
41
-
42
-
43
-
44
-
45
-
46
-
47
-
48
-
49
-
50
-
51
-
52
-
53
-
54
-
55
-
56
-
57
-
58
-
59
-
60
-
61
-
62
-
63
-
64
-
65
-
66
-
67
-
68
-
69
-
70
-
71
-
72
-
73
-
74
-
75
-
76
-
77
-
78
-
79
-
80
-
81
-
82
-
83
-
84
-
85
-
86
-
87
-
88
-
89
-
90
-
91
-
92
-
93
-
94
-
95
-
96
-
97
-
98
-
99
-
100
-
101
-
102
-
103
-
104
-
105
-
106
-
107
-
108
-
109
-
110
-
111
-
112
-
113
-
114
-
115
-
116
-
117
-
118
-
119
-
120
-
121
-
122
-
123
-
124
-
125
-
126
-
127
-
128
-
129
-
130
-
131
-
132
-
133
-
134
-
135
-
136
-
137
-
138
-
139
-
140
-
141
-
142
-
143
-
144
-
145
-
146
-
147
-
148
-
149
-
150
-
151
-
152
-
153
-
154
-
155
-
156
-
157
-
 158
158 -
 159
159 -
 160
160 -
 161
161 -
 162
162 -
 163
163 -
 164
164 -
 165
165 -
 166
166 -
 167
167 -
 168
168 -
169
-
170
-
171
-
172
-
173
-
174
-
175
-
176
-
177
-
178
-
179
-
180
-
181
-
182
-
183
-
184
-
185
-
186
-
187
-
188
-
189
-
190
-
191
-
192
-
193
-
194
-
195
-
196
-
197
-
198
-
199
-
200
-
201
-
202
-
203
-
204
-
205
-
206
-
207
-
208
-
209
-
210
-
211
-
212
-
213
-
214
-
215
-
216
-
217
-
218
-
219
-
220
-
221
-
222
-
223
-
224
-
225
-
226
-
227
-
228
-
229
-
230
-
231
-
232
-
233
-
234
-
235
-
236
-
237
-
238
-
239
-
240
-
241
-
242
-
243
-
244
-
245
-
246
-
247
-
248
-
249
-
250
-
251
-
252
-
253
-
254
-
255
-
256
-
257
-
258
-
259
-
260
-
261
-
262
-
263
-
264
-
265
-
266
-
267
-
268
-
269
-
270
-
271
-
272
-
273
-
274
-
275
-
276
-
277
-
278
-
279
-
280
-
281
-
282
-
283
-
284
-
285
-
286
-
287
-
288
-
289
-
290
-
291
-
292
-
293
-
294
-
295
-
296
-
297
-
298
-
299
-
300
-
301
-
302
-
303
-
304
-
305
-
306
-
307
-
308
-
309
-
310
-
311
-
312
-
313
-
314
-
315
-
316
-
317
-
318
-
319
-
320
-
321
-
322
-
323
-
324
-
325
-
326
-
327
-
328
-
329
-
330
-
331
-
332
-
333
-
334
-
335
-
336
-
337
-
338
-
339
-
340
-
341
-
342
-
343
-
344
-
345
-
346
-
347
-
348
-
349
-
350
-
351
-
352
-
353
-
354
-
355
-
356
-
357
-
358
-
359
-
360
-
361
-
362
-
363
-
364
-
365
-
366
-
367
-
368
-
369
-
370
-
371
-
372
-
373
-
374
-
375
-
376
-
377
-
378
-
379
-
380
-
381
-
382
-
383
-
384
-
385
-
386
-
387
-
388
-
389
-
390
-
391
-
392
-
393
-
394
-
395
-
396
-
397
-
398
-
399
-
400
-
401
-
402
-
403
-
404
-
405
-
406
-
407
-
408
-
409
-
410
-
411
-
412
-
413
-
414
-
415
-
416
-
417
-
418
-
419
-
420
-
421
-
422
-
423
-
424
-
425
-
426
-
427
-
428
-
429
-
430
 |
 |