HP LaserJet Enterprise MFP M633 User Guide - Page 126
Condition on Which to Notify, Method Used to Deliver
 |
View all HP LaserJet Enterprise MFP M633 manuals
Add to My Manuals
Save this manual to your list of manuals |
Page 126 highlights
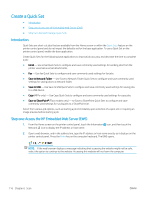
NOTE: Use credentials of user to connect after Sign In at the control panel is selected in the Authentication Settings drop-down menu, the logged-in user must have permissions to write to the specified SharePoint site. NOTE: For security purposes, the printer does not display credentials entered in the Quick Set Wizard. f. Click OK to complete the SharePoint path setup and navigate back to the SharePoint Destination Settings page. 8. Select Verify folder access prior to job start to ensure that the SharePoint folder specified as the destination folder is accessible each time the Quick Set is used. If this option is not selected, jobs can be saved to the SharePoint folder more quickly. However, if this option is not selected and the SharePoint folder is inaccessible the job will fail. 9. Click Next. 10. Set a Condition on Which to Notify: on the Notification Settings page. This setting configures the Quick Set to either not notify, or to send email messages or print a summary page if a job either completes successfully or fails. Select one of the following options from the Condition on Which to Notify: drop-down menu: ● Select Do not notify for the Quick Set to not perform any notification action when a job completes successfully or fails. ● Select Notify when job completes to for the Quick Set to send a notification when a job completes successfully. ● Select Notify only if job fails to for the Quick Set to send a notification only when a job fails. Selecting either Notify when job completes or Notify only if job fails requires the Method Used to Deliver Notification: to be set. Select from the following options: ● Email: Use this option to send an email when the selected notification condition occurs. This option requires a valid email address in the Notification Email Address: field. NOTE: To use the email notification feature, first configure the email feature on the printer. ● Print: Use this option to print the notification when the selected notification condition occurs. NOTE: Select Include Thumbnail for either notification option to include a thumbnail image of the first page of the scanned page of the job. 11. Click Next. 12. Select options from the Scan Settings page, and then click Next. For more information, see Table 6-3 Scan settings for Save to SharePoint® on page 114. 13. Select options from the File Settings page, and then click Next. For more information, see Table 6-4 File settings for Save to SharePoint on page 114. 14. Review the summary of settings, and then click the Finish button to save the Quick Set, or click the Previous button to edit the settings. 112 Chapter 6 Scan ENWW
-
 1
1 -
2
-
3
-
4
-
5
-
6
-
7
-
8
-
9
-
10
-
11
-
12
-
13
-
14
-
15
-
16
-
17
-
18
-
19
-
20
-
21
-
22
-
23
-
24
-
25
-
26
-
27
-
28
-
29
-
30
-
31
-
32
-
33
-
34
-
35
-
36
-
37
-
38
-
39
-
40
-
41
-
42
-
43
-
44
-
45
-
46
-
47
-
48
-
49
-
50
-
51
-
52
-
53
-
54
-
55
-
56
-
57
-
58
-
59
-
60
-
61
-
62
-
63
-
64
-
65
-
66
-
67
-
68
-
69
-
70
-
71
-
72
-
73
-
74
-
75
-
76
-
77
-
78
-
79
-
80
-
81
-
82
-
83
-
84
-
85
-
86
-
87
-
88
-
89
-
90
-
91
-
92
-
93
-
94
-
95
-
96
-
97
-
98
-
99
-
100
-
101
-
102
-
103
-
104
-
105
-
106
-
107
-
108
-
109
-
110
-
111
-
112
-
113
-
114
-
115
-
116
-
117
-
118
-
119
-
120
-
 121
121 -
 122
122 -
 123
123 -
 124
124 -
 125
125 -
 126
126 -
 127
127 -
 128
128 -
 129
129 -
 130
130 -
 131
131 -
132
-
133
-
134
-
135
-
136
-
137
-
138
-
139
-
140
-
141
-
142
-
143
-
144
-
145
-
146
-
147
-
148
-
149
-
150
-
151
-
152
-
153
-
154
-
155
-
156
-
157
-
158
-
159
-
160
-
161
-
162
-
163
-
164
-
165
-
166
-
167
-
168
-
169
-
170
-
171
-
172
-
173
-
174
-
175
-
176
-
177
-
178
-
179
-
180
-
181
-
182
-
183
-
184
-
185
-
186
-
187
-
188
-
189
-
190
-
191
-
192
-
193
-
194
-
195
-
196
-
197
-
198
-
199
-
200
-
201
-
202
-
203
-
204
-
205
-
206
-
207
-
208
-
209
-
210
-
211
-
212
-
213
-
214
-
215
-
216
-
217
-
218
-
219
-
220
-
221
-
222
-
223
-
224
-
225
-
226
-
227
-
228
-
229
-
230
-
231
-
232
-
233
-
234
-
235
-
236
-
237
-
238
-
239
-
240
-
241
-
242
-
243
-
244
-
245
-
246
-
247
-
248
-
249
-
250
-
251
-
252
-
253
-
254
 |
 |