HP Nc4000 Maintenance and Service Guide: HP Compaq Notebook nc4000 Series - Page 104
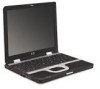
display assembly to the base enclosure., Lift the display assembly straight up and remove it.
 |
View all HP Nc4000 manuals
Add to My Manuals
Save this manual to your list of manuals |
Page 104 highlights
Removal and Replacement Procedures 10. Disconnect the display inverter 1 and video cables 2 from the system board. 11. Remove the two T8M2.0×8.0 screws 3 that secure the display assembly to the base enclosure. Disconnecting the Display Cables and Removing the Display Assembly Screws 12. Lift the display assembly straight up and remove it. Reverse the above procedure to install the display assembly. Maintenance and Service Guide 5-31
-
 1
1 -
2
-
3
-
4
-
5
-
6
-
7
-
8
-
9
-
10
-
11
-
12
-
13
-
14
-
15
-
16
-
17
-
18
-
19
-
20
-
21
-
22
-
23
-
24
-
25
-
26
-
27
-
28
-
29
-
30
-
31
-
32
-
33
-
34
-
35
-
36
-
37
-
38
-
39
-
40
-
41
-
42
-
43
-
44
-
45
-
46
-
47
-
48
-
49
-
50
-
51
-
52
-
53
-
54
-
55
-
56
-
57
-
58
-
59
-
60
-
61
-
62
-
63
-
64
-
65
-
66
-
67
-
68
-
69
-
70
-
71
-
72
-
73
-
74
-
75
-
76
-
77
-
78
-
79
-
80
-
81
-
82
-
83
-
84
-
85
-
86
-
87
-
88
-
89
-
90
-
91
-
92
-
93
-
94
-
95
-
96
-
97
-
98
-
 99
99 -
 100
100 -
 101
101 -
 102
102 -
 103
103 -
 104
104 -
 105
105 -
 106
106 -
 107
107 -
 108
108 -
 109
109 -
110
-
111
-
112
-
113
-
114
-
115
-
116
-
117
-
118
-
119
-
120
-
121
-
122
-
123
-
124
-
125
-
126
-
127
-
128
-
129
-
130
-
131
-
132
-
133
-
134
-
135
-
136
-
137
-
138
-
139
-
140
-
141
-
142
-
143
-
144
-
145
-
146
-
147
-
148
-
149
-
150
-
151
-
152
-
153
-
154
-
155
-
156
-
157
-
158
-
159
-
160
-
161
-
162
-
163
-
164
-
165
-
166
-
167
 |
 |

Removal and Replacement Procedures
Maintenance and Service Guide
5–31
10. Disconnect the display inverter
1
and video cables
2
from
the system board.
11. Remove the two T8M2.0×8.0 screws
3
that secure the
display assembly to the base enclosure.
Disconnecting the Display Cables and Removing the Display
Assembly Screws
12. Lift the display assembly straight up and remove it.
Reverse the above procedure to install the display assembly.