HP Officejet 100 User Guide - Page 40
Print with a single ink cartridge, Store printing supplies, Removed cartridge, Cartridges used, Output
 |
View all HP Officejet 100 manuals
Add to My Manuals
Save this manual to your list of manuals |
Page 40 highlights
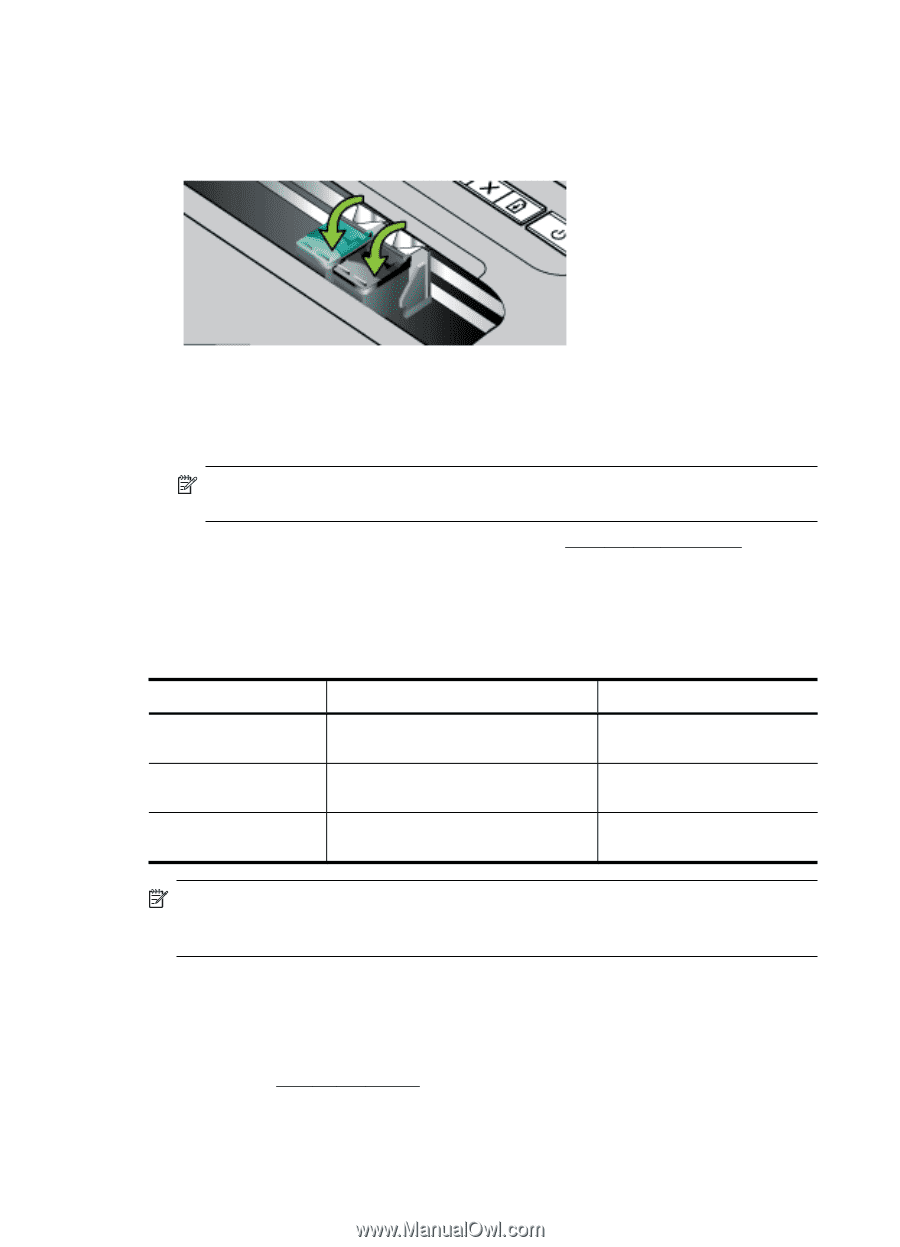
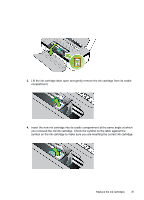
Chapter 3 5. Close the ink cartridge latch. If the cartridge is inserted correctly, closing the latch gently pushes the cartridge into its cradle compartment. Press the latch to make sure it is seated flat on the cartridge. 6. Close the front access cover. 7. Wait for the carriage to complete the ink cartridge initialization routine and return to the home position at the left side of the printer before using the printer. NOTE: Do not open the front access cover until the ink cartridge initialization is complete. 8. Align the ink cartridges. For more information, see Align the ink cartridges. Print with a single ink cartridge If one of the ink cartridges runs out of ink before you can replace it, you can still print with a single ink cartridge. Removed cartridge Black Tri-color Photo Cartridges used Prints with only the tri-color ink cartridge Prints with only the black or photo ink cartridge Prints with only the tri-color ink cartridge Output Color and grayscale All documents print in grayscale Color and grayscale NOTE: Printing with one ink cartridge might be slower and the print quality might be affected. It is recommended to print with both ink cartridges. For borderless printing, the tri-color ink cartridge must be installed. Store printing supplies Ink cartridges can be left in the device for extended periods of time. However, to assure optimal ink cartridge health, be sure to turn off the device properly. For more information, see Turn off the printer. 36 Work with ink cartridges
-
 1
1 -
2
-
3
-
4
-
5
-
6
-
7
-
8
-
9
-
10
-
11
-
12
-
13
-
14
-
15
-
16
-
17
-
18
-
19
-
20
-
21
-
22
-
23
-
24
-
25
-
26
-
27
-
28
-
29
-
30
-
31
-
32
-
33
-
34
-
 35
35 -
 36
36 -
 37
37 -
 38
38 -
 39
39 -
 40
40 -
 41
41 -
 42
42 -
 43
43 -
 44
44 -
 45
45 -
46
-
47
-
48
-
49
-
50
-
51
-
52
-
53
-
54
-
55
-
56
-
57
-
58
-
59
-
60
-
61
-
62
-
63
-
64
-
65
-
66
-
67
-
68
-
69
-
70
-
71
-
72
-
73
-
74
-
75
-
76
-
77
-
78
-
79
-
80
-
81
-
82
-
83
-
84
-
85
-
86
-
87
-
88
-
89
-
90
-
91
-
92
-
93
-
94
-
95
-
96
-
97
-
98
-
99
-
100
-
101
-
102
-
103
-
104
-
105
-
106
-
107
-
108
-
109
-
110
-
111
-
112
-
113
-
114
-
115
-
116
-
117
-
118
 |
 |