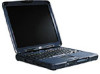
HP OmniBook xe3-gc HP OmniBook XE3 - Setup Guide - Page 52
Recovering and Reinstalling Software
 |
View all HP OmniBook xe3-gc manuals
Add to My Manuals
Save this manual to your list of manuals |
Page 52 highlights
Solving Problems with Your Computer Recovering and Reinstalling Software Recovering and Reinstalling Software You can use the Recovery CD to recover an original build, or you can use it to install the HP custom software over a user-installed alternate operating system. If you need to recover a specific application, you can reinstall the software directly from your hard drive; for instructions, see "To recover an application" in the Reference Guide. The Recovery CD provides the HP notebook-specific Windows drivers to configure your custom system. You can find drivers: • On the hard drive under c:\hp\drivers. • On the Recovery CD, under \hp\drivers. • On the HP notebook website at www.hp.com/notebooks. This website contains the latest updates of software drivers for your computer. CAUTION To recover the factory installation of your hard disk The following procedure describes how to recover the original Windows software and operating system that came with your computer. This procedure will format the hard disk drive. After the hard disk drive is formatted, you'll need to reinstall any applications. Reformatting the hard disk drive will erase all data on the disk. 1. Back up all data from your hard disk. 2. Connect the AC adapter to the computer. 3. Insert the bootable Recovery CD in the CD-ROM drive. 4. Reboot and, when you see the HP logo, press F2. 5. Select the CD-ROM drive as the first boot device and reboot. You can find more details about recovering the factory installation of Windows on the Recovery CD: the file readme.txt is in the CD's root directory. The recovery process can take about 10 or 15 minutes. Do not interrupt the process or unplug the AC adapter until the process is completed. 52 Startup Guide
-
 1
1 -
2
-
3
-
4
-
5
-
6
-
7
-
8
-
9
-
10
-
11
-
12
-
13
-
14
-
15
-
16
-
17
-
18
-
19
-
20
-
21
-
22
-
23
-
24
-
25
-
26
-
27
-
28
-
29
-
30
-
31
-
32
-
33
-
34
-
35
-
36
-
37
-
38
-
39
-
40
-
41
-
42
-
43
-
44
-
45
-
46
-
 47
47 -
 48
48 -
 49
49 -
 50
50 -
 51
51 -
 52
52 -
 53
53 -
 54
54 -
 55
55 -
 56
56 -
 57
57 -
58
-
59
-
60
-
61
-
62
-
63
-
64
-
65
-
66
-
67
-
68
 |
 |