HP P1006 Service Guide - Page 60
Unthread the wires from the retaining clips in the rear of the device.
 |
UPC - 883585164479
View all HP P1006 manuals
Add to My Manuals
Save this manual to your list of manuals |
Page 60 highlights
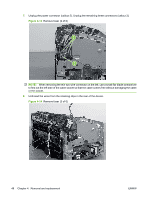
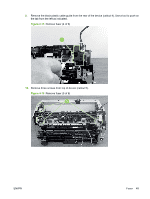
7. Unplug the power connector (callout 2). Unplug the remaining three connectors (callout 3). Figure 4-13 Remove fuser (2 of 6) NOTE: When removing the thin two-wire connector on the left, use a small flat-blade screwdriver to flex out the left side of the cable socket so that the cable comes free without damaging the cable or the socket. 8. Unthread the wires from the retaining clips in the rear of the device. Figure 4-14 Remove fuser (3 of 6) 48 Chapter 4 Removal and replacement ENWW
-
 1
1 -
2
-
3
-
4
-
5
-
6
-
7
-
8
-
9
-
10
-
11
-
12
-
13
-
14
-
15
-
16
-
17
-
18
-
19
-
20
-
21
-
22
-
23
-
24
-
25
-
26
-
27
-
28
-
29
-
30
-
31
-
32
-
33
-
34
-
35
-
36
-
37
-
38
-
39
-
40
-
41
-
42
-
43
-
44
-
45
-
46
-
47
-
48
-
49
-
50
-
51
-
52
-
53
-
54
-
 55
55 -
 56
56 -
 57
57 -
 58
58 -
 59
59 -
 60
60 -
 61
61 -
 62
62 -
 63
63 -
 64
64 -
 65
65 -
66
-
67
-
68
-
69
-
70
-
71
-
72
-
73
-
74
-
75
-
76
-
77
-
78
-
79
-
80
-
81
-
82
-
83
-
84
-
85
-
86
-
87
-
88
-
89
-
90
-
91
-
92
-
93
-
94
-
95
-
96
-
97
-
98
-
99
-
100
-
101
-
102
-
103
-
104
-
105
-
106
-
107
-
108
-
109
-
110
-
111
-
112
-
113
-
114
-
115
-
116
-
117
-
118
-
119
-
120
-
121
-
122
-
123
-
124
-
125
-
126
-
127
-
128
-
129
-
130
-
131
-
132
-
133
-
134
-
135
-
136
-
137
-
138
-
139
-
140
-
141
-
142
-
143
-
144
-
145
-
146
-
147
-
148
 |
 |
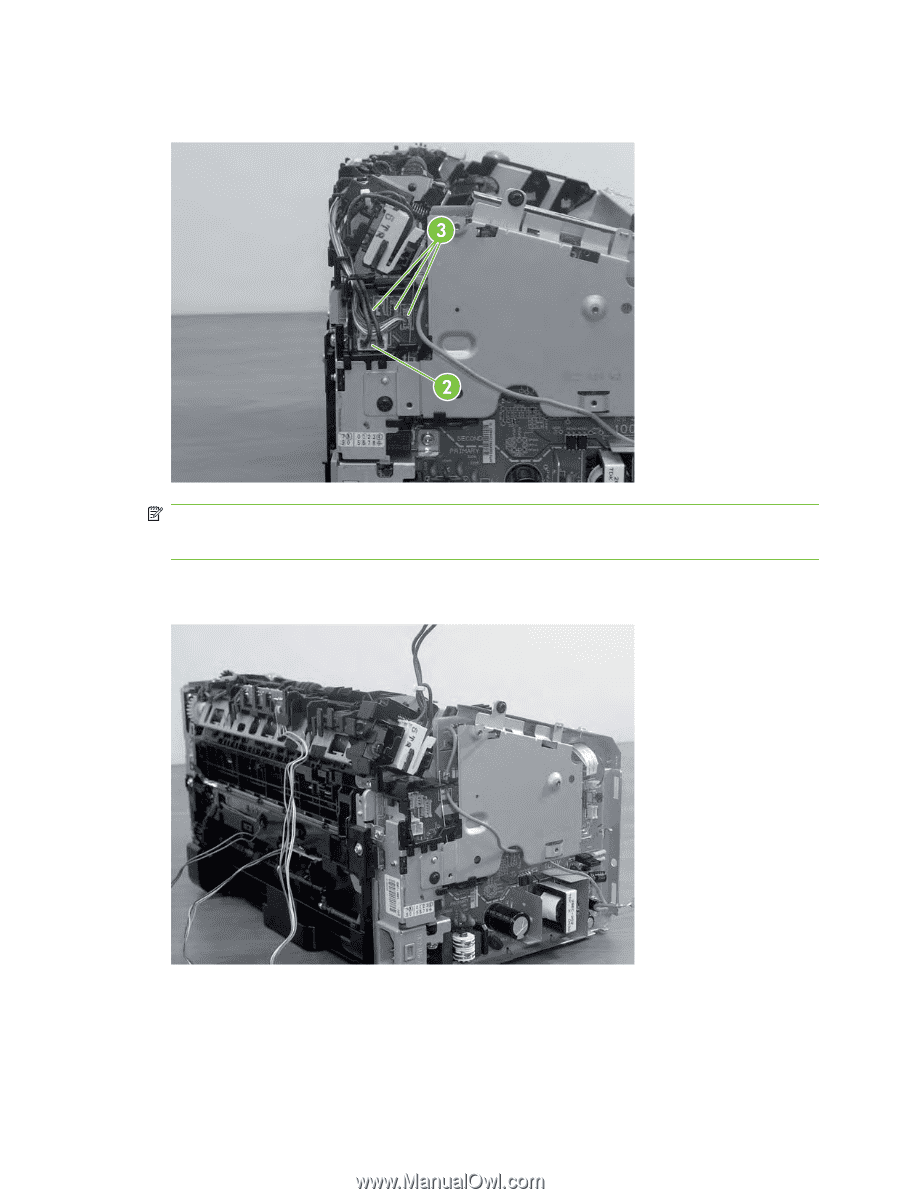
7.
Unplug the power connector (callout 2). Unplug the remaining three connectors (callout 3).
Figure 4-13
Remove fuser (2 of 6)
NOTE:
When removing the thin two-wire connector on the left, use a small flat-blade screwdriver
to flex out the left side of the cable socket so that the cable comes free without damaging the cable
or the socket.
8.
Unthread the wires from the retaining clips in the rear of the device.
Figure 4-14
Remove fuser (3 of 6)
48
Chapter 4
Removal and replacement
ENWW