HP P1006 Service Guide - Page 80
Problem-solving checklist, Step 1: Is the device set up correctly?, Step 2: Is the Ready light on? - power on test print
 |
UPC - 883585164479
View all HP P1006 manuals
Add to My Manuals
Save this manual to your list of manuals |
Page 80 highlights
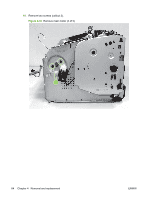
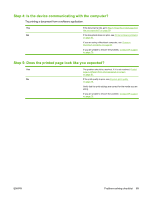
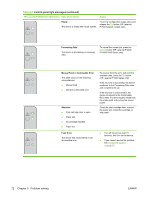
Problem-solving checklist Step 1: Is the device set up correctly? ● Is the device plugged into a power outlet that is known to work? ● Is the on/off switch in the on position? ● Is the print cartridge properly installed? See Replace the print cartridge on page 8. ● Is paper properly loaded in the input tray? Yes If you answered yes to the questions above, go to Step 2: Is the Ready light on? on page 68 No If the device will not turn on, Contact HP support on page 70. Step 2: Is the Ready light on? Verify that the Ready light (1) is illuminated on the control panel. Yes Go to Step 3: Can you print an engine test page? on page 68 No If the control panel lights do not look like the picture above, see Status-light patterns on page 71. If you are unable to resolve the problem, Contact HP support on page 70. Step 3: Can you print an engine test page? To print an engine test page, open and close the cartridge door five times while the printer is in ready mode. The printer should print one page with multiple horizontal lines. Yes If the engine test page printed, go to Step 4: Is the device communicating with the computer? on page 69 No If no paper came out, see Media problem-solving on page 80. If you are unable to resolve the problem, Contact HP support on page 70. 68 Chapter 5 Problem solving ENWW
-
 1
1 -
2
-
3
-
4
-
5
-
6
-
7
-
8
-
9
-
10
-
11
-
12
-
13
-
14
-
15
-
16
-
17
-
18
-
19
-
20
-
21
-
22
-
23
-
24
-
25
-
26
-
27
-
28
-
29
-
30
-
31
-
32
-
33
-
34
-
35
-
36
-
37
-
38
-
39
-
40
-
41
-
42
-
43
-
44
-
45
-
46
-
47
-
48
-
49
-
50
-
51
-
52
-
53
-
54
-
55
-
56
-
57
-
58
-
59
-
60
-
61
-
62
-
63
-
64
-
65
-
66
-
67
-
68
-
69
-
70
-
71
-
72
-
73
-
74
-
 75
75 -
 76
76 -
 77
77 -
 78
78 -
 79
79 -
 80
80 -
 81
81 -
 82
82 -
 83
83 -
 84
84 -
 85
85 -
86
-
87
-
88
-
89
-
90
-
91
-
92
-
93
-
94
-
95
-
96
-
97
-
98
-
99
-
100
-
101
-
102
-
103
-
104
-
105
-
106
-
107
-
108
-
109
-
110
-
111
-
112
-
113
-
114
-
115
-
116
-
117
-
118
-
119
-
120
-
121
-
122
-
123
-
124
-
125
-
126
-
127
-
128
-
129
-
130
-
131
-
132
-
133
-
134
-
135
-
136
-
137
-
138
-
139
-
140
-
141
-
142
-
143
-
144
-
145
-
146
-
147
-
148
 |
 |