HP P1006 Service Guide - Page 71
Rear paper-feed roller,
 |
UPC - 883585164479
View all HP P1006 manuals
Add to My Manuals
Save this manual to your list of manuals |
Page 71 highlights
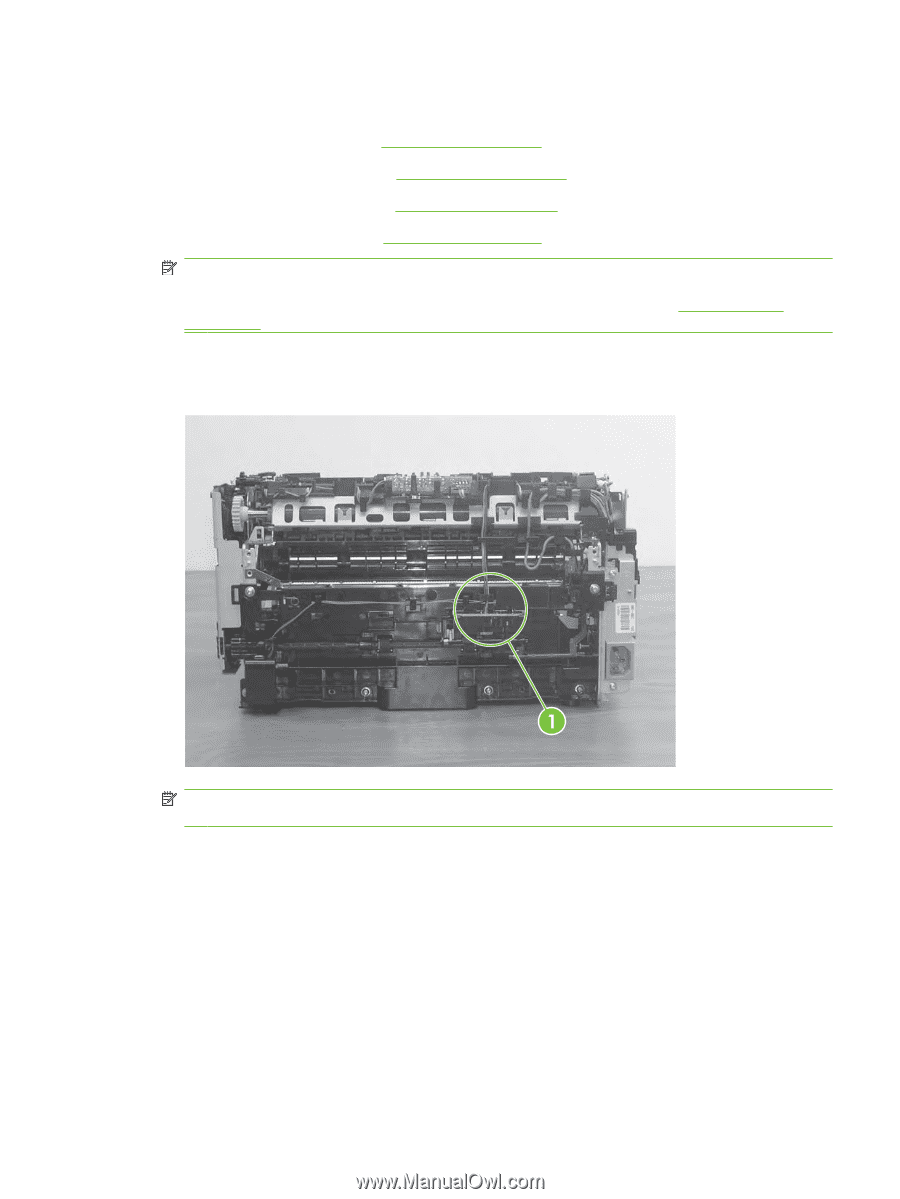
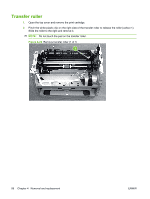
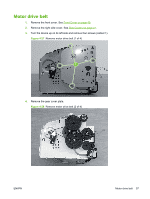
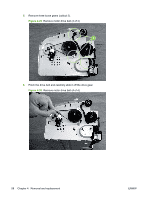
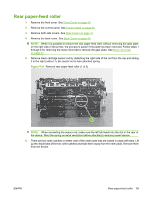
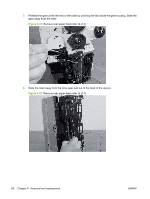
Rear paper-feed roller 1. Remove the front cover. See Front Cover on page 40. 2. Remove the control panel. See Control panel on page 40. 3. Remove both side covers. See Side Covers on page 41. 4. Remove the back cover. See Back Cover on page 43. NOTE: While it is possible to remove the rear paper feed roller without removing the gear plate on the right side of the printer, the process is easier if the plate has been removed. Follow steps 1 through 4 for removing the motor drive belt to remove the gear plate. See Motor drive belt on page 57. 5. Remove black cartridge sensor rod by detaching the right side of the rod from the clip and sliding it to the right (callout 1). Be careful not to lose attached spring Figure 4-31 Remove rear paper feed roller (1 of 3) NOTE: When reinserting the sensor rod, make sure the left tab feeds into the slot in the rear of the device. Wind the spring an extra revolution before attaching to ensure proper tension. 6. There are two roller catches on either side of the roller pads that are locked in place with tabs. Lift up the inside tabs of the two roller catches and slide them away from the roller pads. Remove them from the device. ENWW Rear paper-feed roller 59
-
 1
1 -
2
-
3
-
4
-
5
-
6
-
7
-
8
-
9
-
10
-
11
-
12
-
13
-
14
-
15
-
16
-
17
-
18
-
19
-
20
-
21
-
22
-
23
-
24
-
25
-
26
-
27
-
28
-
29
-
30
-
31
-
32
-
33
-
34
-
35
-
36
-
37
-
38
-
39
-
40
-
41
-
42
-
43
-
44
-
45
-
46
-
47
-
48
-
49
-
50
-
51
-
52
-
53
-
54
-
55
-
56
-
57
-
58
-
59
-
60
-
61
-
62
-
63
-
64
-
65
-
 66
66 -
 67
67 -
 68
68 -
 69
69 -
 70
70 -
 71
71 -
 72
72 -
 73
73 -
 74
74 -
 75
75 -
 76
76 -
77
-
78
-
79
-
80
-
81
-
82
-
83
-
84
-
85
-
86
-
87
-
88
-
89
-
90
-
91
-
92
-
93
-
94
-
95
-
96
-
97
-
98
-
99
-
100
-
101
-
102
-
103
-
104
-
105
-
106
-
107
-
108
-
109
-
110
-
111
-
112
-
113
-
114
-
115
-
116
-
117
-
118
-
119
-
120
-
121
-
122
-
123
-
124
-
125
-
126
-
127
-
128
-
129
-
130
-
131
-
132
-
133
-
134
-
135
-
136
-
137
-
138
-
139
-
140
-
141
-
142
-
143
-
144
-
145
-
146
-
147
-
148
 |
 |