HP P1006 Service Guide - Page 73
Main motor,
 |
UPC - 883585164479
View all HP P1006 manuals
Add to My Manuals
Save this manual to your list of manuals |
Page 73 highlights
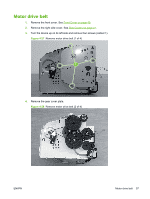
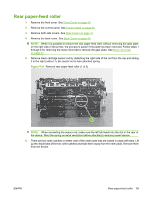
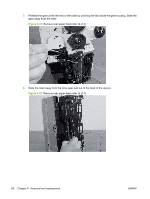
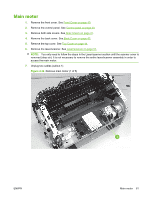
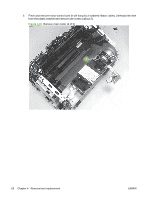
Main motor 1. Remove the front cover. See Front Cover on page 40. 2. Remove the control panel. See Control panel on page 40. 3. Remove both side covers. See Side Covers on page 41. 4. Remove the back cover. See Back Cover on page 43. 5. Remove the top cover. See Top Cover on page 44. 6. Remove the laser/scanner. See Laser/scanner on page 51. NOTE: You only need to follow the steps in the Laser/scanner section until the scanner cover is removed (step six). It is not necessary to remove the entire laser/scanner assembly in order to access the main motor. 7. Unplug two cables (callout 1). Figure 4-34 Remove main motor (1 of 5) ENWW 1 Main motor 61
-
 1
1 -
2
-
3
-
4
-
5
-
6
-
7
-
8
-
9
-
10
-
11
-
12
-
13
-
14
-
15
-
16
-
17
-
18
-
19
-
20
-
21
-
22
-
23
-
24
-
25
-
26
-
27
-
28
-
29
-
30
-
31
-
32
-
33
-
34
-
35
-
36
-
37
-
38
-
39
-
40
-
41
-
42
-
43
-
44
-
45
-
46
-
47
-
48
-
49
-
50
-
51
-
52
-
53
-
54
-
55
-
56
-
57
-
58
-
59
-
60
-
61
-
62
-
63
-
64
-
65
-
66
-
67
-
 68
68 -
 69
69 -
 70
70 -
 71
71 -
 72
72 -
 73
73 -
 74
74 -
 75
75 -
 76
76 -
 77
77 -
 78
78 -
79
-
80
-
81
-
82
-
83
-
84
-
85
-
86
-
87
-
88
-
89
-
90
-
91
-
92
-
93
-
94
-
95
-
96
-
97
-
98
-
99
-
100
-
101
-
102
-
103
-
104
-
105
-
106
-
107
-
108
-
109
-
110
-
111
-
112
-
113
-
114
-
115
-
116
-
117
-
118
-
119
-
120
-
121
-
122
-
123
-
124
-
125
-
126
-
127
-
128
-
129
-
130
-
131
-
132
-
133
-
134
-
135
-
136
-
137
-
138
-
139
-
140
-
141
-
142
-
143
-
144
-
145
-
146
-
147
-
148
 |
 |
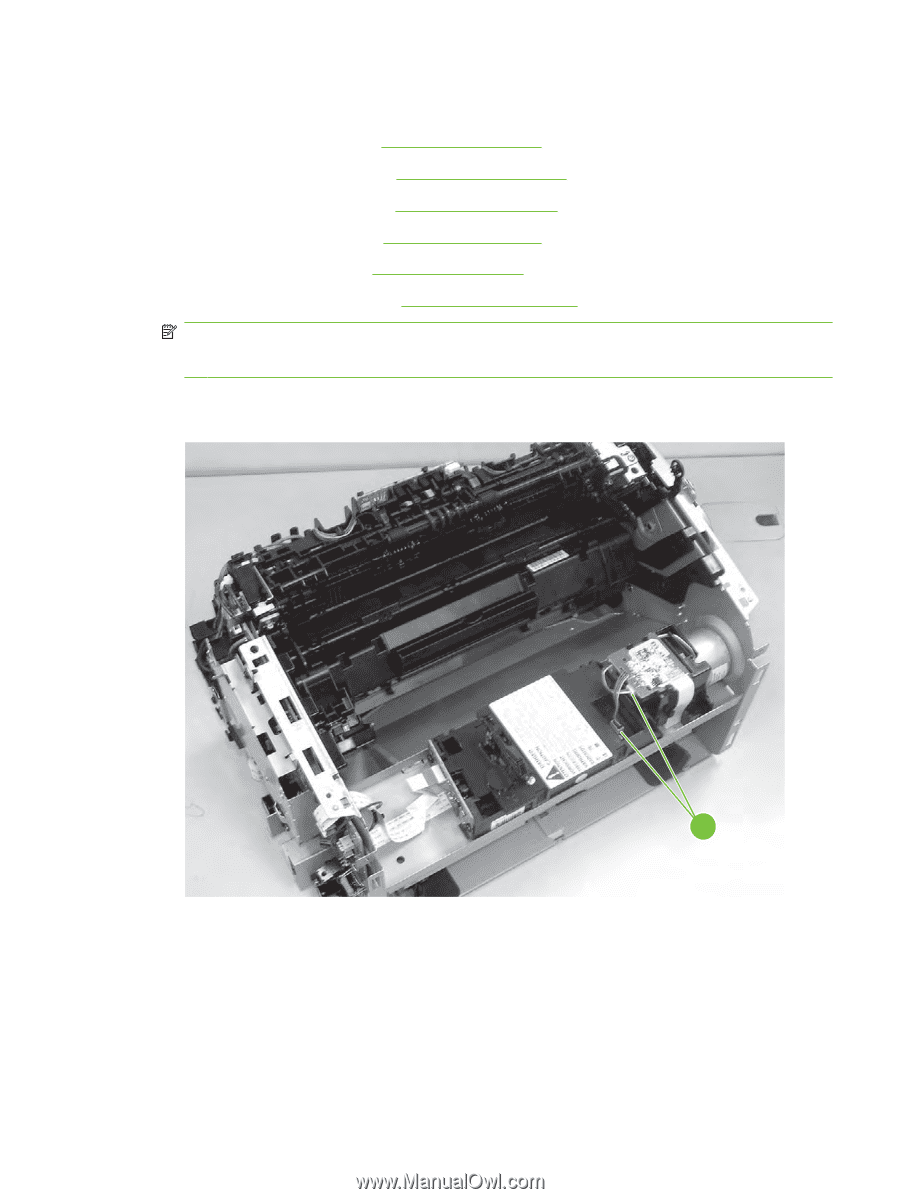
Main motor
1.
Remove the front cover. See
Front Cover
on page
40
.
2.
Remove the control panel. See
Control panel
on page
40
.
3.
Remove both side covers. See
Side Covers
on page
41
.
4.
Remove the back cover. See
Back Cover
on page
43
.
5.
Remove the top cover. See
Top Cover
on page
44
.
6.
Remove the laser/scanner. See
Laser/scanner
on page
51
.
NOTE:
You only need to follow the steps in the Laser/scanner section until the scanner cover is
removed (step six). It is not necessary to remove the entire laser/scanner assembly in order to
access the main motor.
7.
Unplug two cables (callout 1).
Figure 4-34
Remove main motor (1 of 5)
1
ENWW
Main motor
61