HP PageWide Pro 577dw Printing Security Best Practices: Configuring a Printer - Page 20
Input Auto Continue Timeout, Job Hold Timeout, The I/O Timeout to End Print Job options
 |
View all HP PageWide Pro 577dw manuals
Add to My Manuals
Save this manual to your list of manuals |
Page 20 highlights
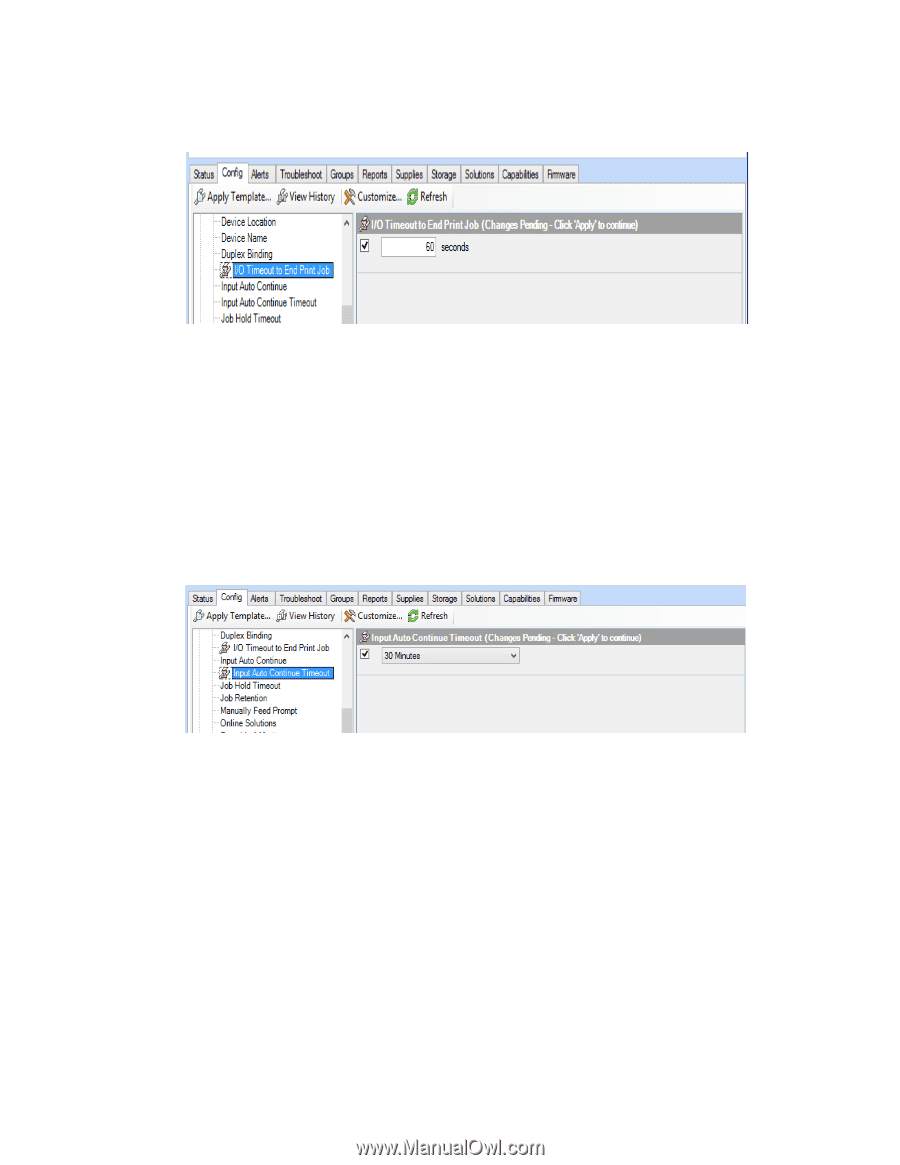
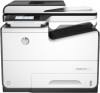
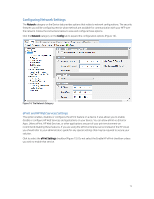
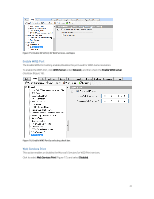
2. Click the checkbox to enable the I/O Timeout to End Print Job setting, and enter a reasonable time for the print device to wait between data packets. Figure 8: The I/O Timeout to End Print Job options Input Auto Continue Timeout The Input Auto Continue Timeout allows you to specify the amount of time a device should wait before performing the default action when the specified media size for a job is not available. Setting this timeout will help prevent jobs sent with improper paper or media selections from tying up a print resource. To set this timeout follow the instructions below. 1. From the Device category, select the Input Auto Continue Timeout menu. 2. Click the checkbox to enable the Input Auto Continue Timeout setting, and then select a reasonable time the print device should wait between data packets. Figure 9: The Input Auto Continue Timeout options Job Hold Timeout 1. From the Device category select the Job Hold Timeout menu (Figure 10). 2. Click the checkbox to enable the Job Hold Timeout (Figure 10) setting, and then enter a reasonable time for printing. This ensures that stored copy jobs and print jobs on the MFP are erased after a reasonable time. 16
-
 1
1 -
2
-
3
-
4
-
5
-
6
-
7
-
8
-
9
-
10
-
11
-
12
-
13
-
14
-
 15
15 -
 16
16 -
 17
17 -
 18
18 -
 19
19 -
 20
20 -
 21
21 -
 22
22 -
 23
23 -
 24
24 -
 25
25 -
26
-
27
-
28
-
29
-
30
-
31
-
32
-
33
-
34
-
35
-
36
-
37
-
38
-
39
-
40
-
41
-
42
-
43
-
44
-
45
-
46
-
47
-
48
-
49
-
50
-
51
-
52
 |
 |