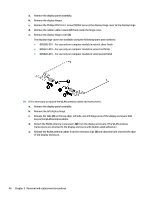
HP Pavilion 13-s000 Maintenance and Service Guide - Page 50
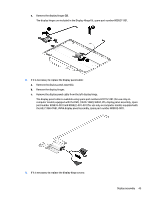
panel assembly., that secures the display panel cable to the display
 |
View all HP Pavilion 13-s000 manuals
Add to My Manuals
Save this manual to your list of manuals |
Page 50 highlights
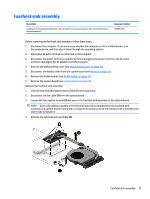
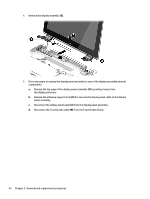
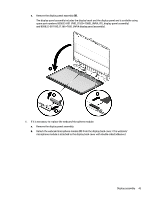
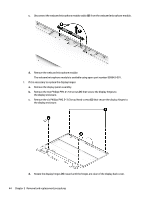
4. Remove the display assembly (3). 5. If it is necessary to replace the display panel assembly or any of the display assembly internal components: a. Release the top edge of the display panel assembly (1) by pulling it away from the display enclosure. b. Release the adhesive support strip (2) that secures the display panel cable to the display panel assembly. c. Disconnect the display panel cable (3) from the display panel assembly. d. Disconnect the TouchScreen cable (4) from the TouchScreen board. 42 Chapter 5 Removal and replacement procedures
-
 1
1 -
2
-
3
-
4
-
5
-
6
-
7
-
8
-
9
-
10
-
11
-
12
-
13
-
14
-
15
-
16
-
17
-
18
-
19
-
20
-
21
-
22
-
23
-
24
-
25
-
26
-
27
-
28
-
29
-
30
-
31
-
32
-
33
-
34
-
35
-
36
-
37
-
38
-
39
-
40
-
41
-
42
-
43
-
44
-
 45
45 -
 46
46 -
 47
47 -
 48
48 -
 49
49 -
 50
50 -
 51
51 -
 52
52 -
 53
53 -
 54
54 -
 55
55 -
56
-
57
-
58
-
59
-
60
-
61
-
62
-
63
-
64
-
65
-
66
-
67
-
68
-
69
-
70
-
71
-
72
-
73
-
74
-
75
-
76
-
77
-
78
-
79
-
80
-
81
-
82
-
83
-
84
-
85
-
86
-
87
-
88
 |
 |
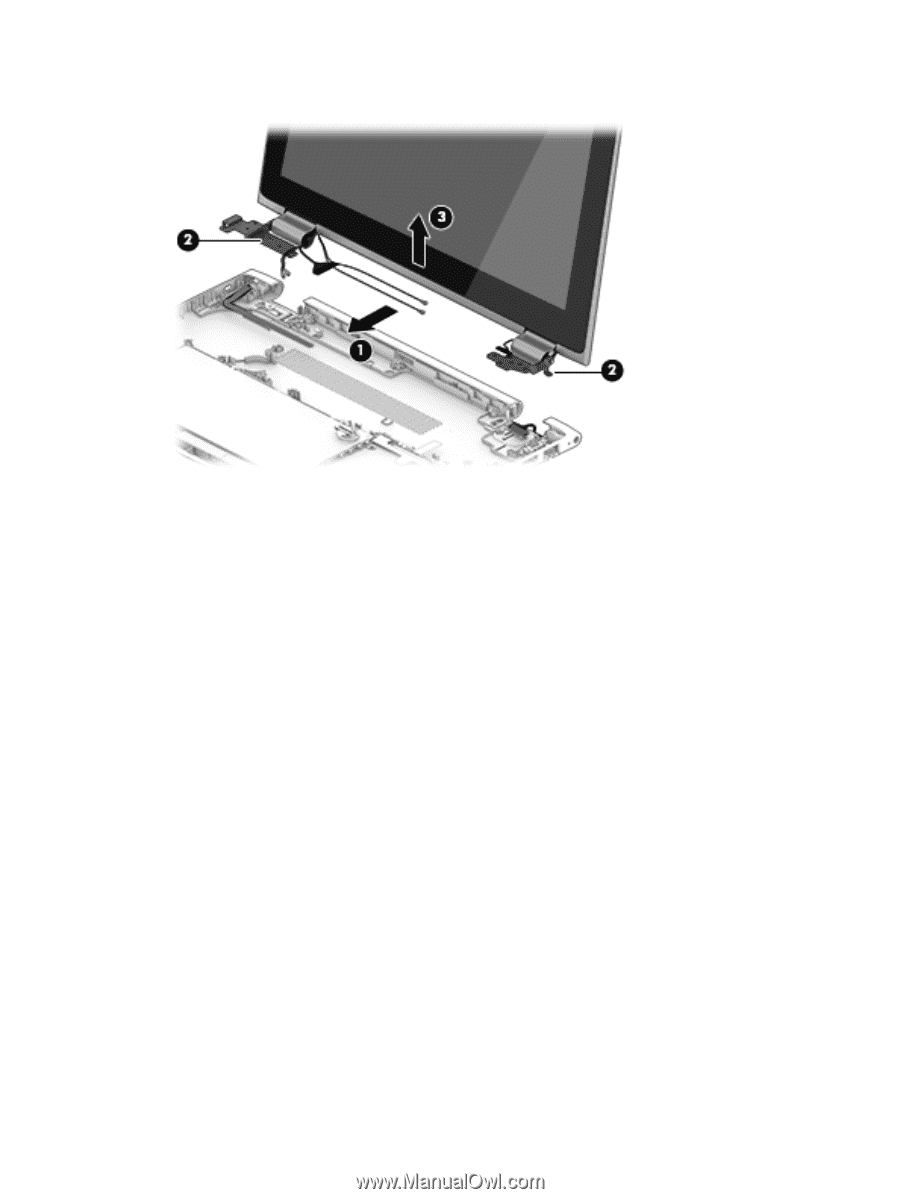
4.
Remove the display assembly
(3)
.
5.
If it is necessary to replace the display panel assembly or any of the display assembly internal
components:
a.
Release the top edge of the display panel assembly
(1)
by pulling it away from
the display enclosure.
b.
Release the adhesive support strip
(2)
that secures the display panel cable to the display
panel assembly.
c.
Disconnect the display panel cable
(3)
from the display panel assembly.
d.
Disconnect the TouchScreen cable
(4)
from the TouchScreen board.
42
Chapter 5
Removal and replacement procedures