HP Pavilion v2000 Getting Started Guide - Page 81
Disc Labeling with LightScribe, LightScribe requirements - audio driver
 |
View all HP Pavilion v2000 manuals
Add to My Manuals
Save this manual to your list of manuals |
Page 81 highlights
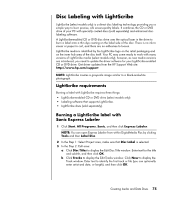
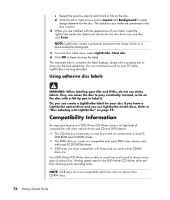
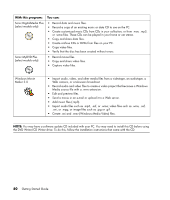
Disc Labeling with LightScribe LightScribe (select models only) is a direct disc labeling technology providing you a simple way to burn precise, silk screen-quality labels. It combines the CD or DVD drive of your PC with specially coated discs (sold separately) and enhanced disclabeling software. A LightScribe-enabled CD or DVD disc drive uses the optical laser in the drive to burn a label onto a thin dye coating on the label side of the disc. There is no ink to smear or paper to curl, and there are no adhesives to loosen. LightScribe media is identified by the LightScribe logo on the retail packaging and on the inner hub area of the disc itself. Your PC may come ready to work with many versions of LightScribe media (select models only); however, as new media versions are introduced, you need to update the driver software for your LightScribe-enabled CD or DVD drive. Get driver updates from the HP Support Web site: http://www.hp.com/support NOTE: LightScribe creates a grayscale image similar to a black-and-white photograph. LightScribe requirements Burning a label with LightScribe requires three things: • LightScribe-enabled CD or DVD drive (select models only). • Labeling software that supports LightScribe. • LightScribe discs (sold separately). Burning a LightScribe label with Sonic Express Labeler 1 Click Start, All Programs, Sonic, and then click Express Labeler. NOTE: You can open Express Labeler from within DigitalMedia Plus by clicking Tools and then Label Disc. 2 In the Step 1: Select Project area, make sure that Disc Label is selected. 3 In the Step 2: Edit area: a Click Disc Titles to display the Edit Disc Title window. Enter text for the title and subtitle, and then click OK. b Click Tracks to display the Edit Tracks window. Click New to display the Track window. Enter text to identify the first track or file (you can optionally enter artist and date, or length), and then click OK. Creating Audio and Data Discs 75
-
 1
1 -
2
-
3
-
4
-
5
-
6
-
7
-
8
-
9
-
10
-
11
-
12
-
13
-
14
-
15
-
16
-
17
-
18
-
19
-
20
-
21
-
22
-
23
-
24
-
25
-
26
-
27
-
28
-
29
-
30
-
31
-
32
-
33
-
34
-
35
-
36
-
37
-
38
-
39
-
40
-
41
-
42
-
43
-
44
-
45
-
46
-
47
-
48
-
49
-
50
-
51
-
52
-
53
-
54
-
55
-
56
-
57
-
58
-
59
-
60
-
61
-
62
-
63
-
64
-
65
-
66
-
67
-
68
-
69
-
70
-
71
-
72
-
73
-
74
-
75
-
 76
76 -
 77
77 -
 78
78 -
 79
79 -
 80
80 -
 81
81 -
 82
82 -
 83
83 -
 84
84 -
 85
85 -
 86
86 -
87
-
88
-
89
-
90
-
91
-
92
-
93
-
94
-
95
-
96
-
97
-
98
-
99
-
100
-
101
-
102
-
103
-
104
-
105
-
106
-
107
-
108
-
109
-
110
-
111
-
112
-
113
-
114
-
115
-
116
-
117
-
118
-
119
-
120
 |
 |