HP Photosmart R727 User Guide - Page 17
Using Panorama mode, Panorama, Action, Night Portrait, Night Scenery, Beach, Sunset, Document
 |
View all HP Photosmart R727 manuals
Add to My Manuals
Save this manual to your list of manuals |
Page 17 highlights
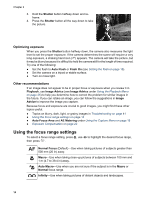
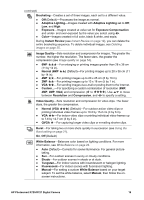
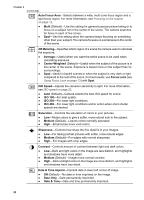
(continued) Panorama-For grand landscapes or group pictures where you need to or capture a wide shot that one image cannot capture (see Using Panorama mode on page 17). Action-For capturing sporting events, moving cars, or any scene where you want to stop the action. Night Portrait-For capturing images of people at night. This mode uses the flash and a long exposure. As a result, you must set the camera on a tripod or stable surface. Night Scenery-For capturing night scenes. This mode uses a long exposure with no flash. As a result, you must set the camera on a tripod or stable surface. Beach-For capturing scenes at the beach. Snow-For capturing scenes in snow. Sunset-For capturing outdoor scenes at sunset. Document-For capturing flat, textual, or graphical pieces. Note The shooting modes do not apply when you are recording video clips. The shooting mode remains in effect until it is changed again, or until you turn off the camera. Using Panorama mode Panorama mode allows you to take a sequence of 2 to 5 pictures that can be stitched together to capture a scene too wide to fit into a single picture. To stitch your panoramic sequence together, use Stitch Panorama on the camera (see Stitching panoramas on page 27). Depending on the HP Photosmart Software version you installed (see About the HP Photosmart Software on page 9), you can also stitch panoramas automatically as you transfer them to your computer. 1. While in Live View, press , use to select either Panorama (left to right) or Panorama (right to left), then press . 2. Press the Shutter button to take the first picture in the panoramic sequence. 3. Position the camera to take the second picture. Use the transparent overlay of the first image superimposed on one third of the Live View screen to align your second picture with the first. 4. Press the Shutter button to take the second picture. 5. Continue adding more pictures to the panorama, or press to end the panoramic sequence. During Instant Review (see Instant Review on page 12), each image in the panoramic sequence is displayed. When the last image HP Photosmart R725/R727 Digital Camera 17
-
 1
1 -
2
-
3
-
4
-
5
-
6
-
7
-
8
-
9
-
10
-
11
-
 12
12 -
 13
13 -
 14
14 -
 15
15 -
 16
16 -
 17
17 -
 18
18 -
 19
19 -
 20
20 -
 21
21 -
 22
22 -
23
-
24
-
25
-
26
-
27
-
28
-
29
-
30
-
31
-
32
-
33
-
34
-
35
-
36
-
37
-
38
-
39
-
40
-
41
-
42
-
43
-
44
-
45
-
46
-
47
-
48
-
49
-
50
-
51
-
52
-
53
-
54
-
55
-
56
 |
 |