HP Photosmart R727 User Guide - Page 6
Camera front, side, and bottom, Camera dock insert, Before taking pictures, Delete, Playback - battery
 |
View all HP Photosmart R727 manuals
Add to My Manuals
Save this manual to your list of manuals |
Page 6 highlights
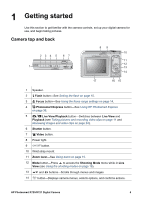
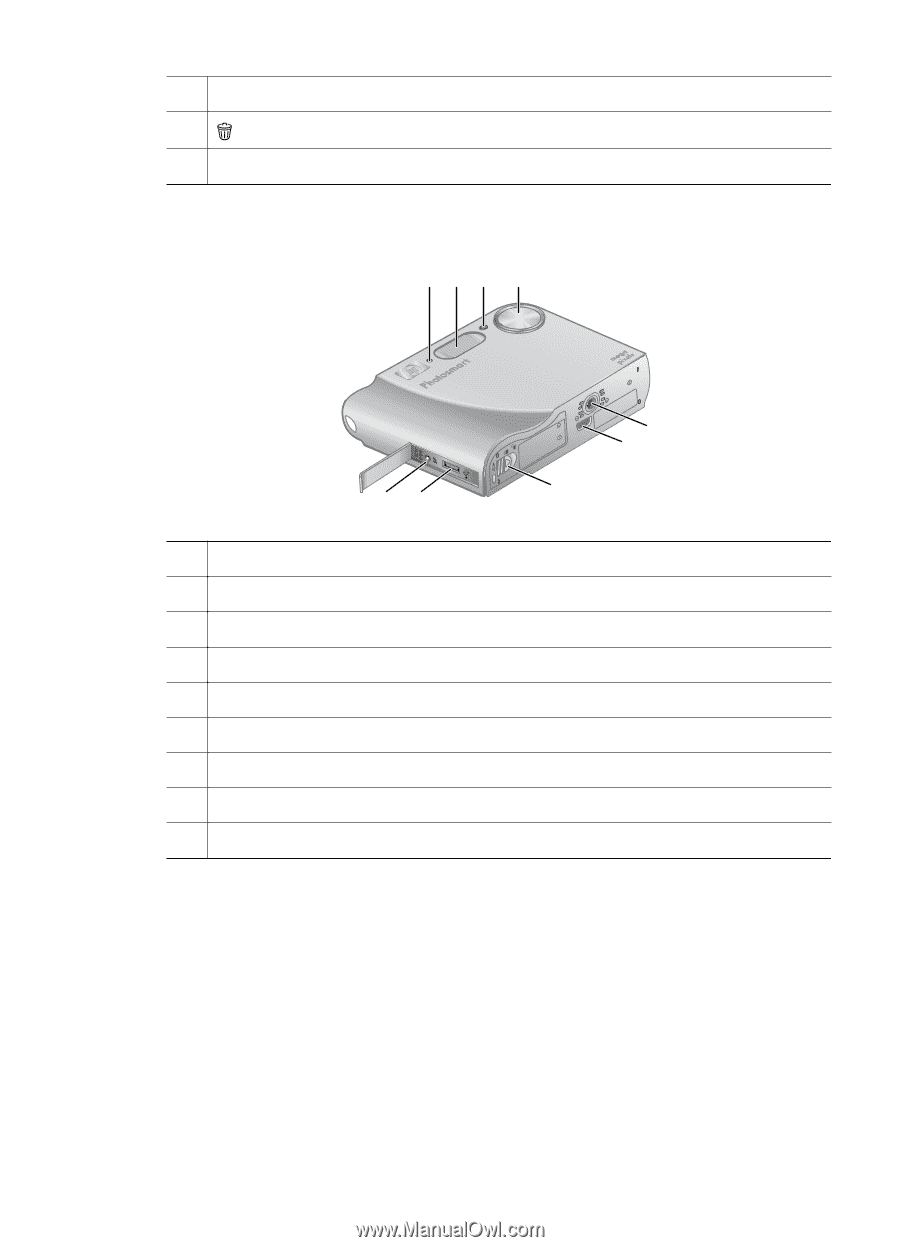
Chapter 1 (continued) 15 Battery Charging light. 16 Delete button-Accesses the Delete function while in Playback. 17 Image Display. Camera front, side, and bottom 123 4 98 5 6 7 1 Microphone. 2 Flash. 3 Self-Timer/Focus Assist light-See Using the Self-Timer settings on page 21. 4 Lens. 5 Tripod mount. 6 Dock connector. 7 Battery/Memory card door. 8 USB connector. 9 Power adapter connector. Camera dock insert If you purchase a dock, it will come with multiple clear inserts. When setting up the optional dock for use with this camera, use the dock insert with the round blue tag. See the dock User Guide for instructions. Before taking pictures Complete the following procedures before taking pictures or recording video clips. 6
-
 1
1 -
 2
2 -
 3
3 -
 4
4 -
 5
5 -
 6
6 -
 7
7 -
 8
8 -
 9
9 -
 10
10 -
 11
11 -
 12
12 -
13
-
14
-
15
-
16
-
17
-
18
-
19
-
20
-
21
-
22
-
23
-
24
-
25
-
26
-
27
-
28
-
29
-
30
-
31
-
32
-
33
-
34
-
35
-
36
-
37
-
38
-
39
-
40
-
41
-
42
-
43
-
44
-
45
-
46
-
47
-
48
-
49
-
50
-
51
-
52
-
53
-
54
-
55
-
56
 |
 |
15
Battery Charging light.
16
Delete
button—Accesses the
Delete
function while in
Playback
.
17
Image Display.
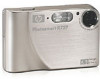
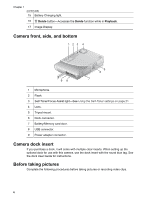
Camera front, side, and bottom
1
3
2
4
8
9
5
6
7
1
Microphone.
2
Flash.
3
Self-Timer/Focus Assist light—See
Using the Self-Timer settings
on page 21
.
4
Lens.
5
Tripod mount.
6
Dock connector.
7
Battery/Memory card door.
8
USB connector.
9
Power adapter connector.
Camera dock insert
If you purchase a dock, it will come with multiple clear inserts. When setting up the
optional dock for use with this camera, use the dock insert with the round blue tag. See
the dock User Guide for instructions.
Before taking pictures
Complete the following procedures before taking pictures or recording video clips.
Chapter 1
(continued)
6