HP Photosmart R727 User Guide - Page 39
Using the Setup Menu
 |
View all HP Photosmart R727 manuals
Add to My Manuals
Save this manual to your list of manuals |
Page 39 highlights
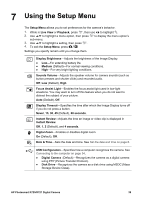
7 Using the Setup Menu The Setup Menu allows you to set preferences for the camera's behavior. 1. While in Live View or Playback, press , then use to highlight . 2. Use to highlight a menu option, then press to display the menu option's sub-menu. 3. Use to highlight a setting, then press . 4. To exit the Setup Menu, press . Settings you specify remain until you change them. Display Brightness-Adjusts the brightness of the Image Display. ● Low-For extending battery life. ● Medium (Default)-For normal viewing conditions. ● High-For very bright lighting conditions. Sounds Volume-Adjusts the speaker volume for camera sounds (such as button presses and shutter clicks) and recorded audio. Off, Low (Default), High. Focus Assist Light-Enables the focus assist light used in low-light situations. You may want to turn off this feature when you do not want to distract the subject of your picture. Auto (Default), Off. Display Timeout-Specifies the time after which the Image Display turns off if you do not press a button. Never, 15, 30, 45 (Default), 60 seconds. Instant Review-Adjusts the time an image or video clip is displayed in Instant Review. Off, 1, 2 (Default), and 4 seconds. Digital Zoom-Enables or disables digital zoom. On (Default), Off. Date & Time-Sets the date and time. See Set the date and time on page 8. USB Configuration-Specifies how a computer recognizes the camera. See Connecting to the computer on page 34. ● Digital Camera (Default)-Recognizes the camera as a digital camera using PTP (Picture Transfer Protocol). ● Disk Drive-Recognizes the camera as a disk drive using MSDC (Mass Storage Device Class). HP Photosmart R725/R727 Digital Camera 39
-
 1
1 -
2
-
3
-
4
-
5
-
6
-
7
-
8
-
9
-
10
-
11
-
12
-
13
-
14
-
15
-
16
-
17
-
18
-
19
-
20
-
21
-
22
-
23
-
24
-
25
-
26
-
27
-
28
-
29
-
30
-
31
-
32
-
33
-
 34
34 -
 35
35 -
 36
36 -
 37
37 -
 38
38 -
 39
39 -
 40
40 -
 41
41 -
 42
42 -
 43
43 -
 44
44 -
45
-
46
-
47
-
48
-
49
-
50
-
51
-
52
-
53
-
54
-
55
-
56
 |
 |