HP Photosmart R727 User Guide - Page 34
Connecting to the computer, Using a memory card reader, Printing images from the camera - mac
 |
View all HP Photosmart R727 manuals
Add to My Manuals
Save this manual to your list of manuals |
Page 34 highlights
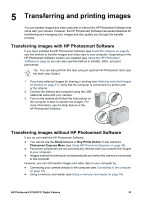
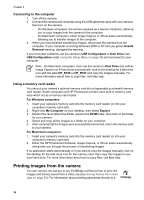
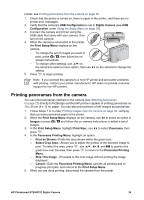
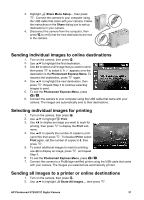
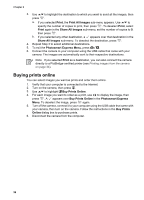
Chapter 5 Connecting to the computer 1. Turn off the camera. 2. Connect the camera and computer using the USB cable that came with your camera, then turn on the camera. - On Windows computers, the camera appears as a device in Explorer, allowing you to copy images from the camera to the computer. - On Macintosh computers, either Image Capture or iPhoto starts automatically, allowing you to transfer images to the computer. 3. When you have finished transferring images, disconnect the camera from the computer. If your computer is running Windows 2000 or XP and you get an Unsafe Removal warning, disregard the warning. If you encounter problems, set the camera's USB Configuration to Disk Drive (see USB Configuration under Using the Setup Menu on page 39) and reconnect to your computer. Note On Macintosh computers, if you set the camera to Disk Drive and neither Image Capture nor iPhoto starts automatically, look on the desktop for a disk drive icon with the label HP_R725 or HP_R727 and copy the images manually. For more information about how to copy files, visit Mac help. Using a memory card reader You can put your camera's optional memory card into a (separately purchased) memory card reader. Some computers and HP Photosmart printers have built-in memory card slots which act as a memory card reader. For Windows computers: 1. Insert your camera's memory card into the memory card reader (or into your computer's memory card slot). 2. Right-click My Computer on your desktop, then select Explore. 3. Expand the removable drive folder, expand the DCIM folder, then click on the folder for your camera. 4. Select and copy all the images to a folder on your computer. 5. After verifying that the images were successfully transferred, return the memory card to your camera. For Macintosh computers: 1. Insert your camera's memory card into the memory card reader (or into your computer's memory card slot). 2. Either the HP Photosmart Software, Image Capture, or iPhoto starts automatically and guides you through the process of transferring images. If no application starts automatically or if you want to copy the images manually, look on the desktop for the disk drive icon for the memory card, then copy the images to your local hard drive. For more information about how to copy files, visit Mac help. Printing images from the camera You can connect the camera to any PictBridge-certified printer to print still images and frames saved from a video clip (see Saving frames from video clips on page 25). For information about printing panoramas directly to a 34
-
 1
1 -
2
-
3
-
4
-
5
-
6
-
7
-
8
-
9
-
10
-
11
-
12
-
13
-
14
-
15
-
16
-
17
-
18
-
19
-
20
-
21
-
22
-
23
-
24
-
25
-
26
-
27
-
28
-
 29
29 -
 30
30 -
 31
31 -
 32
32 -
 33
33 -
 34
34 -
 35
35 -
 36
36 -
 37
37 -
 38
38 -
 39
39 -
40
-
41
-
42
-
43
-
44
-
45
-
46
-
47
-
48
-
49
-
50
-
51
-
52
-
53
-
54
-
55
-
56
 |
 |