HP Photosmart R727 User Guide - Page 35
Printing panoramas from the camera, Select Crop Area - digital camera problems
 |
View all HP Photosmart R727 manuals
Add to My Manuals
Save this manual to your list of manuals |
Page 35 highlights
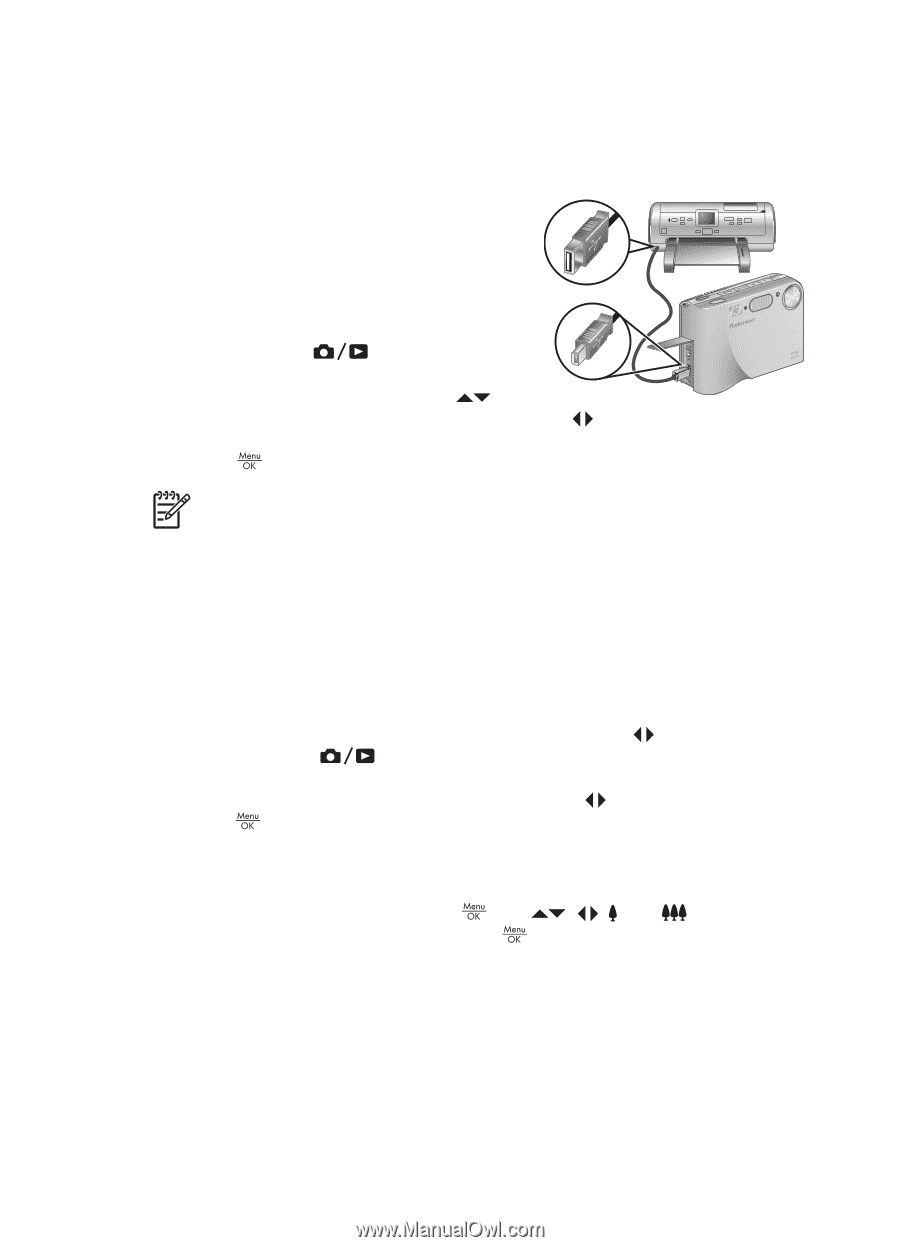
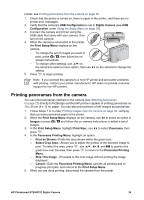
printer, see Printing panoramas from the camera on page 35. 1. Check that the printer is turned on, there is paper in the printer, and there are no printer error messages. 2. Verify that the camera's USB Configuration is set to Digital Camera (see USB Configuration under Using the Setup Menu on page 39). 3. Connect the camera and printer using the USB cable that came with your camera, then turn on the camera. 4. When the camera is connected to the printer, the Print Setup Menu displays on the camera. - To change the set of images you want to print, press , then follow the on- screen instructions. - To change other settings, use on the camera to select a menu option, then use setting. 5. Press to begin printing. on the camera to change the Note If you connect the camera to a non-HP printer and encounter problems with printing, contact your printer manufacturer. HP does not provide customer support for non-HP printers. Printing panoramas from the camera You can print panoramas stitched on the camera (see Stitching panoramas on page 27) directly to PictBridge-certified HP printers capable of printing panoramas on 10 x 30 cm (4 x 12 in) paper. You can also print portions of still images as panoramas. 1. Follow Steps 1 to 3 under Printing images from the camera on page 34, verifying that you have panorama paper in the printer. 2. When the Print Setup Menu displays on the camera, use to select an option in Images or press and follow the on-camera instructions to select a set of images. 3. In the Print Setup Menu, highlight Print Size:, use to select Panorama, then press . 4. In the Panorama Printing Menu, highlight an option. - Print as Shown-Prints the area shown within the green box. - Select Crop Area-Allows you to adjust the portion of the selected image to print. To select the area, press , use , , , and to position the green box over the area, then press to return to the Panorama Printing Menu. - Skip This Image-Proceeds to the next image without printing the image displayed. - Cancel-Exits the Panorama Printing Menu, cancels all pending and inprogress print jobs, and returns to the Print Setup Menu. 5. When you are done printing, disconnect the camera from the printer. HP Photosmart R725/R727 Digital Camera 35
-
 1
1 -
2
-
3
-
4
-
5
-
6
-
7
-
8
-
9
-
10
-
11
-
12
-
13
-
14
-
15
-
16
-
17
-
18
-
19
-
20
-
21
-
22
-
23
-
24
-
25
-
26
-
27
-
28
-
29
-
 30
30 -
 31
31 -
 32
32 -
 33
33 -
 34
34 -
 35
35 -
 36
36 -
 37
37 -
 38
38 -
 39
39 -
 40
40 -
41
-
42
-
43
-
44
-
45
-
46
-
47
-
48
-
49
-
50
-
51
-
52
-
53
-
54
-
55
-
56
 |
 |