HP Presario SR1900 Getting Started Guide - Page 77
Working with Data DVDs and CDs, Verifying data disc recorded without errors, Data disc tips
 |
View all HP Presario SR1900 manuals
Add to My Manuals
Save this manual to your list of manuals |
Page 77 highlights
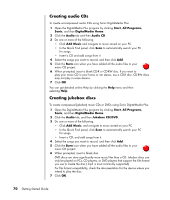
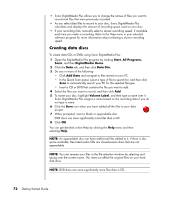
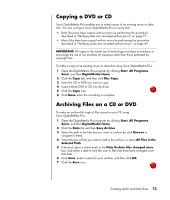
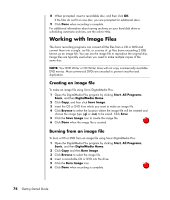
You can get detailed online Help by clicking the Help menu and then selecting Help. NOTE: DigitalMedia Plus scans for all audio files, even the sounds from your operating system. If you don't want to display some of these sounds, you can select the Options icon (wrench). In the Options window, select Audio, and then Quick Find. Select Hide Audio Files Shorter Than (in seconds), type the number of seconds, and click OK. Working with Data DVDs and CDs Unlike audio CDs and jukebox DVDs, data DVDs and CDs can be recorded in multiple sessions. Verifying data disc recorded without errors When copying or burning data files to DVD or CD, it is recommended that you use Sonic DigitalMedia Plus because it includes a feature that confirms that your disc has been created without errors. This data verification feature is enabled by default. To check the status of the write verification feature in DigitalMedia Plus: 1 Open the DigitalMedia Plus program by clicking Start, All Programs, Sonic, and then DigitalMedia Home. 2 Click the Tools menu and then click Options. 3 In the Options window, click Data. 4 Ensure the Verify data written to the disc after burning box is checked. 5 Click OK. Data disc tips When storing data files on a disc, it is important to note that: • You can add new data files to a CD-R, DVD+R or DVD-R in a later recording session, until the disc is full. With DVD+R or DVD-R discs, insert your partially recorded DVD, click the Wrench icon to display the Options window, click Data, select the first Write-Once DVD Compatibility option, and then click OK. • When you record files that have the same name as previously recorded files, Sonic DigitalMedia Plus updates the file, and the previous version is overwritten. Creating Audio and Data Discs 71
-
 1
1 -
2
-
3
-
4
-
5
-
6
-
7
-
8
-
9
-
10
-
11
-
12
-
13
-
14
-
15
-
16
-
17
-
18
-
19
-
20
-
21
-
22
-
23
-
24
-
25
-
26
-
27
-
28
-
29
-
30
-
31
-
32
-
33
-
34
-
35
-
36
-
37
-
38
-
39
-
40
-
41
-
42
-
43
-
44
-
45
-
46
-
47
-
48
-
49
-
50
-
51
-
52
-
53
-
54
-
55
-
56
-
57
-
58
-
59
-
60
-
61
-
62
-
63
-
64
-
65
-
66
-
67
-
68
-
69
-
70
-
71
-
 72
72 -
 73
73 -
 74
74 -
 75
75 -
 76
76 -
 77
77 -
 78
78 -
 79
79 -
 80
80 -
 81
81 -
 82
82 -
83
-
84
-
85
-
86
-
87
-
88
-
89
-
90
-
91
-
92
-
93
-
94
-
95
-
96
-
97
-
98
-
99
-
100
-
101
-
102
-
103
-
104
-
105
-
106
-
107
-
108
-
109
-
110
-
111
-
112
-
113
-
114
-
115
-
116
-
117
-
118
-
119
-
120
 |
 |