HP ProLiant WS460c HP ProLiant WS460c Gen8 Workstation Blade with WS460c Graph - Page 41
Drive blank, Drive
 |
View all HP ProLiant WS460c manuals
Add to My Manuals
Save this manual to your list of manuals |
Page 41 highlights
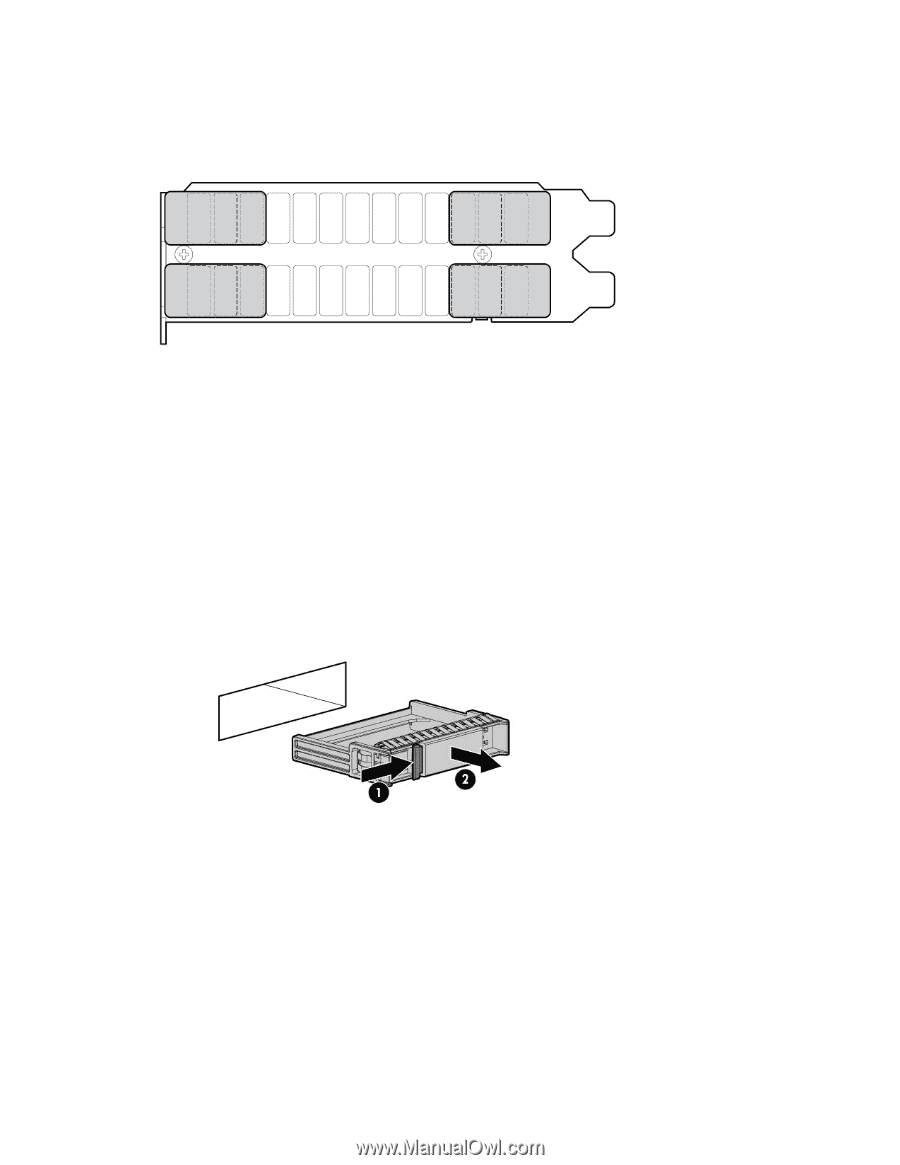
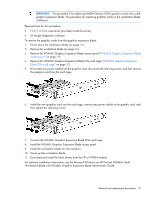
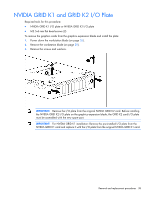
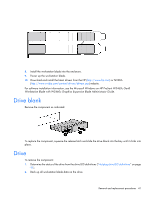
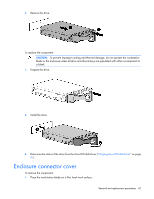
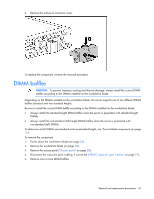
8. Install the workstation blade into the enclosure. 9. Power up the workstation blade. 10. Download and install the latest drivers from the HP (http://www.hp.com) or NVIDIA (http://www.nvidia.com/content/drivers/drivers.asp) website. For software installation information, see the Microsoft Windows on HP ProLiant WS460c Gen8 Workstation Blade with WS460c Graphics Expansion Blade Administrator Guide. Drive blank Remove the component as indicated. To replace the component, squeeze the release latch and slide the drive blank into the bay until it clicks into place. Drive To remove the component: 1. Determine the status of the drive from the drive LED definitions ("Hot-plug drive LED definitions" on page 91). 2. Back up all workstation blade data on the drive. Removal and replacement procedures 41
-
 1
1 -
2
-
3
-
4
-
5
-
6
-
7
-
8
-
9
-
10
-
11
-
12
-
13
-
14
-
15
-
16
-
17
-
18
-
19
-
20
-
21
-
22
-
23
-
24
-
25
-
26
-
27
-
28
-
29
-
30
-
31
-
32
-
33
-
34
-
35
-
 36
36 -
 37
37 -
 38
38 -
 39
39 -
 40
40 -
 41
41 -
 42
42 -
 43
43 -
 44
44 -
 45
45 -
 46
46 -
47
-
48
-
49
-
50
-
51
-
52
-
53
-
54
-
55
-
56
-
57
-
58
-
59
-
60
-
61
-
62
-
63
-
64
-
65
-
66
-
67
-
68
-
69
-
70
-
71
-
72
-
73
-
74
-
75
-
76
-
77
-
78
-
79
-
80
-
81
-
82
-
83
-
84
-
85
-
86
-
87
-
88
-
89
-
90
-
91
-
92
-
93
-
94
-
95
-
96
-
97
-
98
-
99
-
100
-
101
-
102
-
103
-
104
-
105
-
106
-
107
 |
 |