HP dx2100 Quick Setup & Getting Started Guide - Page 12
File System Format, Review and Install Updates
 |
View all HP dx2100 manuals
Add to My Manuals
Save this manual to your list of manuals |
Page 12 highlights
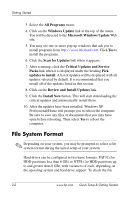
Getting Started 3. Select the All Programs menu. 4. Click on the Windows Update link at the top of the menu. You will be directed to the Microsoft Windows Update Web site. 5. You may see one or more pop-up windows that ask you to install programs from http://www.microsoft.com. Click Yes to install the programs. 6. Click the Scan for Updates link when it appears. 7. After scanning, click the Critical Updates and Service Packs link when it is displayed under the heading Pick updates to install. A list of updates will be displayed with all updates selected by default. It is recommended that you install all of the updates listed in this section. 8. Click on the Review and Install Updates link. 9. Click the Install Now button. This will start downloading the critical updates and automatically install them. 10. After the updates have been installed, Windows XP Professional/Home will prompt you to reboot the computer. Be sure to save any files or documents that you may have open before rebooting. Then select Yes to reboot the computer. File System Format ✎ Depending on your system, you may be prompted to select a file system format during the initial setup of your system. Hard drives can be configured in two basic formats: FAT32 (for HDD partitions less than 8 GB) or NTFS (for HDD partitions up to and greater than 8 GB), with variances of each, depending on the operating system and hard drive support. To check the file 2-2 www.hp.com Quick Setup & Getting Started
-
 1
1 -
2
-
3
-
4
-
5
-
6
-
 7
7 -
 8
8 -
 9
9 -
 10
10 -
 11
11 -
 12
12 -
 13
13 -
 14
14 -
 15
15 -
 16
16 -
 17
17 -
18
-
19
-
20
 |
 |