HP dx2390 Hardware Reference Guide - dx2390 Microtower Model - Page 18
Removing Bezel Blanks
 |
View all HP dx2390 manuals
Add to My Manuals
Save this manual to your list of manuals |
Page 18 highlights
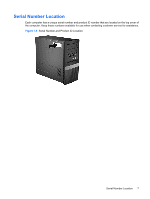
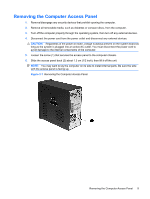
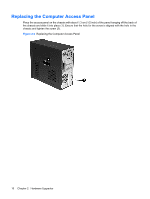
Removing Bezel Blanks On some models, there are bezel blanks covering the 3.5-inch and 5.25-inch external drive bays that need to be removed before installing a drive. 1. Remove the front bezel. 2. To remove the lower 5.25-inch bezel blank, gently twist and pull on the bezel blank until it breaks free from the front bezel (1), then discard the bezel blank. If the blank needs to be replaced at a later date, you can order a replacement blank from HP. 3. To remove the 3.5-inch bezel blank, press the two retaining tabs towards the outer left edge of the bezel (2) and pull the bezel blank inwards to free it from the front bezel (3). Figure 2-4 Removing a Bezel Blank 4. Replace the front bezel. 12 Chapter 2 Hardware Upgrades
-
 1
1 -
2
-
3
-
4
-
5
-
6
-
7
-
8
-
9
-
10
-
11
-
12
-
 13
13 -
 14
14 -
 15
15 -
 16
16 -
 17
17 -
 18
18 -
 19
19 -
 20
20 -
 21
21 -
 22
22 -
 23
23 -
24
-
25
-
26
-
27
-
28
-
29
-
30
-
31
-
32
-
33
-
34
-
35
-
36
-
37
-
38
-
39
-
40
-
41
-
42
-
43
-
44
-
45
-
46
-
47
-
48
-
49
-
50
-
51
-
52
-
53
-
54
-
55
-
56
-
57
 |
 |
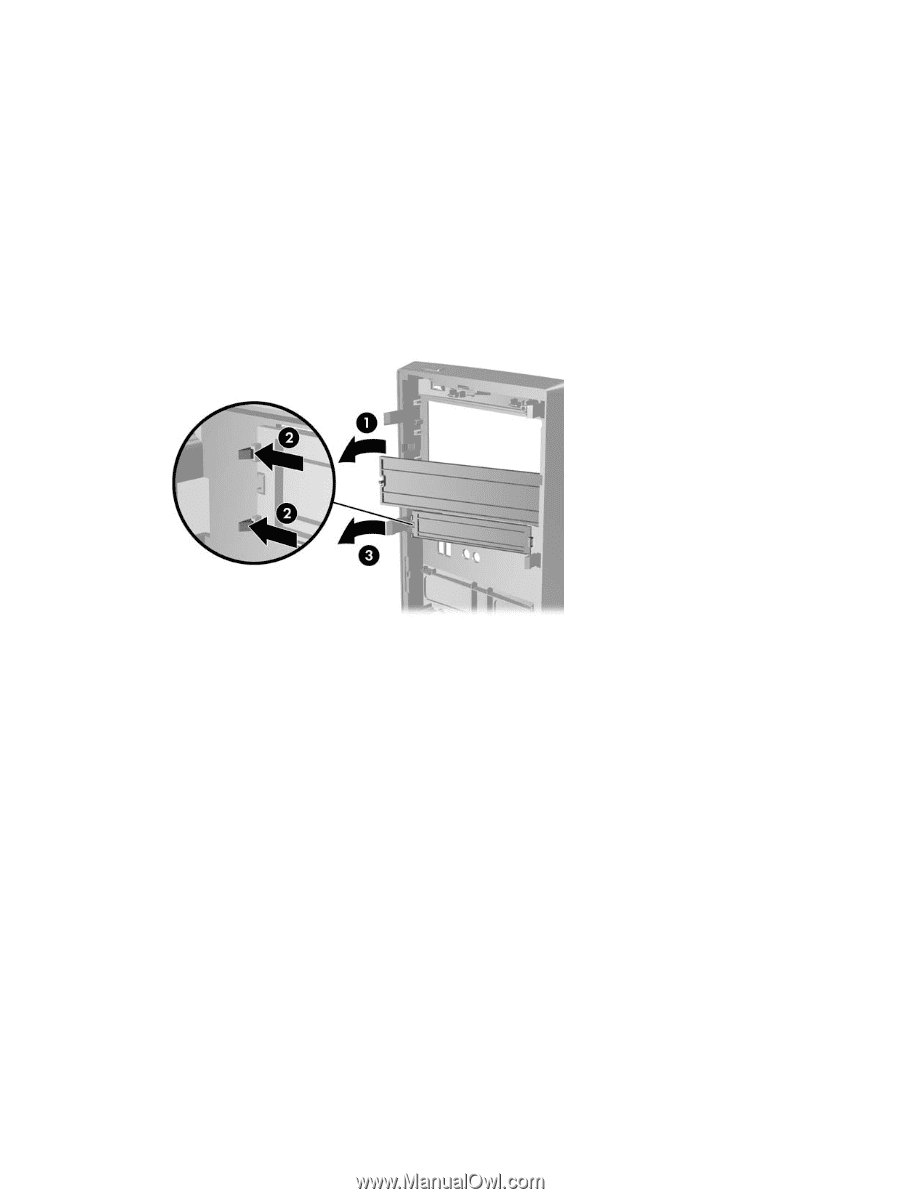
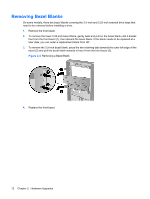
Removing Bezel Blanks
On some models, there are bezel blanks covering the 3.5-inch and 5.25-inch external drive bays that
need to be removed before installing a drive.
1.
Remove the front bezel.
2.
To remove the lower 5.25-inch bezel blank, gently twist and pull on the bezel blank until it breaks
free from the front bezel (1), then discard the bezel blank. If the blank needs to be replaced at a
later date, you can order a replacement blank from HP.
3.
To remove the 3.5-inch bezel blank, press the two retaining tabs towards the outer left edge of the
bezel (2) and pull the bezel blank inwards to free it from the front bezel (3).
Figure 2-4
Removing a Bezel Blank
4.
Replace the front bezel.
12
Chapter 2
Hardware Upgrades