Huawei HG536a User Manual - Page 26
Changing the Wireless Network Name and the Access Password, 5.4 Changing the Login IP Address
 |
View all Huawei HG536a manuals
Add to My Manuals
Save this manual to your list of manuals |
Page 26 highlights
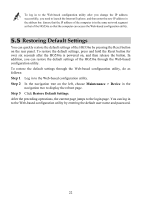
Step 1 Step 2 Step 3 Step 4 Step 5 Log in to the Web-based configuration utility. In the navigation tree on the left, choose Basic > WLAN. Choose the WLAN page. Select or not select the Enable WLAN option. Click Submit. You can refer to the state of the WLAN indicator to check whether the wireless network function is enabled. If the WLAN indicator is on, the wireless network function is enabled. 5.3 Changing the Wireless Network Name and the Access Password To change the name and access password for the wireless network, do as follows (taking the authentication type WPA-PSK as an example): Step 1 Log in to the Web-based configuration utility. Step 2 In the navigation tree on the left, choose Basic > WLAN. Step 3 Choose the WLAN page. Step 4 Enter a new wireless network name in the SSID text box. Step 5 Select WPA-PSK from the Security drop-down combo box. Step 6 Enter a new access password in the WPA pre-shared key text box. Step 7 Select TKIP from the WPA encryption drop-down combo box. Step 8 Click Submit. 5.4 Changing the Login IP Address To make the login IP address easy to remember, you can change the IP address after logging in to the Web-based configuration utility. To change the IP address, do as follows: Step 1 Log in to the Web-based configuration utility. Step 2 In the navigation tree on the left, choose Basic > LAN. Step 3 In the DHCP section, enter a new IP address as desired in the IP address text box. Then, enter a subnet mask in Subnet mask. Step 4 Click Submit. 21
-
 1
1 -
2
-
3
-
4
-
5
-
6
-
7
-
8
-
9
-
10
-
11
-
12
-
13
-
14
-
15
-
16
-
17
-
18
-
19
-
20
-
 21
21 -
 22
22 -
 23
23 -
 24
24 -
 25
25 -
 26
26 -
 27
27 -
 28
28 -
 29
29 -
 30
30 -
 31
31 -
32
-
33
-
34
-
35
-
36
-
37
-
38
-
39
-
40
-
41
-
42
-
43
-
44
-
45
 |
 |
