IBM 17231RX Installation Guide - Page 20
Installing, console, cabinet - temperature
 |
UPC - 000435862730
View all IBM 17231RX manuals
Add to My Manuals
Save this manual to your list of manuals |
Page 20 highlights
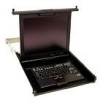
Installing the console unit in the rack cabinet Statement 26: CAUTION: Do not place any object on top of rack-mounted devices. Review the documentation that comes with your rack cabinet for safety and cabling information. When you install your system in a rack cabinet, observe the following guidelines: v Make sure that the room air temperature is below 35°C (95°F). v Do not block any air vents; usually 15 cm (6 in.) of air space provides proper airflow. v Plan the device installation starting from the bottom of the rack cabinet. v Install the heaviest device in the bottom of the rack cabinet. v Do not extend more than one device out of the rack cabinet at the same time. v Connect all power cords to properly wired and grounded electrical outlets. v Do not overload the power outlet when you install multiple devices in the rack. Use cage nuts for rack cabinets with square holes. Use clip nuts for rack cabinets with round holes. If your rack cabinet requires cage nuts, use a cage-nut-insertion tool or a flat-blade screwdriver to install them. Cage nuts Clip Cage nuts nuts To install the console unit in the rack cabinet, complete the following steps: 1. Place the console unit on a stable, flat surface. Attention: The video cable is connected to the flat-panel display. As you install the console unit in the rack cabinet, be careful that you do not pinch or cut the video cable. 10 1U 17-inch Flat Panel Console Kit: Installation and Maintenance Guide
-
 1
1 -
2
-
3
-
4
-
5
-
6
-
7
-
8
-
9
-
10
-
11
-
12
-
13
-
14
-
 15
15 -
 16
16 -
 17
17 -
 18
18 -
 19
19 -
 20
20 -
 21
21 -
 22
22 -
 23
23 -
 24
24 -
 25
25 -
26
-
27
-
28
-
29
-
30
-
31
-
32
-
33
-
34
-
35
-
36
-
37
-
38
-
39
-
40
-
41
-
42
-
43
-
44
-
45
-
46
-
47
-
48
-
49
-
50
-
51
-
52
-
53
-
54
-
55
-
56
-
57
-
58
-
59
-
60
-
61
-
62
-
63
-
64
-
65
-
66
-
67
-
68
-
69
-
70
-
71
-
72
-
73
-
74
-
75
-
76
-
77
-
78
-
79
-
80
-
81
-
82
-
83
-
84
-
85
-
86
-
87
-
88
-
89
-
90
-
91
-
92
 |
 |
