IBM 17231RX Installation Guide - Page 55
hand-tighten
 |
UPC - 000435862730
View all IBM 17231RX manuals
Add to My Manuals
Save this manual to your list of manuals |
Page 55 highlights
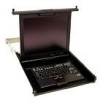
12. Fasten the keyboard-and-mouse cable to the console unit with the nut and clamp: a. Push the keyboard-and-mouse cable into the clamp that you removed in step 1 on page 41. Important: Make sure that you place the clamp on the keyboard-and-mouse cable approximately 70 - 76 mm (2.75 3 in.) from where the cable exits the keyboard. This prevents the cable from hanging below the bottom of the console unit. Note: In the following illustration, the console unit is turned over and is placed on a table or other flat surface. b. Place the clamp on the screw on the console unit frame and hand-tighten the nut on top of the clamp. 13. Turn over the console unit: a. Grasp the cable-management arm and the loose cables in one hand. b. On the opposite end of the console unit, grasp the flat-panel display and the console unit frame together with the other hand. c. Carefully turn over the console unit. 14. Route the keyboard-and-mouse cable through the cable-management arm in the extended position to avoid strain on the cables. Secure the cable with the hook-and-loop fasteners. Chapter 4. Hardware maintenance information 45
-
 1
1 -
2
-
3
-
4
-
5
-
6
-
7
-
8
-
9
-
10
-
11
-
12
-
13
-
14
-
15
-
16
-
17
-
18
-
19
-
20
-
21
-
22
-
23
-
24
-
25
-
26
-
27
-
28
-
29
-
30
-
31
-
32
-
33
-
34
-
35
-
36
-
37
-
38
-
39
-
40
-
41
-
42
-
43
-
44
-
45
-
46
-
47
-
48
-
49
-
 50
50 -
 51
51 -
 52
52 -
 53
53 -
 54
54 -
 55
55 -
 56
56 -
 57
57 -
 58
58 -
 59
59 -
 60
60 -
61
-
62
-
63
-
64
-
65
-
66
-
67
-
68
-
69
-
70
-
71
-
72
-
73
-
74
-
75
-
76
-
77
-
78
-
79
-
80
-
81
-
82
-
83
-
84
-
85
-
86
-
87
-
88
-
89
-
90
-
91
-
92
 |
 |
