Insignia NS-R5101AHD-A User Manual (English) - Page 24
Using advanced setup
 |
UPC - 600603128851
View all Insignia NS-R5101AHD-A manuals
Add to My Manuals
Save this manual to your list of manuals |
Page 24 highlights
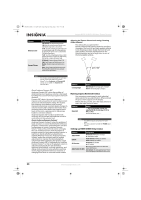
NS-R5101AHD-A_10-0487_MAN_.book Page 20 Friday, May 7, 2010 7:51 AM Insignia NS-R5101AHD-A AV Home Theater Receiver Listening Mode All Ch Stereo (All Ch St) Full Mono (Full Mono) T-D (TheaterDimensional) (T-D) Description Input Source Speaker Layout Ideal for background music, this mode fills the entire listening area with stereo sound from the front, surround, and surround back speakers. MONO STEREO 5.1ch 7.1ch 3.1, 5.1 In this mode, all speakers output the same sound in mono, so the sound you hear is the same regardless of where you MONO are within the listening room. STEREO 5.1ch 7.1ch 3.1, 5.1 With this mode you can enjoy a virtual surround sound even with only two or three speakers. This works by controlling MONO how sounds reach the listener's left and right ears. Good results may not be possible if there is too much reverb, so we STEREO recommend that you use this mode in an environment with little or no natural reverb. 5.1ch 7.1ch 2.1, 3.1, 5.1 Speaker layout The following shows the speakers that are activated in each type of configuration. 2.1Zch 3.1Xch 5C.1ch ab c d Using advanced setup Using on-screen setup menus On-screen setup menus appear on the connected TV and provide a convenient way to change the receiver's various settings. Settings are organized into nine categories on the main menu. You can change the settings by using the on-screen display. To use the on-screen setup menus: 1 Press RECEIVER, then press SETUP. The Setup menu opens. Setup Menu 1. HDMI Input 2. Component 3. Digital Audio 4. Sp Config 5. Sp Distance 6. Level Cal 7. Audio Adjust 8. Name Edit 9. HDMI Setup Tip If the main menu doesn't appear, make sure the appropriate external input is selected on your TV. 2 Press or to select a menu, then press ENTER. 3 Press or to select an option, then press or to change the setting. 4 Press SETUP to close the menu. a - Front speakers b - Center speaker c - Subwoofer d - Surround speakers 5 Press RETURN to return to the main menu. Tip You can also performed these changes on the receiver by pressing SETUP, the arrow buttons, then ENTER. Setting up HDMI input (HDMI Input menu) If you connect a video component to HDMI inputs, you must assign that input to an input selector. For example, if you connect your Blu-ray Disc/DVD player to HDMI IN 2, you must assign HDMI2 to the BD/DVD input selector. Here are the default assignments: Input selector BD/DVD VCR/DVR CBL/SAT GAME AUX TV/CD PORT Default assignment HDMI1 -----HDMI2 HDMI3 HDMI1, HDMI2, HDMI3-Select the HDMI input to which the video component has been connected. - - - - --Select if you're not using the HDMI OUT. 20 www.insigniaproducts.com
-
 1
1 -
2
-
3
-
4
-
5
-
6
-
7
-
8
-
9
-
10
-
11
-
12
-
13
-
14
-
15
-
16
-
17
-
18
-
 19
19 -
 20
20 -
 21
21 -
 22
22 -
 23
23 -
 24
24 -
 25
25 -
 26
26 -
 27
27 -
 28
28 -
 29
29 -
30
-
31
-
32
-
33
-
34
-
35
-
36
-
37
-
38
-
39
-
40
-
41
-
42
-
43
-
44
 |
 |
