Intel SE7520BD2 User Guide - Page 31
Installing the Processor - processors
 |
View all Intel SE7520BD2 manuals
Add to My Manuals
Save this manual to your list of manuals |
Page 31 highlights
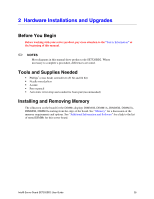
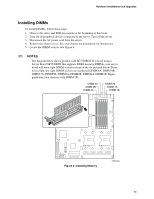
Hardware Installations and Upgrades Installing the Processor To install a processor, follow these instructions: 1. Observe the safety and ESD precautions at the beginning of this book. 2. Turn off all peripheral devices connected to the server. Turn off the server. 3. Disconnect the AC power cord from the server. 4. Remove the chassis cover and locate the processor sockets. 5. Locate the processor socket and raise the socket handle completely. TP00725 Figure 7. Opening Socket Lever 6. Align the pins of the processor with the socket, and insert the processor into the socket. ✏ NOTE Make sure the alignment triangle mark and the alignment triangle cutout align correctly. TP00864 Figure 8. Inserting Processor 31
-
 1
1 -
2
-
3
-
4
-
5
-
6
-
7
-
8
-
9
-
10
-
11
-
12
-
13
-
14
-
15
-
16
-
17
-
18
-
19
-
20
-
21
-
22
-
23
-
24
-
25
-
 26
26 -
 27
27 -
 28
28 -
 29
29 -
 30
30 -
 31
31 -
 32
32 -
 33
33 -
 34
34 -
 35
35 -
 36
36 -
37
-
38
-
39
-
40
-
41
-
42
-
43
-
44
-
45
-
46
-
47
-
48
-
49
-
50
-
51
-
52
-
53
-
54
-
55
-
56
-
57
-
58
-
59
-
60
-
61
-
62
-
63
-
64
 |
 |
Hardware Installations and Upgrades
31
Installing the Processor
To install a processor, follow these instructions:
1.
Observe the safety and ESD precautions at the beginning of this book.
2.
Turn off all peripheral devices connected to the server. Turn off the server.
3.
Disconnect the AC power cord from the server.
4.
Remove the chassis cover and locate the processor sockets.
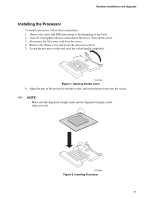
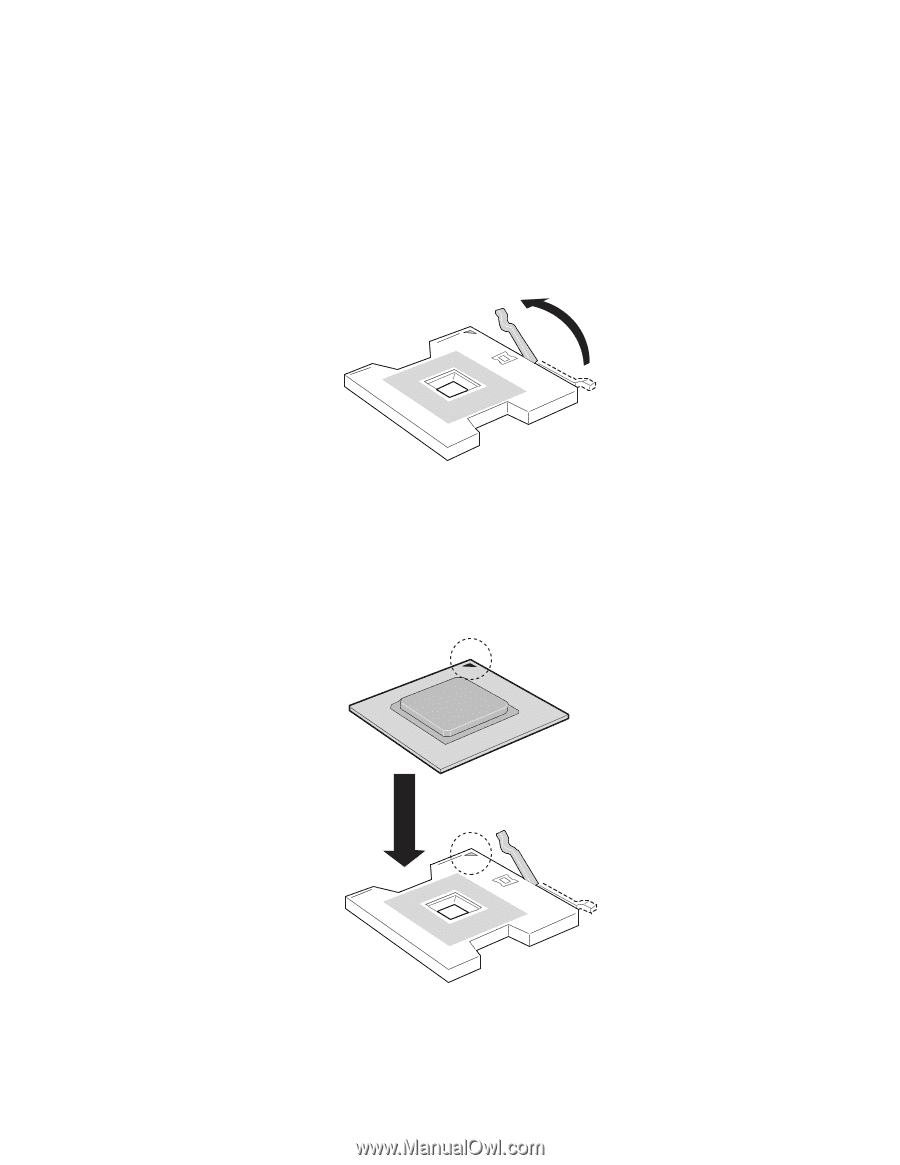
5.
Locate the processor socket and raise the socket handle completely.
TP00725
Figure 7. Opening Socket Lever
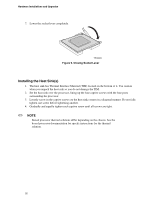
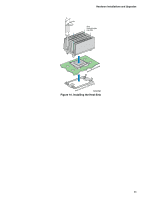
6.
Align the pins of the processor with the socket, and insert the processor into the socket.
✏
NOTE
Make sure the alignment triangle mark and the alignment triangle cutout
align correctly.
TP00864
Figure 8. Inserting Processor