Intel SE7520BD2 User Guide - Page 43
Manually Recovering the BIOS
 |
View all Intel SE7520BD2 manuals
Add to My Manuals
Save this manual to your list of manuals |
Page 43 highlights
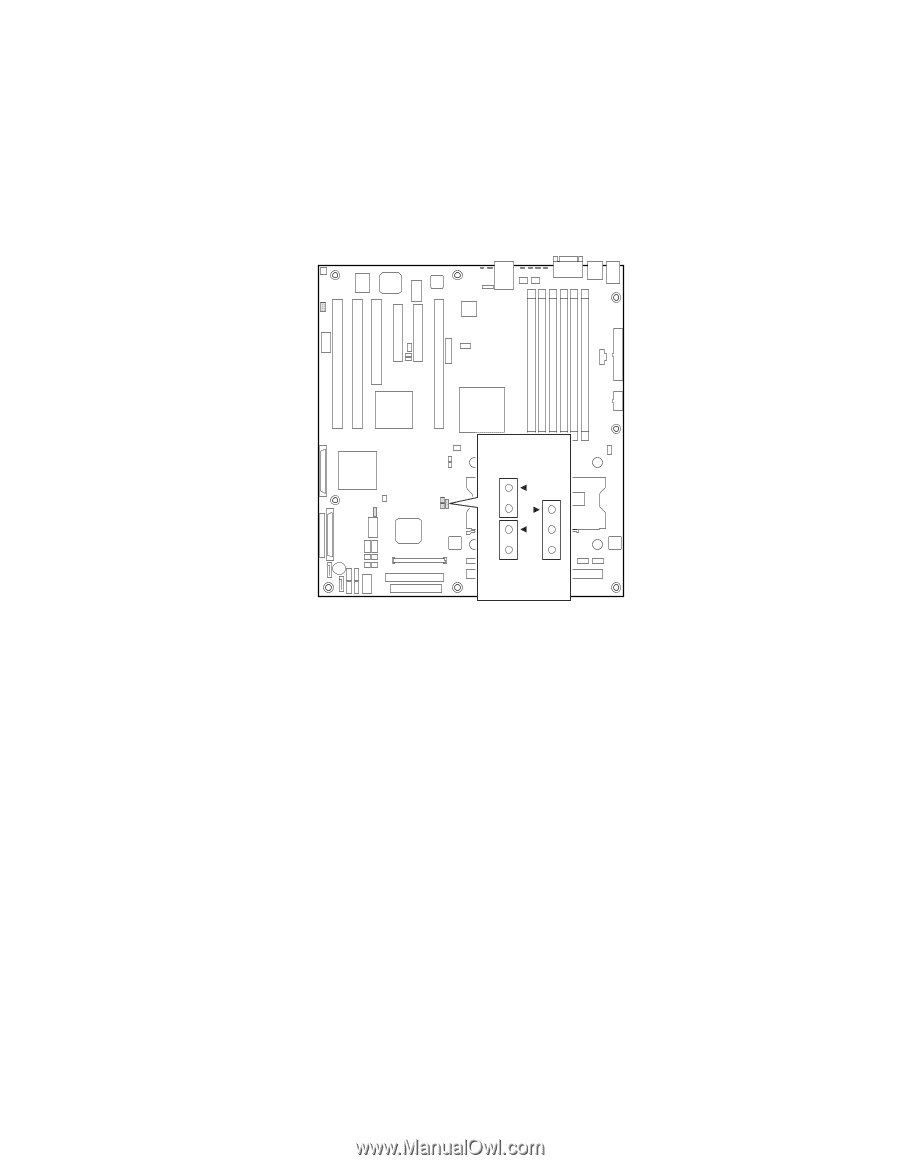
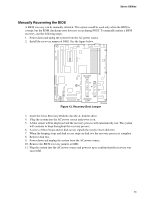
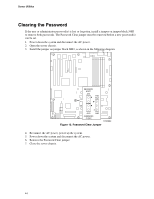
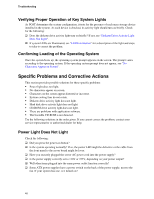
Server Utilities Manually Recovering the BIOS A BIOS recovery can be manually initiated. This option would be used only when the BIOS is corrupt, but the ROM checksum error does not occur during POST. To manually initiate a BIOS recovery, use the following steps: 1. Power down and uplug the system from the AC power source. 2. Install the recovery jumper at J4H1. See the figure below. RECOVERY BOOT J4H1 FRB HALT 3 J4H3 J4H2 PASSWORD CLEAR TP00902 Figure 12. Recovery Boot Jumper 3. Insert the Crisis Recovery Diskette into the A: diskette drive. 4. .Plug the system into the AC power source and power it on. 5. A blue screen will be displayed and the recovery process will automatically run. The system will continue to beep throughout the recovery process. 6. A series of three beeps and no disk access signals the need to insert disk two. 7. When the beeping stops and disk access stops on disk two the recovery process is complete. 8. Remove disk two. 9. Power down and unplug the system from the AC power source. 10. Remove the BIOS recovery jumper at J4H1. 11. Plug the system into the AC power source and power it up to confirm that the recovery was successful. 43
-
 1
1 -
2
-
3
-
4
-
5
-
6
-
7
-
8
-
9
-
10
-
11
-
12
-
13
-
14
-
15
-
16
-
17
-
18
-
19
-
20
-
21
-
22
-
23
-
24
-
25
-
26
-
27
-
28
-
29
-
30
-
31
-
32
-
33
-
34
-
35
-
36
-
37
-
 38
38 -
 39
39 -
 40
40 -
 41
41 -
 42
42 -
 43
43 -
 44
44 -
 45
45 -
 46
46 -
 47
47 -
 48
48 -
49
-
50
-
51
-
52
-
53
-
54
-
55
-
56
-
57
-
58
-
59
-
60
-
61
-
62
-
63
-
64
 |
 |