Intel SE7520BD2 User Guide - Page 34
Installing or Removing a PCI Card
 |
View all Intel SE7520BD2 manuals
Add to My Manuals
Save this manual to your list of manuals |
Page 34 highlights
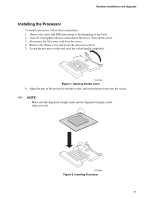
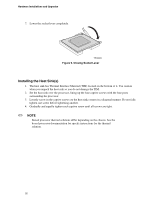
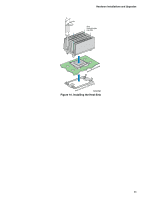
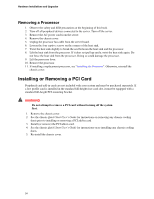
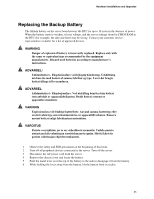
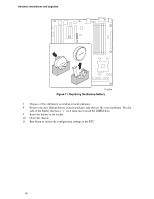
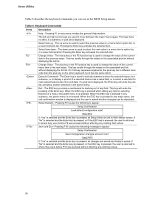
Hardware Installations and Upgrades Removing a Processor 1. Observe the safety and ESD precautions at the beginning of this book. 2. Turn off all peripheral devices connected to the server. Turn off the server. 3. Remove the AC power cord from the server. 4. Remove the chassis cover. 5. Unplug the processor fan cable from the server board. 6. Loosen the four captive screws on the corners of the heat sink. 7. Twist the heat sink slightly to break the seal between the heat sink and the processor. 8. Lift the heat sink from the processor. If it does not pull up easily, twist the heat sink again. Do not force the heat sink from the processor. Doing so could damage the processor. 9. Lift the processor lever. 10. Remove the processor. 11. If installing a replacement processor, see "Installing the Processor". Otherwise, reinstall the chassis cover. Installing or Removing a PCI Card Peripherals and add-in cards are not included with your system and must be purchased separately. If a low profile card is installed in the standard full-height riser card slot, it must be equipped with a standard full-height PCI mounting bracket. WARNING Do not attempt to remove a PCI card without turning off the system first. 1. Remove the chassis cover. 2. See the chassis Quick Start User's Guide for instructions on removing any chassis cooling ducts prior to installing or removing a PCI add-in card. 3. Install (or remove) the PCI add-in card. 4. See the chassis Quick Start User's Guide for instructions on re-installing any chassis cooling ducts. 5. Re-install the chassis cover. 34
-
 1
1 -
2
-
3
-
4
-
5
-
6
-
7
-
8
-
9
-
10
-
11
-
12
-
13
-
14
-
15
-
16
-
17
-
18
-
19
-
20
-
21
-
22
-
23
-
24
-
25
-
26
-
27
-
28
-
 29
29 -
 30
30 -
 31
31 -
 32
32 -
 33
33 -
 34
34 -
 35
35 -
 36
36 -
 37
37 -
 38
38 -
 39
39 -
40
-
41
-
42
-
43
-
44
-
45
-
46
-
47
-
48
-
49
-
50
-
51
-
52
-
53
-
54
-
55
-
56
-
57
-
58
-
59
-
60
-
61
-
62
-
63
-
64
 |
 |