Intel SR1680MV Service Guide - Page 121

Installing the Rackmount Rail Kits
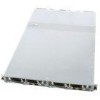
Page 121 highlights

7 Installing the Rackmount Rail Kits This section contains the detail instructions of installing rail kit to racks for this server. Reverse the instillation steps to remove the rail. The front overview and back overview of rail is shown below: Figure 64. Overview of Rail Kit Tighten Screw 1 Align Pin Tighten Screw 2 Spring Secure Screw Spring Here are some recommended screwdrivers for your reference to secure or loosen the corresponding screws. Table 44. Recommended screwdrivers Screw Tape Tighten Screw 1 Align Pin Screw Driver Tape TROX 25 Slotted Point Screwdriver Screw Tape Tighten Screw 2 Spring Secure Screw Screw Driver Tape Cross Point Screwdriver Slotted Point Screwdriver There are seven spring screw holes in rail to secure each spring. Spring secured in different spring screw holes can fit to different depths for racks. The locations and the adapt depth for racks are shown below: Intel® Server System SR1680MV Service Guide 101

  • 1
  • 2
  • 3
  • 4
  • 5
  • 6
  • 7
  • 8
  • 9
  • 10
  • 11
  • 12
  • 13
  • 14
  • 15
  • 16
  • 17
  • 18
  • 19
  • 20
  • 21
  • 22
  • 23
  • 24
  • 25
  • 26
  • 27
  • 28
  • 29
  • 30
  • 31
  • 32
  • 33
  • 34
  • 35
  • 36
  • 37
  • 38
  • 39
  • 40
  • 41
  • 42
  • 43
  • 44
  • 45
  • 46
  • 47
  • 48
  • 49
  • 50
  • 51
  • 52
  • 53
  • 54
  • 55
  • 56
  • 57
  • 58
  • 59
  • 60
  • 61
  • 62
  • 63
  • 64
  • 65
  • 66
  • 67
  • 68
  • 69
  • 70
  • 71
  • 72
  • 73
  • 74
  • 75
  • 76
  • 77
  • 78
  • 79
  • 80
  • 81
  • 82
  • 83
  • 84
  • 85
  • 86
  • 87
  • 88
  • 89
  • 90
  • 91
  • 92
  • 93
  • 94
  • 95
  • 96
  • 97
  • 98
  • 99
  • 100
  • 101
  • 102
  • 103
  • 104
  • 105
  • 106
  • 107
  • 108
  • 109
  • 110
  • 111
  • 112
  • 113
  • 114
  • 115
  • 116
  • 117
  • 118
  • 119
  • 120
  • 121
  • 122
  • 123
  • 124
  • 125
  • 126
  • 127
  • 128
  • 129
  • 130
  • 131
  • 132
  • 133
  • 134
  • 135
  • 136
  • 137
  • 138
  • 139
  • 140
  • 141
  • 142
  • 143
  • 144
  • 145
  • 146
  • 147
  • 148
  • 149
  • 150
  • 151
  • 152
  • 153
  • 154
  • 155
  • 156
  • 157
  • 158
  • 159
  • 160
  • 161
  • 162
  • 163
  • 164
  • 165
  • 166
  • 167
  • 168
  • 169
  • 170
  • 171
  • 172
  • 173
  • 174
  • 175
  • 176
  • 177
  • 178
  • 179
  • 180
  • 181
  • 182
  • 183
  • 184
  • 185
  • 186
  • 187
  • 188
  • 189
  • 190
  • 191
  • 192
  • 193
  • 194
  • 195
  • 196

Intel
®
Server System SR1680MV Service Guide
101
7
Installing the Rackmount Rail Kits
This section contains the detail instructions of installing rail kit to racks for this server.
Reverse the instillation steps to remove the rail.
The front overview and back overview of rail is shown below:
Figure 64. Overview of Rail Kit
Here are some recommended screwdrivers for your reference to secure or loosen the
corresponding screws.
Table 44.
Recommended screwdrivers
There are seven spring screw holes in rail to secure each spring. Spring secured in
different spring screw holes can fit to different depths for racks. The locations and the
adapt depth for racks are shown below:
Tighten Screw 1
Spring Secure Screw
Align Pin
Spring
Tighten Screw 2
Screw Tape
Screw Driver
Tape
Screw Tape
Screw Driver
Tape
Tighten Screw 1
TROX 25
Tighten Screw 2
Cross Point
Screwdriver
Align Pin
Slotted Point
Screwdriver
Spring Secure Screw
Slotted Point
Screwdriver