Intel SR1680MV Service Guide - Page 50
Pluggable SATA Drive, 2.5-inch Pluggable SATA HDD
 |
UPC - 735858210447
View all Intel SR1680MV manuals
Add to My Manuals
Save this manual to your list of manuals |
Page 50 highlights
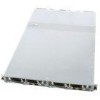
Pluggable SATA Drive 2.5-inch Pluggable SATA HDD The sever supports up to four 2.5-inch pluggable SATA HDDs, two on each server board module. Four HDDs share the same removal and installation procedure. For your reference, this section provides the steps of removing and installing one 2.5-inch pluggable SATA HDD as an example. Figure 33 shows the location of the 2.5-inch pluggable SATA HDD on the server chassis: Figure 33. 2.5-inch Pluggable SATA HDD Location Note: Before you remove or install the pluggable HDD, complete the following steps: 1. Make sure the server is not turned on or connected to the AC power. To power off the server, see "Power Off". 2. Disconnect all necessary cable connections. 3. Remove the HDD blank if the HDD blank is installed. Removing a 2.5-inch Pluggable SATA HDD 1. Turn the lock counter-clockwise. 2. Slide the locking latch along the direction of the arrow. 3. The HDD carrier locking lever springs open by itself. 30 Intel® Server System SR1680MV Service Guide
-
 1
1 -
2
-
3
-
4
-
5
-
6
-
7
-
8
-
9
-
10
-
11
-
12
-
13
-
14
-
15
-
16
-
17
-
18
-
19
-
20
-
21
-
22
-
23
-
24
-
25
-
26
-
27
-
28
-
29
-
30
-
31
-
32
-
33
-
34
-
35
-
36
-
37
-
38
-
39
-
40
-
41
-
42
-
43
-
44
-
 45
45 -
 46
46 -
 47
47 -
 48
48 -
 49
49 -
 50
50 -
 51
51 -
 52
52 -
 53
53 -
 54
54 -
 55
55 -
56
-
57
-
58
-
59
-
60
-
61
-
62
-
63
-
64
-
65
-
66
-
67
-
68
-
69
-
70
-
71
-
72
-
73
-
74
-
75
-
76
-
77
-
78
-
79
-
80
-
81
-
82
-
83
-
84
-
85
-
86
-
87
-
88
-
89
-
90
-
91
-
92
-
93
-
94
-
95
-
96
-
97
-
98
-
99
-
100
-
101
-
102
-
103
-
104
-
105
-
106
-
107
-
108
-
109
-
110
-
111
-
112
-
113
-
114
-
115
-
116
-
117
-
118
-
119
-
120
-
121
-
122
-
123
-
124
-
125
-
126
-
127
-
128
-
129
-
130
-
131
-
132
-
133
-
134
-
135
-
136
-
137
-
138
-
139
-
140
-
141
-
142
-
143
-
144
-
145
-
146
-
147
-
148
-
149
-
150
-
151
-
152
-
153
-
154
-
155
-
156
-
157
-
158
-
159
-
160
-
161
-
162
-
163
-
164
-
165
-
166
-
167
-
168
-
169
-
170
-
171
-
172
-
173
-
174
-
175
-
176
-
177
-
178
-
179
-
180
-
181
-
182
-
183
-
184
-
185
-
186
-
187
-
188
-
189
-
190
-
191
-
192
-
193
-
194
-
195
-
196
 |
 |
