Intermec PB51 Fingerprint Developer's Guide (old) - Page 133
Controlling the LEDs and Beeper, Using an LED ON|OFF|BLINK Statement, Using a BEEP or SOUND Statement
 |
View all Intermec PB51 manuals
Add to My Manuals
Save this manual to your list of manuals |
Page 133 highlights
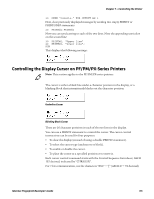
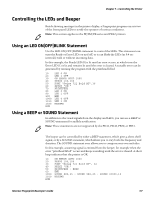
Chapter 7 - Controlling the Printer Controlling the LEDs and Beeper Beside showing messages in the printer display, a Fingerprint program can use two of the front panel LEDs to notify the operator of various conditions. Note: This section applies to the PF/PM/PX-series and PD42 printers. Using an LED ON|OFF|BLINK Statement Use the LED ON|OFF|BLINK statement to control the LEDs. This statement can turn the Ready or Error LEDs on and off, or it can blink the LEDs (at 0.4 sec intervals) with or without incoming data. In this example, the Ready LED (0) is lit until an error occurs, at which time the Error LED (1) is lit and remains lit until the error is cleared. A suitable error can be generated by running the program with the printhead lifted. 10 20 30 40 50 60 70 80 90 100 1000 1010 1020 RUN LED 0 ON LED 1 OFF ON ERROR GOTO 1000 PRPOS 100,100 FONT "Swiss 721 Bold BT",36 PRTXT "OK!" PRINTFEED LED 0 ON LED 1 OFF END LED 0 OFF LED 1 ON RESUME Using a BEEP or SOUND Statement In addition to the visual signals from the display and LEDs, you can use a BEEP or SOUND statement for audible notification. Note: These statements are not supported by the PD41, PD42, PB50, or PB51. The beeper can be controlled by either a BEEP statement, which gives a short shrill signal, or by a SOUND statement, which allows you to vary both the frequency and duration. The SOUND statement even allows you to compose your own melodies. In this example, a warning signal is emitted from the beeper, for example when the error "printhead lifted" occurs and keeps sounding until the error is cleared. A short beep indicates that the printer is OK. 10 20 30 40 50 60 1000 1010 RUN ON ERROR GOTO 1000 PRPOS 100,100 FONT "Swiss 721 Bold BT", 36 PRTXT "OK!" PRINTFEED : BEEP END SOUND 880,25 : SOUND 988,25 : SOUND 30000,10 RESUME Intermec Fingerprint Developer's Guide 117
-
 1
1 -
2
-
3
-
4
-
5
-
6
-
7
-
8
-
9
-
10
-
11
-
12
-
13
-
14
-
15
-
16
-
17
-
18
-
19
-
20
-
21
-
22
-
23
-
24
-
25
-
26
-
27
-
28
-
29
-
30
-
31
-
32
-
33
-
34
-
35
-
36
-
37
-
38
-
39
-
40
-
41
-
42
-
43
-
44
-
45
-
46
-
47
-
48
-
49
-
50
-
51
-
52
-
53
-
54
-
55
-
56
-
57
-
58
-
59
-
60
-
61
-
62
-
63
-
64
-
65
-
66
-
67
-
68
-
69
-
70
-
71
-
72
-
73
-
74
-
75
-
76
-
77
-
78
-
79
-
80
-
81
-
82
-
83
-
84
-
85
-
86
-
87
-
88
-
89
-
90
-
91
-
92
-
93
-
94
-
95
-
96
-
97
-
98
-
99
-
100
-
101
-
102
-
103
-
104
-
105
-
106
-
107
-
108
-
109
-
110
-
111
-
112
-
113
-
114
-
115
-
116
-
117
-
118
-
119
-
120
-
121
-
122
-
123
-
124
-
125
-
126
-
127
-
 128
128 -
 129
129 -
 130
130 -
 131
131 -
 132
132 -
 133
133 -
 134
134 -
 135
135 -
 136
136 -
 137
137 -
 138
138 -
139
-
140
-
141
-
142
-
143
-
144
-
145
-
146
-
147
-
148
-
149
-
150
-
151
-
152
-
153
-
154
-
155
-
156
-
157
-
158
-
159
-
160
-
161
-
162
-
163
-
164
-
165
-
166
-
167
-
168
-
169
-
170
-
171
-
172
-
173
-
174
-
175
-
176
-
177
-
178
-
179
-
180
-
181
-
182
-
183
-
184
-
185
-
186
-
187
 |
 |
