JVC KD-AVX77 Instructions - Page 5
Basic operations, · Using the monitor panel/touch panel - usb
 |
UPC - 046838035494
View all JVC KD-AVX77 manuals
Add to My Manuals
Save this manual to your list of manuals |
Page 5 highlights
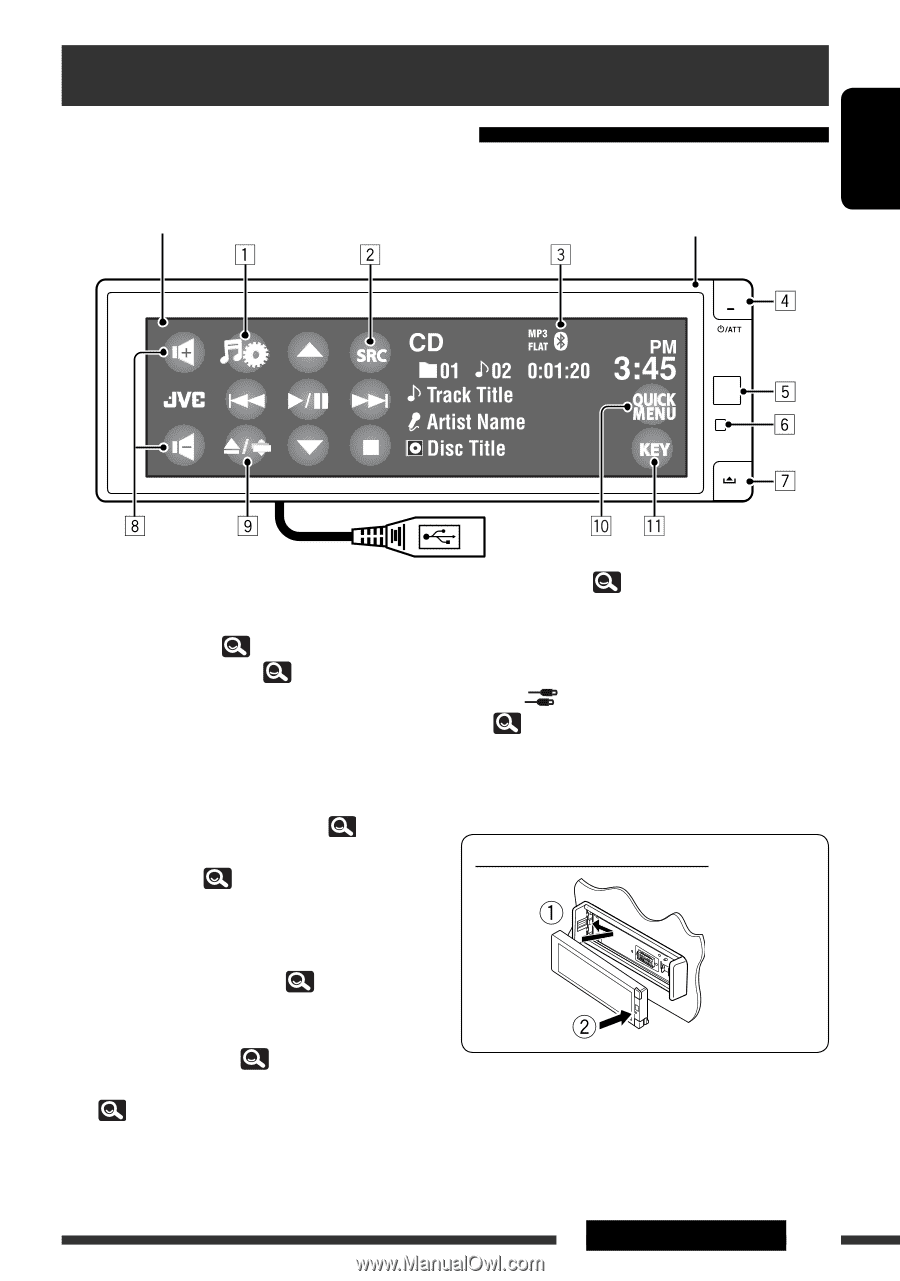
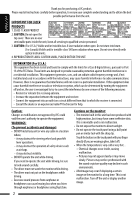
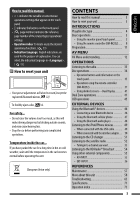
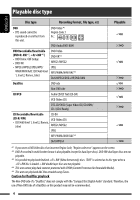
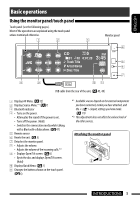
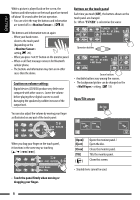
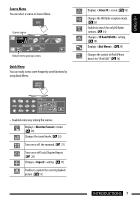
ENGLISH Basic operations Using the monitor panel/touch panel Touch panel (see the following pages). Most of the operations are explained using the touch panel unless mentioned otherwise. Monitor panel USB cable from the rear of the unit, ( 45, 49) 1 Displays AV Menu. ( 12) 2 Displays Source Menu.*1 ( 7) 3 Bluetooth indicator 4 • Turns on the power. • Attenuates the sound (if the power is on). • Turns off the power. (Hold) • Switches the conversation media while talking with a Bluetooth cellular phone. ( 47) 5 Remote sensor 6 Resets the unit. ( 3) 7 Detaches the monitor panel. 8 • Adjusts the volume. • Adjusts the volume of the incoming calls.*2 9 • Displays Open/Tilt screen. ( 6) • Ejects the disc and displays Open/Tilt screen. (Hold) p Displays Quick Menu. ( 7) q Changes the buttons shown on the touch panel. ( 6) *1 Available sources depend on the external components you have connected, media you have attached, and the < > (input) settings you have made. ( 19) *2 This adjustment does not affect the volume level of the other sources. Attaching the monitor panel INTRODUCTIONS 5
-
 1
1 -
 2
2 -
 3
3 -
 4
4 -
 5
5 -
 6
6 -
 7
7 -
 8
8 -
 9
9 -
 10
10 -
 11
11 -
12
-
13
-
14
-
15
-
16
-
17
-
18
-
19
-
20
-
21
-
22
-
23
-
24
-
25
-
26
-
27
-
28
-
29
-
30
-
31
-
32
-
33
-
34
-
35
-
36
-
37
-
38
-
39
-
40
-
41
-
42
-
43
-
44
-
45
-
46
-
47
-
48
-
49
-
50
-
51
-
52
-
53
-
54
-
55
-
56
-
57
-
58
-
59
-
60
-
61
-
62
-
63
-
64
-
65
-
66
-
67
-
68
-
69
-
70
-
71
-
72
-
73
-
74
-
75
-
76
-
77
-
78
-
79
-
80
-
81
-
82
-
83
-
84
-
85
-
86
-
87
-
88
-
89
-
90
-
91
-
92
-
93
-
94
-
95
-
96
-
97
-
98
-
99
-
100
-
101
-
102
-
103
-
104
-
105
-
106
-
107
-
108
-
109
-
110
-
111
-
112
-
113
-
114
-
115
-
116
-
117
-
118
-
119
-
120
-
121
-
122
-
123
-
124
-
125
-
126
-
127
-
128
-
129
-
130
-
131
-
132
-
133
-
134
-
135
-
136
-
137
-
138
-
139
-
140
-
141
-
142
-
143
-
144
-
145
-
146
-
147
-
148
-
149
-
150
-
151
-
152
-
153
-
154
-
155
-
156
-
157
-
158
-
159
-
160
-
161
-
162
-
163
-
164
-
165
-
166
-
167
-
168
-
169
-
170
-
171
-
172
-
173
-
174
-
175
-
176
-
177
-
178
-
179
-
180
-
181
-
182
-
183
-
184
-
185
-
186
-
187
-
188
-
189
-
190
-
191
-
192
-
193
-
194
-
195
-
196
-
197
-
198
-
199
-
200
-
201
-
202
-
203
-
204
-
205
-
206
-
207
-
208
-
209
-
210
-
211
-
212
-
213
-
214
-
215
-
216
-
217
-
218
 |
 |