Jensen VM9512 Operation Manual
Jensen VM9512 - Motorized Touch-Screen Multimedia Receiver Manual
 |
UPC - 043258303783
View all Jensen VM9512 manuals
Add to My Manuals
Save this manual to your list of manuals |
Jensen VM9512 manual content summary:
- Jensen VM9512 | Operation Manual - Page 1
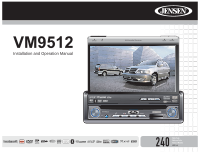
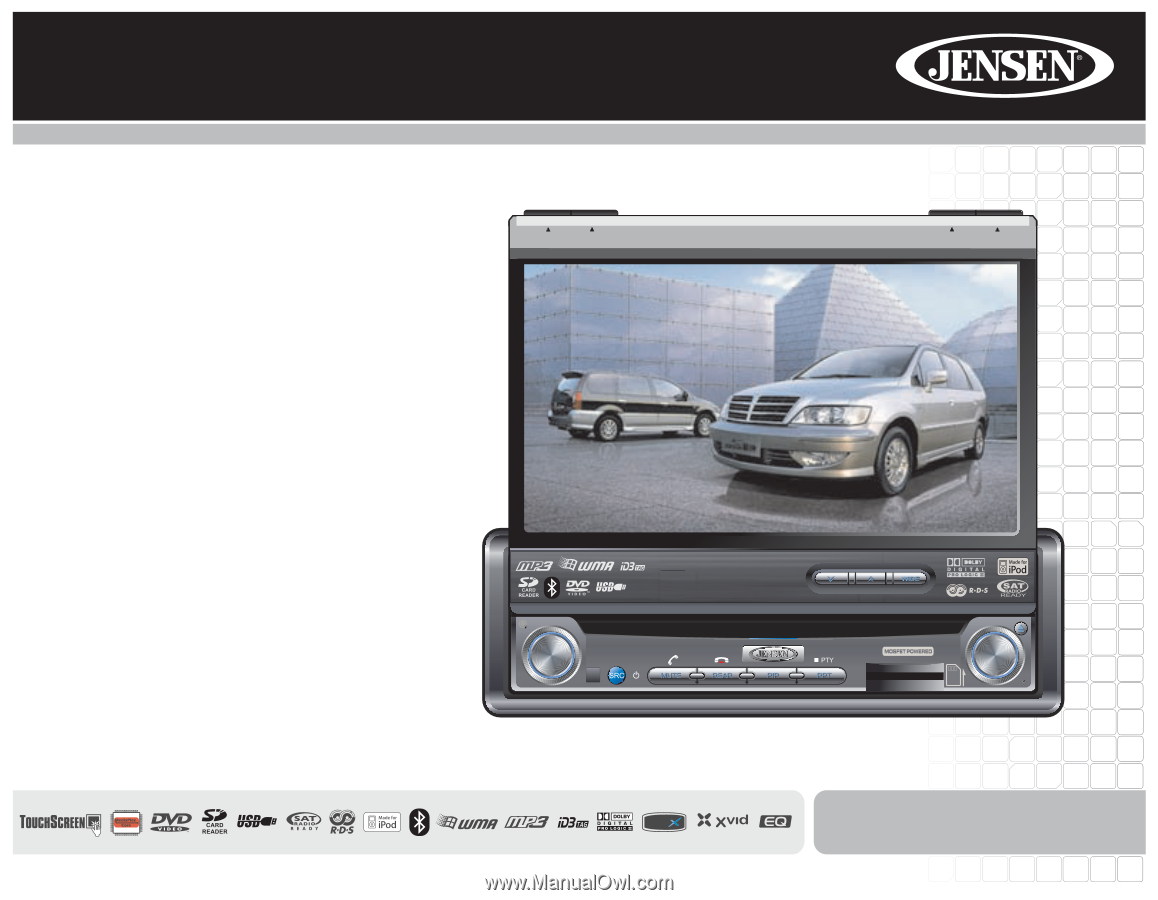
VM9512 Installation and Operation Manual BAND AS Multimedia Receiver DISP CLOSE Press Audio VM9512 ANGLE / TILT PICTURE Enter DIV ® video 240 Watts Peak Watts en Crête Vatios el Máximo 60W x 4 - Jensen VM9512 | Operation Manual - Page 2
- Jensen VM9512 | Operation Manual - Page 3
and Indicators ...7 Remote Control ...9 Using the TFT Monitor ...12 Operating Instructions ...14 Multi-ZONE Operation...15 Setup Menu...16 Tuner Operation ...18 Satellite Radio Operation ...20 DVD/VCD Video Operation 22 DVD/CD Audio Operation 25 MP3/WMA/iPod Operation 26 Troubleshooting ...29 - Jensen VM9512 | Operation Manual - Page 4
ii - Jensen VM9512 | Operation Manual - Page 5
Congratulations on your purchase of the Jensen VM9512 Mobile Multimedia Receiver. It's a good idea to read all of the instructions before beginning the installation. We recommend having your Jensen VM9512 installed by a reputable installation shop. Features DVD • Aspect Ratio - Cinema, Normal and - Jensen VM9512 | Operation Manual - Page 6
instructions will be included with the NAV101 navigation module. Once the NAV101 is connected and operating properly, the NAV source mode will become active. While the NAV101 is not installed, the NAV option appears gray, indicating the function is not available. • Rear Camera The VM9512 is "camera - Jensen VM9512 | Operation Manual - Page 7
VM9512 WIRING DIAGRAM * See the MediaLink and Satellite Connections diagram for more information about connecting a satellite receiver and an iPod (through the MediaLink). External Power Amplifier BLUE RED WHITE RED WHITE GRAY SUB.W FRONT R FRONT L REAR R REAR L CENTER MediaLink Bus SAT Radio - Jensen VM9512 | Operation Manual - Page 8
To Head Unit MEDIALINK AND SATELLITE CONNECTIONS SAT Radio SAT L SAT R *SAT Cable Kit: JXMC or XMDJEN100 (sold separately) **XM or Sirius satellite tuner (sold separately) * ** VM9512 MediaLink 3.5mm - Audio VIDEO LEFT RIGHT iPod Video iPod iPod Mini iPod Nano jLink iPod Cable (Included) - Jensen VM9512 | Operation Manual - Page 9
d. Install support strap to make the unit more stable. INSTALL HALF SLEEVE CAUTION! Be careful not to damage the car wiring. 3. Place the radio in front of the dashboard opening so the wiring can be brought through the mounting sleeve. Wiring Complete wiring as illustrated in the wiring diagram on - Jensen VM9512 | Operation Manual - Page 10
steps: 1. Press the SETUP button (31) on the remote control or touch the button on the screen to enter the "SETUP" menu. 2. Touch RATING to view the "RATING" sub-menu. The small "lock" icon will be "unlocked". 3. Enter a new 6-digit password and press ENTER. The "lock" icon will lock and - Jensen VM9512 | Operation Manual - Page 11
8. MUTE Press to reset system settings to factory default (except the password and parental lock setting). Press to silence the receiver. Press again to resume previous volume level. BT Mode: Answer Bluetooth call. NOTE: The VM9512 features Softmute, which will allow the volume to increase or - Jensen VM9512 | Operation Manual - Page 12
disc insertion/ejection. Press and hold to reset core mechanism position. 17. TFT Display 18. REAR Select rear zone source. Allows front passengers to listen to the radio while rear passengers listen to a CD, MP3, WMA or watch DVDs. BT Mode: Disconnect Bluetooth call. 19. RPT Press to control - Jensen VM9512 | Operation Manual - Page 13
VM9512 REMOTE CONTROL The VM9512 Remote controls both the front and rear zones. 30 To switch from front to 9 12 24 23 28 25 20 21 10 27 29 26 6 7 33 34 NOTE: Your remote control may differ slightly from the one pictured here. The above diagram is for illustrative purposes only. 9 - Jensen VM9512 | Operation Manual - Page 14
VM9512 Table 1: Remote Control Functions Button Function Name MENU TITLE MUTE POWER/ AUDIO RPT A-B RPT SRC SUBTITLE DISP/ CLEAR PRESET PRESET ANGLE Joystick /\ VOL VOL + Joystick < Joystick (press) Joystick > GOTO Joystick \/ Ref# DVD VCD TUNER CD/MP3 SATELLITE iPod 1 Enters the main - Jensen VM9512 | Operation Manual - Page 15
VM9512 Table 1: Remote Control Functions Button Function Name Ref# DVD VCD TUNER CD/MP3 SATELLITE iPod ||>/BAND 23 PIC 24 OPEN/ 25 CLOSE TILT 26 TILT 27 WIDE 28 1, 2, 3, 4, 5, 29 6, 7, 8, 9, 0 (Numeric Keypad) PIP 30 SETUP 31 F/R 32 RDM 33 SCN 34 EJECT 35 Slow - Jensen VM9512 | Operation Manual - Page 16
button on the control panel or remote control to adjust the tilt angle in a continuous motion. Monitor Left/Right Angle Adjustment To manually adjust the left/right angle of the TFT screen, follow these steps: 1. Make sure the TFT screen in "Out". Press the OPEN button (1), if necessary. Extender - Jensen VM9512 | Operation Manual - Page 17
/ PICTURE button on the monitor Parking Brake Parking Brake Inhibit When the pink "Parking" wire is connected to the vehicle brake switch, the front TFT monitor will display video only when the parking brake sequence is engaged. Before starting the parking brake sequence, the radio must be on with - Jensen VM9512 | Operation Manual - Page 18
status appears in the LCD (7). You can also turn on the unit by pressing the OPEN button (1) and opening the TFT screen. Press and hold the button to power off the unit.The monitor is drawn back into the main compartment. AUX1, AUX2 and CAMERA. The playing mode is displayed on the TFT and LCD - Jensen VM9512 | Operation Manual - Page 19
, current Front Zone, or NAV screen. Use the left/right arrows below reset button (12) located on the front bottom-right corner of the unit. After a system reset, the unit restores all factory default settings. NOTE: If the unit is reset while a DVD is playing, the DVD resumes play once the reset - Jensen VM9512 | Operation Manual - Page 20
which you would like to specify the source. Controlling the Rear Zone Screen(s) If you have a rear touch screen installed, you can touch the screen to control most rear zone functions. You can also use the remote control. The VM9512 remote controls both the front and rear zones. To switch from front - Jensen VM9512 | Operation Manual - Page 21
remote control or touch the button on the screen to enter the "SETUP" menu. The "GENERAL" sub-menu appears highlighted in blue. RADIO SETUP 02:40 AM General RDS Rating DivX Hardware P.VOL TS Cal Language Audio Speaker Bluetooth Features If a DVD supports more than AUDIO button (volume control). - Jensen VM9512 | Operation Manual - Page 22
to open the keypad and enter the pairing code or pass key required for Bluetooth connection to your mobile phone. Not all phones/devices require a pairing code. The default code is "0000" for many models. RDS Sub-menu Features Setting RDS CT Options Function On Unit will display Radio Data - Jensen VM9512 | Operation Manual - Page 23
fully extended. TFT screen moves back slightly after opening. TFT screen brightness remains constant unless manually adjusted. TFT screen will automatically dim when less light is available. If the monitor is in display mode, the monitor automatically switches to CAMERA mode upon reverse driving - Jensen VM9512 | Operation Manual - Page 24
the AM/FM or RADIO source. Select FM/AM Band Touch the BAND button (15) on the screen, or press the BAND button on the unit (4) or remote control (20) to change between the following bands: FM1, FM2, FM3, AM1, and AM2. NOTE: The BAND button on the unit only works when the TFT - Jensen VM9512 | Operation Manual - Page 25
Station Seeking (LOC) When the Local function is on, only radio stations with a strong local radio signal are played. To activate the Local function in AM/FM tuner mode, touch the 1/2 button to access the second screen of menu options, and then touch the onscreen LOC button. Touch the LOC button - Jensen VM9512 | Operation Manual - Page 26
MEM: View screen used to enter current channel into preset memory 20. DIAG: This feature is reserved for use by service professionals for troubleshooting. Displaying the Identification (ID) Code Before you listen to satellite radio, you must subscribe to the service using your radio's identification - Jensen VM9512 | Operation Manual - Page 27
button to preview each of the 6 channels displayed for 10 seconds. • Press the CG button to return to the Preset Mode screen. • To select a channel while in Channel Guide mode, touch the channel name on the screen. The channel will begin playing and the unit will return to the Preset Mode. Category - Jensen VM9512 | Operation Manual - Page 28
OPERATION NOTE: When properly installed, DVD video cannot be displayed on the main TFT screen unless the parking brake is applied. If you attempt to play a DVD while the vehicle is moving, the TFT screen displays "PARKING" with a blue background. Rear video screens, if applicable, will operate - Jensen VM9512 | Operation Manual - Page 29
to move to the previous chapter. Direct Chapter / Track Selection Remote Control Direct Entry During DVD, VCD and CD playback, you can use the numeric keypad on the remote control (29) to access a track directly. Touch Screen Direct Entry To select a title, chapter/track, or specific playback - Jensen VM9512 | Operation Manual - Page 30
single layer (DVD-5) Single side double layer (DVD-9) Double side single layer (DVD-10) Double side double layer (DVD-18) Single the 16:9 video can be converted to Letter Box video. Indicates the region code where the disc can be played. • Region 1: USA, Canada, East Pacific : All regions 26 VM9512 - Jensen VM9512 | Operation Manual - Page 31
the following disc media: • CD-DA • CD-R/RW • DVD • DVD+R/RW • DVD-R/RW Upon inserting a disc with the TFT screen open, the disc and track title (if available), along with the track number and playing time appear on the screen. CD Player User Interface The on-screen indicators and touch key areas - Jensen VM9512 | Operation Manual - Page 32
directly, touch the display the direct entry menu. button on screen to TRACK: _ _ / ## 123 Exit 456 789 0 Clear Enter the desired track number using the on-screen number pad, and then press the Enter button. To exit the screen without making a selection, touch Exit. To clear your entry and - Jensen VM9512 | Operation Manual - Page 33
Insert the SD card into the SD slot (21) on the front of the radio. The unit will read the audio media files on the card automatically. BAND AS Press Audio VM9512 DISP OPEN Enter BAND AS Press Audio VM9512 DISP OPEN Enter To remove the card, first press the SRC button (6) to switch to - Jensen VM9512 | Operation Manual - Page 34
a DVD disc navigation. Select the "Disc at Once" option and close your disc. Stopping Playback Touch the button on screen or press the /BAND button (20) on the remote remote control to play the files on the disc in a random, shuffled order. Press RDM again to cancel Random Play mode. NOTE: CD-R and CD - Jensen VM9512 | Operation Manual - Page 35
, press the SRC button (6) on the front panel or remote control (8) until the iPod menu appears on the screen. NOTE: Be sure your iPod has the latest Apple firmware installed to avoid connectivity issues. The following touch screen icons and remote control buttons are used to access the iPod menus - Jensen VM9512 | Operation Manual - Page 36
phone" when an attempt is made to download a phone book. Bluetooth User Interface The on-screen indicators and touch key areas for Bluetooth operation are outlined below. 14 15 17 1 BT Disconnected E Q 1 2 R E A 3 R 4 P I P Missed Calls Received Calls Dialed Calls Phone Book Menu List - Jensen VM9512 | Operation Manual - Page 37
number in the Pairing Code field under the Bluetooth SETUP menu. The default pairing code for many phones is "0000". The default code for the VM9512 is "1234". See "Bluetooth Sub-menu Features" on page 18 for instructions on entering the pairing code. 3. Select "VM9512" from the pairing list on the - Jensen VM9512 | Operation Manual - Page 38
player using this unit vary greatly. Please refer to the instruction manual that came with your Bluetooth audio player as well as this manual while operating your player with the VM9512. Refer to the MUSIC INTERFACE instructions under "Bluetooth User Interface" on page 32 for information about on - Jensen VM9512 | Operation Manual - Page 39
ACC and positive battery wire TFT MONITOR Monitor does not open automatically TFT Auto Open is turned off No image Incorrect connection to parking brake wire PRK SW is activated and parking brake is not engaged Flashing image or interference appears on screen DVD is not compatible with - Jensen VM9512 | Operation Manual - Page 40
unit DVD is not compatible with region code of unit Illegal mechanism operation Clean disc with soft cloth Insert disc with label side up Insert disc Clean disc with soft cloth Insert disc with label side up Corrective Action Press EJECT key for 5 seconds to reset loading mechanism 36 VM9512 - Jensen VM9512 | Operation Manual - Page 41
VM9512 Care and Maintenance 1. Use only a clean silicone cloth and neutral detergent to clean the front panel or monitor. A rough cloth and . Such damage is not covered by the Warranty on this product. 6. The CD player may not operate properly in extreme hot or cold. If such conditions occur - Jensen VM9512 | Operation Manual - Page 42
DVD/CD Player Compatible Disc Media: DVD + R / RW (Single and Dual Layer) and CD-R / RW Compatible Media Formats: CD-DA, MP3, WMA, VCD, SVCD, AVI, MPEG1 / 2, XviD, DivX and Kodak picture CD Monitor Screen Size: 7.0" (Measured diagonally), 16:9 Widescreen • 6.06" (154.1mm) W X 3.42" (87mm) H Screen - Jensen VM9512 | Operation Manual - Page 43
in cosmetic, decorative or non-operative structural parts • Correction of antenna problems • Costs incurred for installation, removal or reinstallation of the product • Consequential damage to compact discs, USB devices, digital media cards, accessories or vehicle electrical systems • Damage caused - Jensen VM9512 | Operation Manual - Page 44
Audiovox Electronics Corporation Hauppauge, NY 11788 Technical Assistance: 1-800-323-4815 www.jensen.com © 2007 Audiovox Ver. 070607 Printed in China
-
 1
1 -
 2
2 -
 3
3 -
 4
4 -
 5
5 -
 6
6 -
 7
7 -
8
-
9
-
10
-
11
-
12
-
13
-
14
-
15
-
16
-
17
-
18
-
19
-
20
-
21
-
22
-
23
-
24
-
25
-
26
-
27
-
28
-
29
-
30
-
31
-
32
-
33
-
34
-
35
-
36
-
37
-
38
-
39
-
40
-
41
-
42
-
43
-
44
 |
 |
240
®
D
IV
Watts Peak
Watts en Crête
Vatios el Máximo
60W x 4
VM9512
Installation and Operation Manual
video
Enter
VM9512
Press Audio
ANGLE / TILT
PICTURE
Multimedia Receiver
AS
DISP
BAND
CLOSE