Jensen VM9512 Operation Manual - Page 21
Setup - no am radio
 |
UPC - 043258303783
View all Jensen VM9512 manuals
Add to My Manuals
Save this manual to your list of manuals |
Page 21 highlights
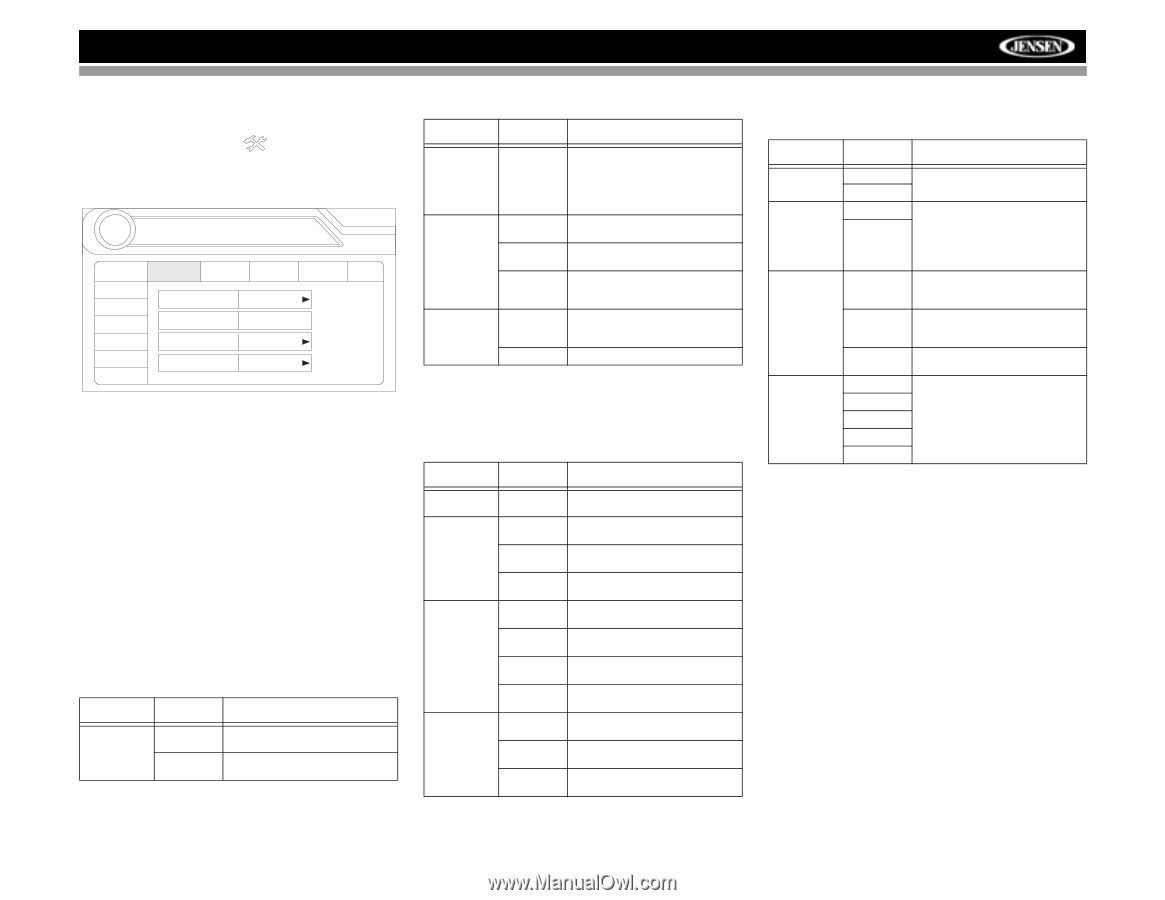
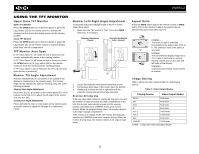
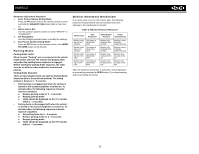
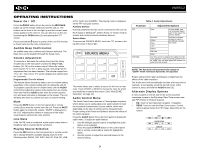
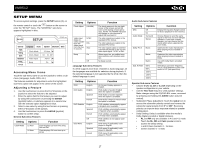
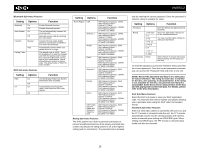
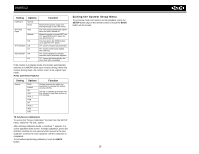
VM9512 SETUP MENU To access system settings, press the SETUP button (31) on the remote control or touch the button on the screen to enter the "SETUP" menu. The "GENERAL" sub-menu appears highlighted in blue. RADIO SETUP 02:40 AM General RDS Rating DivX Hardware P.VOL TS Cal Language Audio Speaker Bluetooth Back Clock Mode Clock Adjust Video Input Beep 12 Hour 04 : 31 AM AUTO On Accessing Menu Items Touch the sub-menu name or use the joystick to select a submenu (Language, Audio, RDS, etc.). The features available for adjustment under the highlighted sub-menu option will appear in the center of the screen. Adjusting a Feature 1. Use the touchscreen or press the /\ or V buttons on the joystick to select the feature to be adjusted. 2. Enter the option field for the feature you want to adjust by using the touchscreen or pressing the ENTER (joystick) button. A submenu appears in a second row with the selected option highlighted in blue. 3. Select a new value by using the touchscreen or pressing the /\ or V buttons on the joystick. 4. Use the touchscreen or press the ENTER (joystick) button to confirm setup. General Sub-menu Features Setting Clock Mode Options Function 12 Hour 24 Hour Clock displays 12 hour time using AM and PM. Clock displays 24 hour time up to 23:59. Setting Options Function Clock Adjust (HH:MM) Video Input (Input circuitry autodetects the video signal from the Aux In source). NTSC PAL Auto Beep On Off The clock appears in the top right corner of the screen and on the LCD screen during certain operations. NOTE: The AM/PM indication will change as you continue to adjust the hour past 12. The color signals are output in the standard NTSC format. The color signals are output in the standard PAL format. The color signal output is switched automatically based on the current video input signal - NTSC or PAL. When turned on, an audible beep tone confirms each function selection. No beep sounds. Language Sub-menu Features If a DVD supports more than 1 Subtitle or Audio language, all the languages are available for selection during playback. If the selected language is not supported by the DVD, then the default language is used. Setting Options Function OSD English DVD Audio English Spanish French DVD Subtitle English Spanish French Off Disc Menu English Spanish French On Screen Display appears in English. DVD Audio is heard in English when the option is available. DVD Audio is heard in Spanish when the option is available. DVD Audio is heard in French when the option is available. DVD subtitles automatically appear in English when available. DVD subtitles automatically appear in Spanish when available. DVD subtitles automatically appear in French when available. DVD subtitles do not appear automatically. DVD menu (if applicable) is displayed in English. DVD menu (if applicable) is displayed in Spanish. DVD menu (if applicable) is displayed in French. Audio Sub-menu Features Setting Options Function DRC Audio Mode Off On Surround Stereo Dolby Pro II Music Movie Matrix Sub. W Filter 50Hz 80Hz 100Hz 120Hz 150Hz Employ the Dynamic Range Control for better playback for low volumes. Choose Stereo to send the same signal to the front and rear left/right speakers. If you have a center speaker, you can choose the Surround option when supported by your media. Optimized for music reproduction when playing music encoded in Dolby. Optimized for video reproduction when playing movies encoded in Dolby. Use with Dolby Matrix encoded media. Selecting a crossover frequency sets a cut-off frequency of the subwoofer's LPF (low-pass filter). Speaker Sub-menu Features • Choose 4 CH, 4.1 CH or 5.1 CH depending on the speaker configuration in your vehicle. • Use the Test Tone feature to verify speaker settings. Make changes using the EQ/FAD-BAL menu, accessed by pressing and holding the AUDIO button (volume control). • Subwoofer Phase Adjustment: Touch the sub.w icon to access the subwoofer polarity controls and reverse the subwoofer signal polarity from 0° to 180°. Reversing polarity can improve bass response related to speaker configuration. • Delay Setting: Delay is available when the media is Dolby Digital encoded or digital bitstream. • RL and RR only are available in 4.0 and 4.1 mode • Touch the RL, RR and Cent speaker icons to access the delay setting • L and R Rear channels: 0 - 15 msec • Center channel: 0 - 5 msec 17
-
 1
1 -
2
-
3
-
4
-
5
-
6
-
7
-
8
-
9
-
10
-
11
-
12
-
13
-
14
-
15
-
 16
16 -
 17
17 -
 18
18 -
 19
19 -
 20
20 -
 21
21 -
 22
22 -
 23
23 -
 24
24 -
 25
25 -
 26
26 -
27
-
28
-
29
-
30
-
31
-
32
-
33
-
34
-
35
-
36
-
37
-
38
-
39
-
40
-
41
-
42
-
43
-
44
 |
 |