Kenwood C-V751 User Manual - Page 16
Check the operation of the component., Programming remote control functions
 |
View all Kenwood C-V751 manuals
Add to My Manuals
Save this manual to your list of manuals |
Page 16 highlights
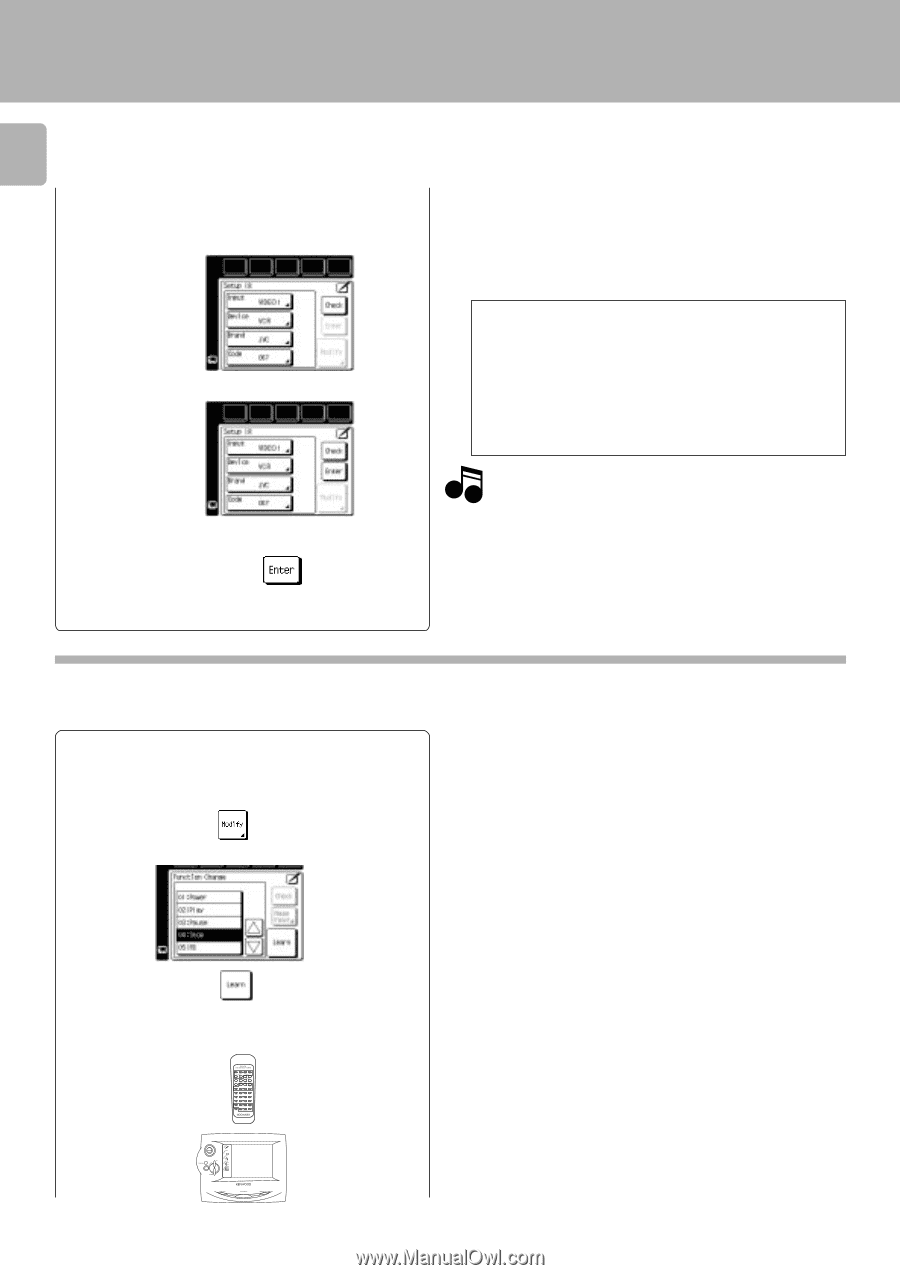
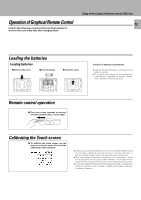
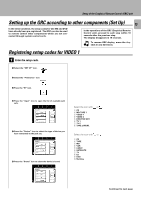
Setup of the Graphical Remote Control (GRC) unit 16 7 Press the "Code" icon. You can now choose from a list of all the codes available for the device. Select the first code on the list. 8 Press the "Check" icon. 9 Press the "Enter" icon. Set up other components in the same way as above. ÷ When a code which is not shown in the setup code chart is entered, the entered code disappears automatically. ÷ Even when the system control code is connected, some models may not automatically display the "System" screen. ÷ With CD-Carrousel, select "Sys-carrousel". ÷ When CD, MD and TAPE are connected through system control cords, select "System". Check the operation of the component. 1 Display the operation screen of the component to be checked. 2 Turn on the component from the GRC and confirm the actual component. ÷ If there is more than one setup code, select the "Check" icon. This instructs GRC to send a "Power" test signal to the receiver. If your device turns on, the code you entered was correct. If it does not turn on, try the next code in the list. Continue until one of the codes works. Note Although each setup code is designed to work with a number of different models, certain codes may not work with some models. (Also, certain codes may only operate some of the functions available on a given model.) With some models, be sure to keep the Check icon pressed for a while. ÷ If the device power cannot be turned ON/OFF, return to 7 and select the net code in the list. Repeat 7 and 8 until the device power can be turned ON and OFF properly. Programming remote control functions Remote control functions of some components may not be available even after the setup codes have been registered. In this case, required functions can be programmed as if the GRC unit "learns" them. To program STOP as a new control item 1 Perform steps 1 to 4 in 1. 2 Press the "Modify" icon. 3 Select the function to be programmed. 4 Aim the device's remote at GRC and press and hold the button on the device's remote that corresponds to the command you want GRC to learn. 10 cm ÷ This may take a few seconds; do not move GRC or the device's remote until GRC displays the the Function change menu again. ÷ Be sure to use the device's original remote. GRC will not learn commmands from other universal remotes. Continued to next page
-
 1
1 -
2
-
3
-
4
-
5
-
6
-
7
-
8
-
9
-
10
-
 11
11 -
 12
12 -
 13
13 -
 14
14 -
 15
15 -
 16
16 -
 17
17 -
 18
18 -
 19
19 -
 20
20 -
 21
21 -
22
-
23
-
24
-
25
-
26
-
27
-
28
-
29
-
30
-
31
-
32
-
33
-
34
-
35
-
36
-
37
-
38
-
39
-
40
-
41
-
42
-
43
-
44
-
45
-
46
-
47
-
48
-
49
-
50
-
51
-
52
-
53
-
54
-
55
-
56
-
57
-
58
-
59
-
60
-
61
-
62
-
63
-
64
 |
 |