Kenwood TS-590S User Manual - Page 55
Program Scan Partially Slowed
 |
View all Kenwood TS-590S manuals
Add to My Manuals
Save this manual to your list of manuals |
Page 55 highlights
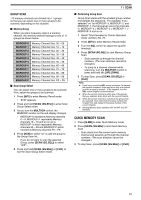
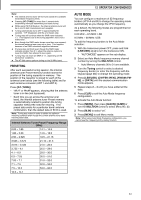
3 Turn the MULTI/CH control or press Mic [UP]/ [DWN] to select the memory channel (VGROUP-0 to VGROUP-9). As you select the Memory Channel, "on" or "oFF" appears on the main frequency display. "on" signifies that the memory channel is active for the Program Scan and "oFF" signifies that the memory channel group is inactive for the Program Scan. 4 To activate the Program Scan frequency range, select the desired VGROUP number by turning the MULTI/CH control. Then, press [M.IN] to select "on" for the VGROUP (channel). When a channel is activated for Program Scan, "on" appears on the display. 5 Press and hold [SCAN (SG.SEL)] or press [CLR] to return to the current VFO mode. 6 Press [SCAN (SG.SEL)] to start the Program Scan. • To quickly move toward a desired frequency while scanning, turn the Tuning control or the MULTI/CH control, or press Mic [UP]/ [DWN]. • Turning the RIT/ XIT control clockwise decreases the scan speed and counterclockwise increases the speed, except while in FM mode. The current scan speed is shown on the display; P1 is the fastest speed and P9 is the slowest. • While in FM mode, Scan automatically stops on a frequency where a signal is present. The transceiver will either remain on that channel for a short time (Time-Operated mode) or until the signal drops out (Carrier-Operated mode), depending on which mode you select via Menu No. 22 {page 48}. 7 To stop Scan, press [SCAN (SG.SEL)] or [CLR]. Note: ◆ If you have turned the SQL control clockwise, far beyond the squelch threshold while in FM mode, Scan may fail to stop at a channel where a signal is present. If this happens, turn the SQL control slightly counterclockwise. ◆ If you press [SCAN (SG.SEL)] before storing any frequency range for memory channels P0 to P9, the transceiver starts VFO scan. ◆ When the current receive frequency is within one of the ranges that you selected with channel numbers, Scan starts with the current frequency. The operating mode stored in the memory channel is used. ◆ The operating mode can be changed while scanning, but the memory channel will be overwritten with the changed mode. ◆ When the current Scan range is smaller than a single step of the MULTI/CH control, turning the control clockwise causes Scan to jump to the start frequency, and counterclockwise to the end frequency. ◆ Starting Program Scan switches OFF the RIT and XIT functions. ◆ While in FM mode, Program Scan monitors rounded off frequencies regardless of the Menu No. 12 setting. 11 SCAN PROGRAM SCAN PARTIALLY SLOWED You can specify a maximum of 5 frequency points for each memory channel from P0 to P9 so that Program Scan slows down the scanning speed. To specify the slow down frequency points, first program the start and end frequencies into a memory channel (P0 ~ P9). 1 Access Menu No. 19 to confirm that the function is ON (default is ON). 2 You can further configure the slow down frequency width. Access Menu No. 20 to select the range from 100 Hz to 500 Hz (default is 300 Hz). Note: If you select, for example, 500 Hz for Menu No. 20, the Program Scan slows down to a ±500 Hz width, centering the frequency you marked below. 3 Press [M/V], then turn the MULTI/CH control to recall the memory channel (P0 ~ P9) for which you want to specify the scan slow down frequencies. 4 Turn the Tuning control to the center frequency point that you want the Program Scan to slow down. Then, press [Q-M.IN] to mark the slow down frequency point. • " " appears. 5 Repeat step 4 to specify the center slow down frequency points. • You can specify a maximum of 5 frequency points for each channel. 6 If you want to clear a slow down frequency point that you previously stored, select the frequency that you stored, then press [Q-M.IN] at this frequency spot where " " appears. • A confirmation beep sounds and " " disappears. • To clear all slow down frequency points, press and hold [Q-M.IN]. 7 Press [M/V] to return to VFO mode. 8 Press [SCAN (SG.SEL)] to start the Program Scan with the slow down frequency point(s). Note: ◆ During Program Scan, you can turn the RIT/ XIT control to adjust the scanning speed. Turn the control clockwise/ counterclockwise to slow down/ speed up the scan. The Program Scan speed indicator appears on the main display during Program Scan; P1 is the fastest speed and P9 is the slowest. ◆ You cannot change the Program Scan speed in FM mode. ◆ Although you can specify the Program Scan slow down frequency point in FM mode, it does not function. ◆ When copying a Program Memory Channel, all frequency points are cleared. 47
-
 1
1 -
2
-
3
-
4
-
5
-
6
-
7
-
8
-
9
-
10
-
11
-
12
-
13
-
14
-
15
-
16
-
17
-
18
-
19
-
20
-
21
-
22
-
23
-
24
-
25
-
26
-
27
-
28
-
29
-
30
-
31
-
32
-
33
-
34
-
35
-
36
-
37
-
38
-
39
-
40
-
41
-
42
-
43
-
44
-
45
-
46
-
47
-
48
-
49
-
 50
50 -
 51
51 -
 52
52 -
 53
53 -
 54
54 -
 55
55 -
 56
56 -
 57
57 -
 58
58 -
 59
59 -
 60
60 -
61
-
62
-
63
-
64
-
65
-
66
-
67
-
68
-
69
-
70
-
71
-
72
-
73
-
74
-
75
-
76
-
77
-
78
-
79
-
80
-
81
-
82
-
83
-
84
-
85
-
86
-
87
-
88
-
89
-
90
-
91
-
92
 |
 |
