Kenwood TS-590S User Manual - Page 64
Tx Monitor, Tx Power, Tx Tune, Quick Data Transfer
 |
View all Kenwood TS-590S manuals
Add to My Manuals
Save this manual to your list of manuals |
Page 64 highlights
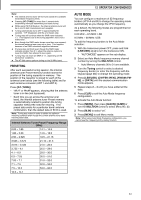
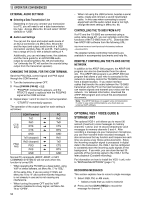
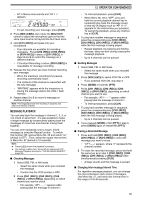
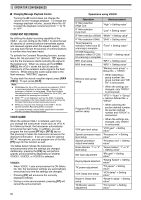
12 OPERATOR CONVENIENCES Note: ◆ When using a transverter, not all the functions of this transceiver are available. ◆ When turning the transverter ON, the frequency entry history is cleared, thus you cannot use the frequency entry history function. ◆ When using an antenna tuner in the IN state and the transverter is turned ON, the antenna tuner is forced to the THRU state. TRANSMISSION OUTPUT POWER If Menu No. 50 is set to "1" {above}, the transceiver automatically decreases the output power to 5 watts. However, if you do not wish to decrease the output power, access Menu No. 50 and select "2"; the transceiver will transmit at full power. Note: You are responsible for your transmission output power settings. TX MONITOR TX monitor allows you to monitor the on-going transmission sound. This is convenient when you want to check the modulation sound quality of the transmission. In FSK mode, you can monitor the FSK signal that the transceiver is transmitting. 1 Press and hold [PWR (TX MONI)]. • The current TX monitor setting appears on the sub-display. 2 Turn the MULTI/CH control to select the monitor sound level from "oFF", and "1" to "9". 3 Press [CLR] to store the selected TX monitor level. Note: ◆ We recommend you use headphones when you monitor SSB, AM, or FM mode, in order to avoid howling. ◆ The CW transmission signal cannot be monitored using the TX monitor function. Use the TX sidetone function to monitor CW transmissions (Menu Nos. 04 and 34). TX POWER You can adjust the transmission output power by pressing [PWR (TX MONI)] and turning the MULTI/ CH control. If more precise power adjustment is required, access Menu No. 48 and select "on". When this function is activated, the power adjustment steps change as shown in the table below. Mode SSB/ CW/ FM/ FSK AM Menu No. 48 OFF 5 ~ 100 W in steps of 5 5 ~ 25 W in steps of 5 Menu No. 48 ON 5 ~ 100 W in steps of 1 5 ~ 25 W in steps of 1 Note: The output power settings are stored independently for HF and 50 MHz. As shown in the table above, you can also store different output power settings for AM and other modes for HF bands and the 50 MHz band. TX TUNE The TX Tune function allows you to adjust the antenna length, or tune the linear amplifier while transmitting a continuous CW signal. To use the TX Tune function, first assign the function to a PF key (either the front panel or Microphone PF keys). 1 Press [MENU], then press [Q-M.IN]/ [Q-MR] or turn the MULTI/CH control to select a Menu No. from 79 to 86. 2 Press [M.IN]/ [SCAN (SG.SEL)] to select "204". 3 Press [MENU] to exit Menu mode. 4 Press the assigned [PF] key. • The transceiver automatically switches to CW mode, and transmits a continuous carrier. The transceiver selects the SWR meter function automatically. • While in TX Tune mode, most keys are disabled. • The default output power is configured as 10 watts. However, you can adjust the output power using [PWR (TX MONI)] and the MULTI/ CH control if necessary. The transceiver stores the new output power setting when you exit the TX Tune mode. 5 Press the assigned [PF] key again to exit the TX Tune mode. QUICK DATA TRANSFER This transceiver has the capability to quickly and conveniently transfer the reception frequency and mode to another compatible transceiver. Compatible transceivers include: TS-590S TS-480HX/ SAT TS-2000/X TS-570S/ 570D TS-870S Data transfer could be useful while contesting. A spotting station that is searching for new contest multipliers can quickly transfer a frequency over to the running (main) station. SETTING UP ■ Equipment Needed In addition to a compatible transceiver, to transfer to a TS-590S, TS-480HX/ SAT, TS-2000/X, TS-570S/D, or TS-870S, you must have 1 crosswired cable with a DB-9 female connector at both ends. ■ Connections For diagrams on how to connect the 2 transceivers, refer to "CONNECTING PERIPHERAL EQUIPMENT" {page 65}. 56
-
 1
1 -
2
-
3
-
4
-
5
-
6
-
7
-
8
-
9
-
10
-
11
-
12
-
13
-
14
-
15
-
16
-
17
-
18
-
19
-
20
-
21
-
22
-
23
-
24
-
25
-
26
-
27
-
28
-
29
-
30
-
31
-
32
-
33
-
34
-
35
-
36
-
37
-
38
-
39
-
40
-
41
-
42
-
43
-
44
-
45
-
46
-
47
-
48
-
49
-
50
-
51
-
52
-
53
-
54
-
55
-
56
-
57
-
58
-
 59
59 -
 60
60 -
 61
61 -
 62
62 -
 63
63 -
 64
64 -
 65
65 -
 66
66 -
 67
67 -
 68
68 -
 69
69 -
70
-
71
-
72
-
73
-
74
-
75
-
76
-
77
-
78
-
79
-
80
-
81
-
82
-
83
-
84
-
85
-
86
-
87
-
88
-
89
-
90
-
91
-
92
 |
 |
