Kenwood TS-590S User Manual - Page 67
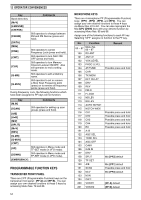
Operator Conveniences, Message Playback
 |
View all Kenwood TS-590S manuals
Add to My Manuals
Save this manual to your list of manuals |
Page 67 highlights
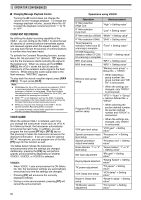
• BT in Morse code sounds and "AP 1 -" appears. • To quit recording your message, press [CLR]. 3 Press [MIC (CAR)], then rotate the MULTI/CH control to adjust the microphone gain so that the voice input level is not beyond the ALC level zone. 4 Hold [CH1 (REC)] and speak into your microphone. • Four channels are available for recording messages. Press [CH2 (REC)], [CH3 (REC)], or [RX/4 (REC)] in place of [CH1 (REC)], in steps 3 and 4 to record the message on a different channel. • If Constant Recording is active, [RX/4 (REC)] is unavailable for message recording. 5 Release the key when you have finished recording your message. • When the maximum recording time passes, recording automatically stops. • The contents of the channel is overwritten with the new message. • "WRITING" appears while the transceiver is storing the message data to the VGS-1 flash memory. 6 Repeat steps 2 to 5 to record a message on another channel. Note: Pressing [ ] cancels the recording in progress and clears the memory channel. MESSAGE PLAYBACK You can play back the message in channel 1, 2, 3, or 4 to check or send them. It is also possible to make a longer message by consecutively playing back the messages of more than one channel, linking them together. You can even repeatedly send a longer, linked message by using the Repeat function. To switch this function ON, access Menu No. 56 and select "on" (default is OFF). Then, select the repeat interval time in Menu No. 57 (default is 10 seconds). Note: ◆ Pressing [ ] cancels the playback in progress. ◆ The settings in Menu Nos. 56 and 57 are shared with CW Message Playback described in "CW MESSAGE MEMORY" {page 34}. ■ Checking Messages 1 Select SSB, FM, or AM mode. • Select the same mode when you recorded the message. • Confirm that the VOX function is OFF. 2 Press [CH1 (REC)], [CH2 (REC)], [CH3 (REC)], or [RX/4 (REC)], depending on which channel you want to check. • For example, "AP 1- - -" appears while playing back the message in channel 1. 12 OPERATOR CONVENIENCES • To interrupt playback, press [CLR]. • When Menu No. 56 is "oFF", pres and hold the current playback channel key to repeatedly play back the message saved to that key (A display such as "AP 1111" appears for the channel key you pressed.). To cancel the playback, press any channel key or [CLR]. 3 To play back another message in sequence, press the corresponding key ([CH1 (REC)], [CH2 (REC)], [CH3 (REC)], or [RX/4 (REC)]) while the first message is being played. • Repeat playback, by pressing and holding the keys, does not work during consecutive message playback. • Up to 4 channels can be queued. ■ Sending Messages 1 Select SSB, FM, or AM mode. • Select the same mode when you recorded the message. 2 Press [VOX (LEV)] to switch VOX ON or OFF. • If you switched VOX ON, skip step 3. 3 Press [SEND] or hold Mic [PTT]. 4 Press [CH1 (REC)], [CH2 (REC)], [CH3 (REC)], or [RX/4 (REC)], depending on which channel you want to use. • For example, "AP 1- - -" appears while playing back the message in channel 1. • To interrupt playback, press [CLR]. 5 To play back another message in sequence, press the corresponding key ([CH1 (REC)], [CH2 (REC)], [CH3 (REC)], or [RX/4 (REC)]) while the first message is being played. • Up to 4 channels can be queued. 6 If you pressed [SEND] or Mic [PTT] in step 3, press [SEND] again or release Mic [PTT]. ■ Erasing a Recorded Message 1 Press and hold [CH1 (REC)], [CH2 (REC)], [CH3 (REC)], or [RX/4 (REC)] to select the message you want to erase. • "AP n - -" appears, where "n" represents the channel number. 2 To erase the recorded message, press and hold the same key as in step 1 ([CH1 (REC)], [CH2 (REC)], [CH3 (REC)], or [RX/4 (REC)]) while simultaneously pressing [CLR]. • A beep sounds and the message is erased. ■ Changing Inter-message Interval Time For repetitive message playback, you can change the interval between each series of messages. Use Menu No. 57, and select the interval time in the range of 0 to 60 seconds. 59
-
 1
1 -
2
-
3
-
4
-
5
-
6
-
7
-
8
-
9
-
10
-
11
-
12
-
13
-
14
-
15
-
16
-
17
-
18
-
19
-
20
-
21
-
22
-
23
-
24
-
25
-
26
-
27
-
28
-
29
-
30
-
31
-
32
-
33
-
34
-
35
-
36
-
37
-
38
-
39
-
40
-
41
-
42
-
43
-
44
-
45
-
46
-
47
-
48
-
49
-
50
-
51
-
52
-
53
-
54
-
55
-
56
-
57
-
58
-
59
-
60
-
61
-
 62
62 -
 63
63 -
 64
64 -
 65
65 -
 66
66 -
 67
67 -
 68
68 -
 69
69 -
 70
70 -
 71
71 -
 72
72 -
73
-
74
-
75
-
76
-
77
-
78
-
79
-
80
-
81
-
82
-
83
-
84
-
85
-
86
-
87
-
88
-
89
-
90
-
91
-
92
 |
 |
