KitchenAid KDTF924PPS Owners Manual - Page 17
Custom Panel Installation (on some models), Custom Panel Installation steps
 |
View all KitchenAid KDTF924PPS manuals
Add to My Manuals
Save this manual to your list of manuals |
Page 17 highlights
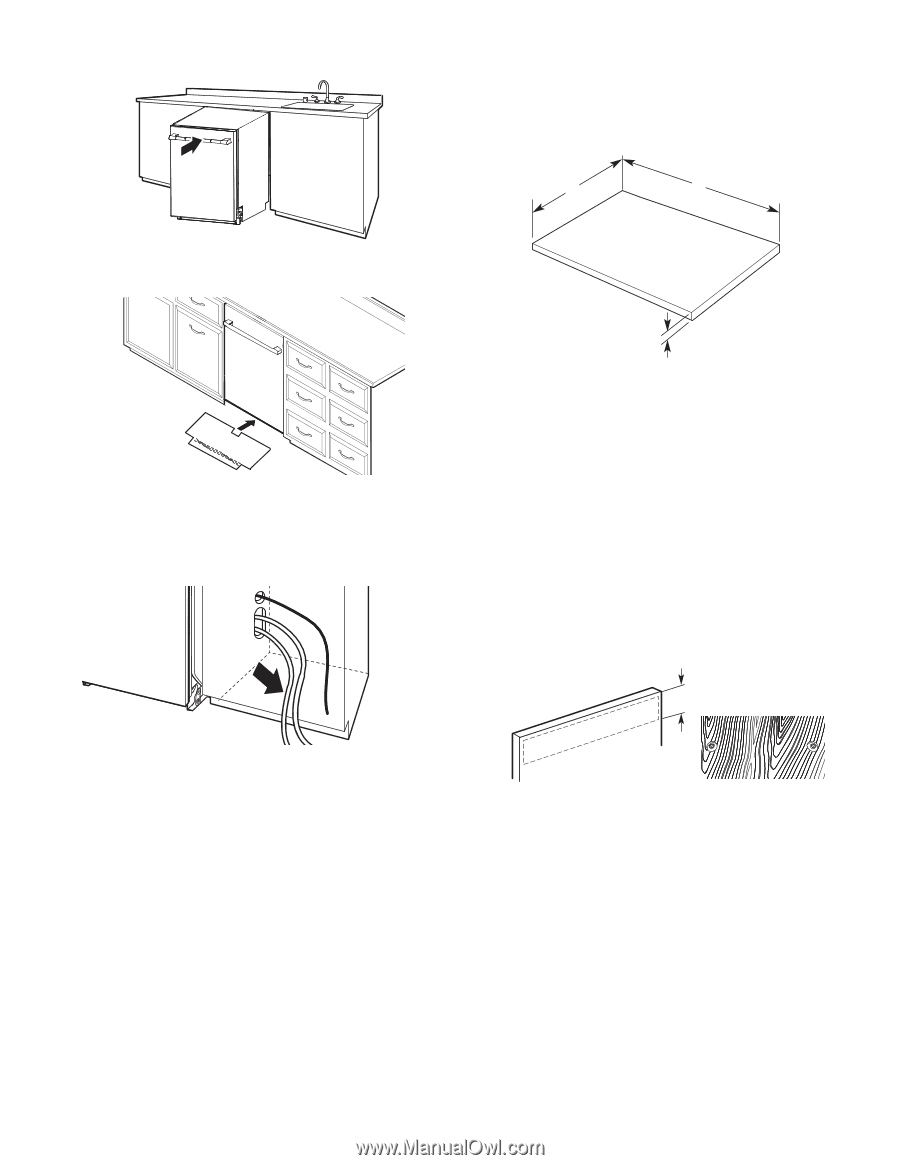
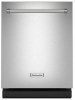
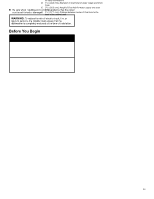
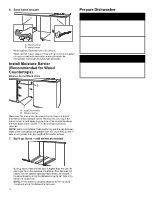
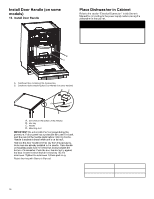
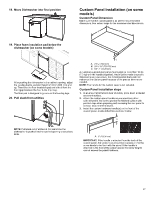
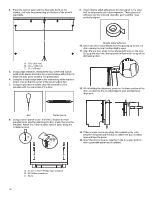
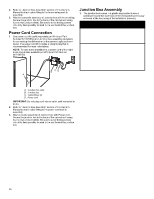
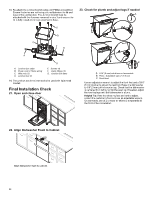
18. Move Dishwasher into final position Custom Panel Installation (on some models) Custom Panel Dimension Make sure that the custom panel is as per the recommended dimensions. See below image for the recommended dimensions. A B 19. Place foam insulation pad below the dishwasher (on some models) After pushing the dishwasher in the cabinet opening, adjust the leveling feet to standard height of 337/8" (860 mm) and up. Then take the floor insulation pad and slide it from the front (gap between the floor & the drip tray). The floor pad is designed to go around the leveling legs. 20. Pull slack from utilities C A. 239/16" (598 mm) B. 283/8"-30" (720-762 mm) C. 5/8"-1" (16-25 mm) A customer supplied door panel must weigh no more than 16 lbs (7.3 kg) with the handle (together). And must be made to specific dimensions as given above. It is recommended that a cabinet maker cut the custom panel because of the precise dimensions needed. NOTE: The handle for the custom panel is not included. Custom Panel Installation steps 1. In an area that is flat and clear of debris, place down a blanket as a work surface. 2. Attach the custom panel handle as you would any other cabinet handle. Be sure to protect the finished surface with painters tape when preparing and recessing the rear panel to conceal attachment hardware. 3. Install the custom hardware handle(s) on the front of the custom panel, inside dotted line as shown below A NOTE: Pull slack out of utilities at the same time the dishwasher is pushed into the cabinet opening to avoid any kinks. A. 6" (152.4 mm) IMPORTANT: If the handle is attached from the back of the custom panel, the screw holes should be countersunk for the screw heads to be flush with the panel. If the handle is attached to the front of the custom panel, the screw lengths cannot exceed the panel thickness. 17
-
 1
1 -
2
-
3
-
4
-
5
-
6
-
7
-
8
-
9
-
10
-
11
-
 12
12 -
 13
13 -
 14
14 -
 15
15 -
 16
16 -
 17
17 -
 18
18 -
 19
19 -
 20
20 -
 21
21 -
 22
22 -
23
-
24
-
25
-
26
-
27
-
28
-
29
-
30
-
31
-
32
-
33
-
34
-
35
-
36
-
37
-
38
-
39
-
40
-
41
-
42
-
43
-
44
-
45
-
46
-
47
-
48
-
49
-
50
-
51
-
52
-
53
-
54
-
55
-
56
-
57
-
58
-
59
-
60
-
61
-
62
-
63
-
64
 |
 |