Kodak ESP 7250 Extended user guide - Page 57
Scanning from the control panel, Scan Option, Settings, Description - will not connect to home network
 |
View all Kodak ESP 7250 manuals
Add to My Manuals
Save this manual to your list of manuals |
Page 57 highlights
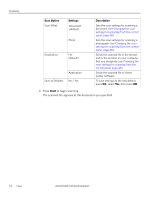
KODAK ESP 7200 Series All-in-One Printer Scanning from the control panel To scan a document or a picture from the control panel: 1. Lift the scanner lid, and place the original face down in the right-front corner of the scanner glass. 2. Close the lid. 3. Press Home. 4. Press to select Scan, then press OK. 5. Press to select an option, then press or to change the setting. Scan Option Scan To Settings Description USB-connected computer (default) The scanned file is sent to the USB-connected computer. Name of computer (only if a computer is connected by wireless or Ethernet network) The scanned file is sent to the computer on the wireless or Ethernet network. Memory card The scanned file is sent to the memory card in one of the card slots. IMPORTANT: Use only one card slot at a time. www.kodak.com/go/aiosupport 51
-
 1
1 -
2
-
3
-
4
-
5
-
6
-
7
-
8
-
9
-
10
-
11
-
12
-
13
-
14
-
15
-
16
-
17
-
18
-
19
-
20
-
21
-
22
-
23
-
24
-
25
-
26
-
27
-
28
-
29
-
30
-
31
-
32
-
33
-
34
-
35
-
36
-
37
-
38
-
39
-
40
-
41
-
42
-
43
-
44
-
45
-
46
-
47
-
48
-
49
-
50
-
51
-
 52
52 -
 53
53 -
 54
54 -
 55
55 -
 56
56 -
 57
57 -
 58
58 -
 59
59 -
 60
60 -
 61
61 -
 62
62 -
63
-
64
-
65
-
66
-
67
-
68
-
69
-
70
-
71
-
72
-
73
-
74
-
75
-
76
-
77
-
78
-
79
-
80
-
81
-
82
-
83
-
84
-
85
-
86
-
87
-
88
-
89
-
90
-
91
-
92
 |
 |
