Konica Minolta Kodak i2820 User Guide - Page 11
Back view, NOTE:The LED/Start button, Scroll button and Function window are
 |
View all Konica Minolta Kodak i2820 manuals
Add to My Manuals
Save this manual to your list of manuals |
Page 11 highlights
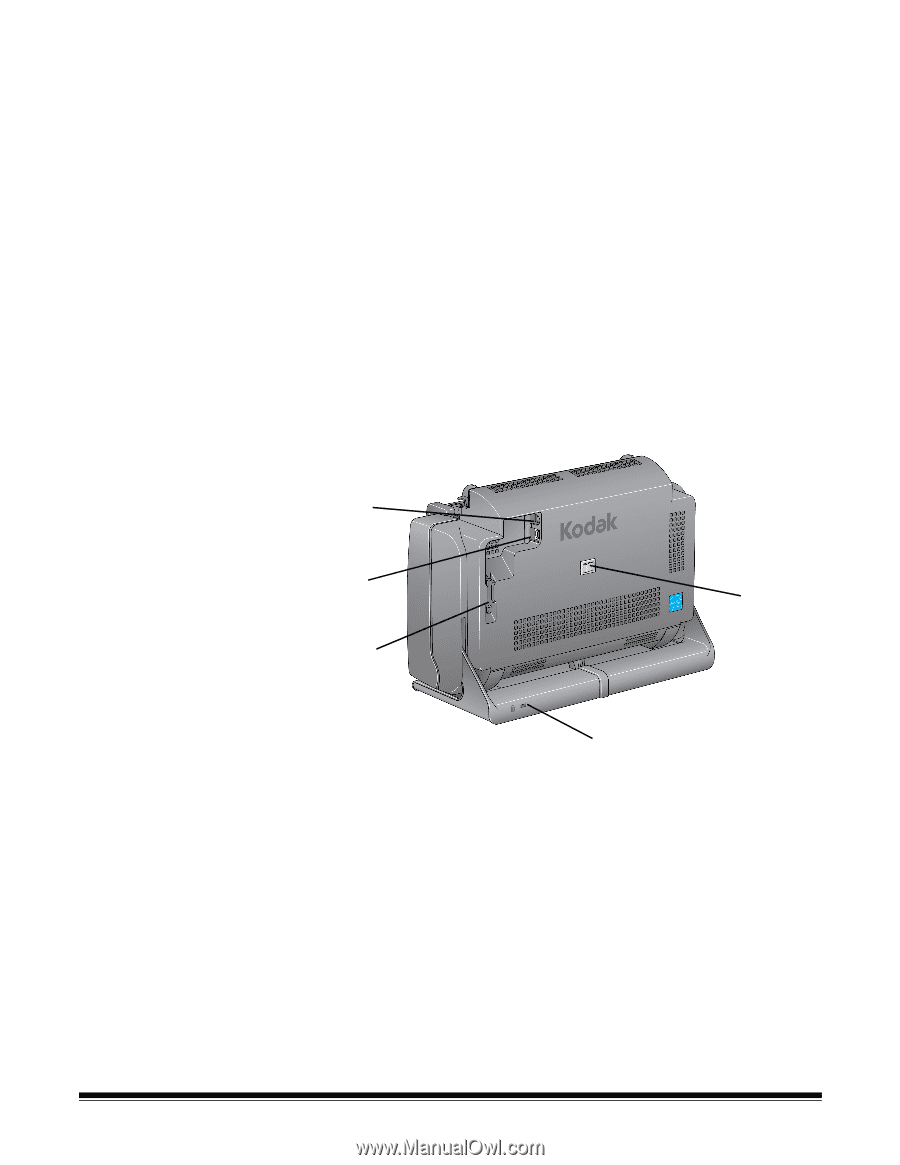
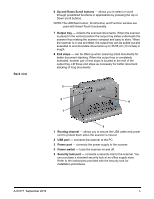
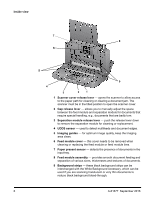
Back view 6 Up and Down Scroll buttons - allows you to select or scroll through predefined functions or applications by pressing the Up or Down scroll buttons. NOTE:The LED/Start button, Scroll button and Function window are used with Smart Touch functionality. 7 Output tray - collects the scanned documents. When the scanner is placed in the vertical position the output tray slides underneath the scanner thus making the scanner compact and easy to store. When the scanner is in use and tilted, the output tray can be pulled out and extended to accommodate documents up to 35.56 cm (14 inches) in length. 8 End stops - can be lifted up when scanning small documents for better document stacking. When the output tray is completely extended, another pair of end stops is located at the end of the output tray. Lift these end stops as necessary for better document stacking of long documents. 3 2 4 1 5 1 Routing channel - allows you to secure the USB cable and power cord to protect them when the scanner is moved. 2 USB port - connects the scanner to the PC. 3 Power port - connects the power supply to the scanner. 4 Power switch - turns the scanner on and off. 5 Security lock port - connects a security lock to the scanner. You can purchase a standard security lock at an office supply store. Refer to the instructions provided with the security lock for installation procedures. A-61677 September 2016 5
-
 1
1 -
2
-
3
-
4
-
5
-
 6
6 -
 7
7 -
 8
8 -
 9
9 -
 10
10 -
 11
11 -
 12
12 -
 13
13 -
 14
14 -
 15
15 -
 16
16 -
17
-
18
-
19
-
20
-
21
-
22
-
23
-
24
-
25
-
26
-
27
-
28
-
29
-
30
-
31
-
32
-
33
-
34
-
35
-
36
-
37
-
38
-
39
-
40
-
41
-
42
-
43
-
44
-
45
-
46
-
47
-
48
 |
 |