Lenovo E49 (English) User Guide - Page 53
Remove the card, and the card pops up.
 |
View all Lenovo E49 manuals
Add to My Manuals
Save this manual to your list of manuals |
Page 53 highlights
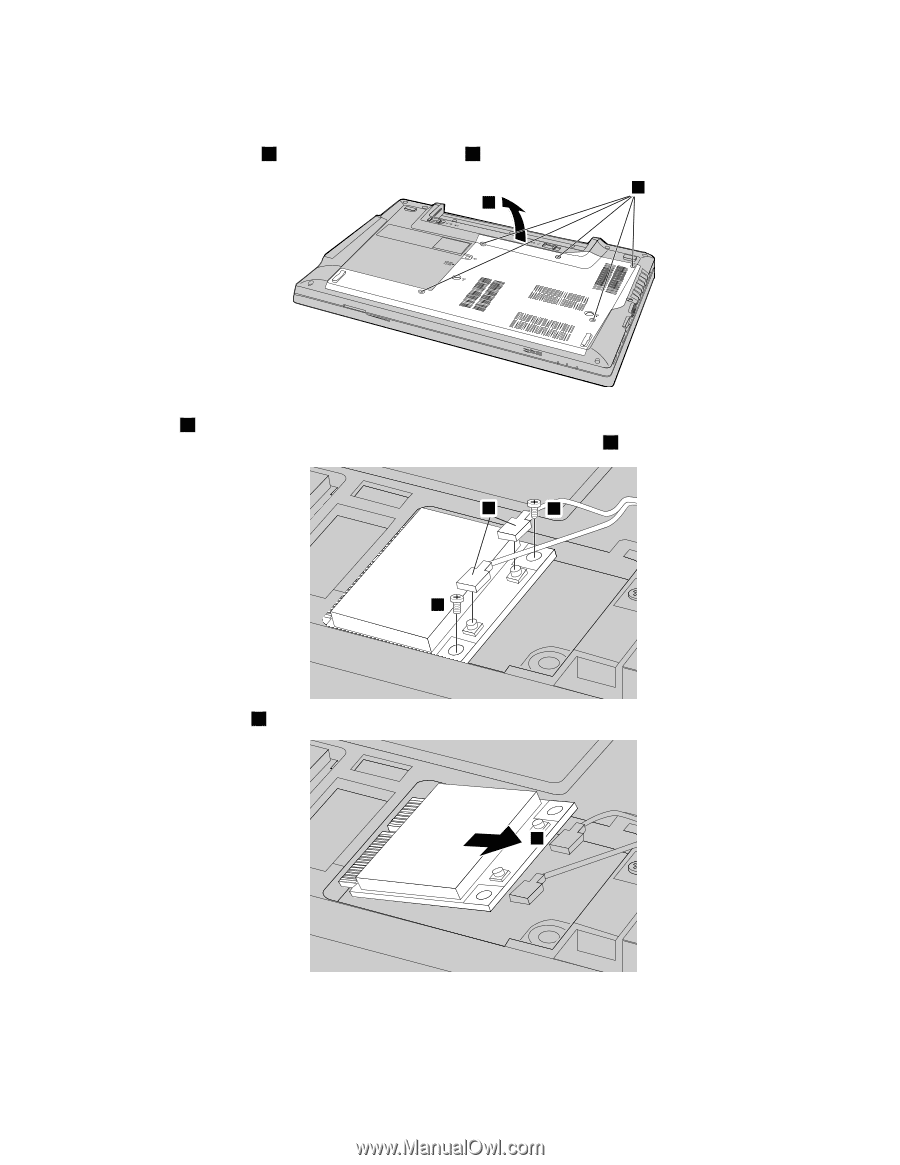
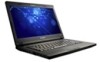
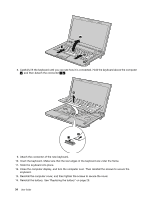
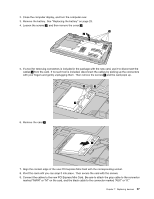
2. Close the computer display, and turn the computer over. 3. Remove the battery. See "Replacing the battery" on page 29. 4. Loosen the screws 1 , and then remove the cover 2 . 1 2 5. If a tool for removing connectors is included in the package with the new card, use it to disconnect the cables 3 from the card. If no such tool is included, disconnect the cables by picking up the connectors with your fingers and gently unplugging them. Then remove the screws 4 and the card pops up. 3 4 4 6. Remove the card 5 . 5 7. Align the contact edge of the new PCI Express Mini Card with the corresponding socket. 8. Pivot the card until you can snap it into place. Then secure the card with the screws. 9. Connect the cables to the new PCI Express Mini Card. Be sure to attach the gray cable to the connector marked "MAIN" or "M" on the card, and the black cable to the connector marked "AUX" or "A." Chapter 7. Replacing devices 37
-
 1
1 -
2
-
3
-
4
-
5
-
6
-
7
-
8
-
9
-
10
-
11
-
12
-
13
-
14
-
15
-
16
-
17
-
18
-
19
-
20
-
21
-
22
-
23
-
24
-
25
-
26
-
27
-
28
-
29
-
30
-
31
-
32
-
33
-
34
-
35
-
36
-
37
-
38
-
39
-
40
-
41
-
42
-
43
-
44
-
45
-
46
-
47
-
 48
48 -
 49
49 -
 50
50 -
 51
51 -
 52
52 -
 53
53 -
 54
54 -
 55
55 -
 56
56 -
 57
57 -
 58
58 -
59
-
60
-
61
-
62
-
63
-
64
-
65
-
66
-
67
-
68
-
69
-
70
-
71
-
72
-
73
-
74
-
75
-
76
-
77
-
78
 |
 |